Old Guys Simplex moto-peddle bike

GoldenMotor.com

indian22

Well-Known Member
Dec 31, 2014
4,722
7,697
113
Oklahoma
Pat I wasn't certain this 48v. pack would fit. How hard can it be to accurately measure a battery pack before shipping. It turns out your battery tank was 1/2" wider than the lithium pack, so no issues. Your tank measurements were spot on Pat.

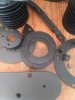
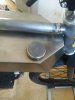
I've been busy prepping the motor case and sundry parts for paint today I drilled and threaded various case parts & think I'm at the point of applying some flat black where the sun don't shine and some where it does. I really dislike prepping & painting, but I'll get over it.

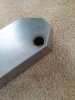
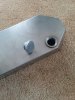
Some cool parts came in and others are in various stages of on the way so I'm a happy camper 'cause I've got more pieces here than I've been able to devote time to. It's good I'm not on a contract deadline with delivery penalties, I'd be in deep trouble. Hobbies are fun that way.

Rick C.
 

indian22

Well-Known Member
Dec 31, 2014
4,722
7,697
113
Oklahoma
I'm hoping today is as productive as yesterday. It's warmed up enough to paint parts, and I've some fabrication work yet to do before another partial reassembly and then some more fabrication. The fuel bung is yet to be installed and my list grows longer though many tasks have been completed. Most of it not very interesting but quite necessary. I suppose making the magneto housing is the last significant metal part left to build since I'm using Pat's oil tank tool box to house the controller that eliminates that as a sheet metal project.

I've ordered another leather saddle from Rich Phillips, a deep dark brown, that I might use on this bike, but probably not...same pan, style and size as the black one already mounted. I've got six of his saddles and they suit me.

Rick C.
 

indian22

Well-Known Member
Dec 31, 2014
4,722
7,697
113
Oklahoma
I rattle canned some motor case parts with some Ace brand enamel, flat black. I left them outside for a few hours and then brought a few inside. I've been told that when you can't smell the paint it's cured, not gassing off, I can barely smell the paint when I hold the part close to my nose. Can it actually have cured that quick? I'd think it improbable to dry in four hours. 4 days or 4 weeks with some paint.

It covered well and sprayed smooth and dried to handle in just an hour.

Rick C.
 

Attachments

PeteMcP

Well-Known Member
Jun 27, 2017
918
2,545
93
68
Rick,
Wondered if you're still planning on including raised lettering somewhere on the twin's casing?

Yeah, paint cure times vary greatly. Only ever when I'm rattle canning satin black or grey primer, I use a hot air gun or hair dryer to speed up the drying time. I recently primed/sprayed several of Blue Bamboo's blacked-out parts in satin black and was able to handle them confidently without fear of damage in 20 minutes.
 

indian22

Well-Known Member
Dec 31, 2014
4,722
7,697
113
Oklahoma
Helpful suggestions as always Pete. Hair dryers are such handy shop tools that can be stored elsewhere till required.

Still considering the raised lettering Pete they really looked great on your Indian. They adhere to painted surfaces well no? I ride a lot of gravel and where I'd want the lettering would be low on the case, about 4" off the roadway. I'm thinking the plastic will take a lot of abuse from rock that plastic isn't designed to deal with and keep it's good looks. I don't baby my babies nor do I go out of my way to damage them. I just ride and enjoy, if I lose some paint oh well but drop a letter & I'd probably remove the lot.

Rick C.
 

indian22

Well-Known Member
Dec 31, 2014
4,722
7,697
113
Oklahoma
If the smell test works the paint is cured. I've handled as in assembled and waited a few hours and disassembled a couple of the small parts and so far so good. The paint didn't lift, peel or flake so think I'm golden and impressed with the Ace brand rattle can paint, quality nozzle too.

I think the previous photos posted & these will explain the mods made to the "Crow" double leg stand. That's a 1/4" coarse thread bolt 1/2" length that's threaded through the stand side & through the swivel plate inside. The legs absolutely can not fold when the bolt is in place. This is a great modification to secure the bike when changing tires etc. using torque to tighten or loosen bolts etc.

I use a small aluminum rod to hold the bike secure when I park, rather than the bolt, because it's faster than threading the bolt on, but the bolt would be a deterrent for a quick snatch & ride off event.

The stand connection mod won't allow the legs to swivel out of position & potentially get into the tire. The small compression bracket also is held in place by the chain stay tubes and can't swivel, nor can it be tightened so much that it compresses the chain stay tubes. This last mod will have to be modified some bike to bike. My fat tire e-bike needs this same basic mod as well the other 5 have the same connection setup, though I still use the adjustable bolts on a couple of bikes, that will change.

Rick C.


crow stand 1.jpg crow stand mod 1.jpg crow stand mod 2.jpg crow stand mod 3.jpg crow stand mod 4.jpg crow stand 6.jpg
 

PeteMcP

Well-Known Member
Jun 27, 2017
918
2,545
93
68
If you do decide to go with the lettering on the crankcase idea, I'd advise using slower setting superglue or epoxy to stick the letters direct to the bare metal rather than to a painted surface. Otherwise you're just gluing the lettering to a thin skim of paint. And that's a recipe for the letters to lift off easily if bumped or hit.
On my 'Indian' tribute's clutch cover, once the lettering was glued in place, I over-sprayed the cover with four or five coats of metallic silver engine enamel. The letters are on there for good.
In our original chat about the lettering, I did mention and describe the option of having the sprues of letters cast into brass using the 'lost plastic' process. If you're concerned about the longevity of the plastic letters, consider this option.
 

indian22

Well-Known Member
Dec 31, 2014
4,722
7,697
113
Oklahoma
Lots of parts involved with the F head motor case, the flat head e-twin case will be less complex yet hopefully still be rather convincing. I'll use a bottom bracket based reduction drive on the flathead case and that alone simplifies construction a lot.

The charge plug is a 3/8" flat panel mount type plug, threaded with lock nut. It will mount through a flat plate at the bottom of the fuel port. Remove fuel cap and plug in to recharge. Quality 12 thread per inch bung and cap with a good O ring, not just a flat rubber gasket. I sealed the cap vent also.

Now I put it all back together again to finalize spacing & alignments. Thee chain lines are always a treat first go round.

Rick C.
.
Charging plug V-twin.jpg
black parts V-twin.jpg
lot of parts.jpg
 

indian22

Well-Known Member
Dec 31, 2014
4,722
7,697
113
Oklahoma
The pile of parts reassembled, sans exterior push rods, I'm refining those a little I added an oil drip sight glass and brass oil line fitting to the case as well. I really just needed the basics in place to determine clearances and alignment, just kept adding stuff that wasn't required at this time. I've motor mount connections to finalize and chain lines to verify. Also a few fastener selections to make (to aid the ease of assembly) & bracket/spacers to make. Also the top support bracket needs a tweak also

Sheltering in place I see as an opportunity to attend to some things that I've long put off.

Rick C.
 

indian22

Well-Known Member
Dec 31, 2014
4,722
7,697
113
Oklahoma
New saddle came in same dimensions that I use on my other bikes, but the pan has a more pronounced flip. The leather is dyed a really deep chocolate brown. I didn't order it for the E-V-twin, but I'll probably mount it just to see how it looks. I kinda' dig the different pan profile & it's as close to black as you can get and still call it brown.

I received the new Crow drive off stand and it 's still built to the same quality standards as my previous stands. I can't get over the low price shipped 5 day delivery.

Rick C.

chocolate brown saddle high flip.jpg
 
Last edited:

indian22

Well-Known Member
Dec 31, 2014
4,722
7,697
113
Oklahoma
The new Crow stand had to be mounted on the bike; those big steel pads are too rough for carpet let alone hardwood floors. When she goes outside to stay I'll put the modified stand back on, but in the meantime I'll drill a hole for the safety pin to keep the stand from accidentally folding while I'm working on the bike

Rick C.
 

indian22

Well-Known Member
Dec 31, 2014
4,722
7,697
113
Oklahoma
Chipping away at details as I await parts and fabricate a few as well.

I installed the brass oil line fitting to the crankcase and the brass oil drip sight glass just below it. I'll attach a copper line from the fitting to the oil tank when it comes. Eventually a copper fuel line will connect the glass sediment bowl to the carb shutoff valve. Lines and wiring would just get in the way of construction at this point.

Alignments are within fractional adjustment now and I've plenty of room for any final changes, this being really nice to say because too often I've not had any wiggle room at the end of a build. The deep dish loop design of the custom Sportsman frame and it's 135mm wide rear triangle really simplified engine and component's mounting.

There's room for the magneto housing yet to be constructed. I can start this now that I have the engine finally located in the frame. I can also make an extended pedal shaft to clear the magneto drive housing. I'd don't want the shortened pedals to stick out more than is absolutely required to clear the motor case on either side of the bike.

New 3" rear tire also came in. It's a Vee tire & now rated 65 lb. p.s.i. max, up from 60 . Minimum pressure 40 p.s.i. I run a 2.5" version of the Vee up front. If you have a heavy bike these have super high load capacity. These are preferred for use on bike trucks and pedicabs. Hundreds of pounds load capacity & I've used them for several years on the Simplex Copper gator and my Harley Peashooter. The tire currently mounted on the rear is a Kenda (40 pound max) & the difference is night and day & that includes price as well unfortunately, but the quality is worth it. om my lighter bikes I use the Maxxis Holy Roller and they too are great tires, but I've not seen them offered in 3".

Rick C.

oil sight glass.jpg
painted HD motor 1.jpg
 

indian22

Well-Known Member
Dec 31, 2014
4,722
7,697
113
Oklahoma
There are real V-twin motors that don't look this good.
Doesn't happen often, but this is one of those occasions when I feel like I should stand and applaud.
Thanks guys, I appreciate the complements. Pete I'd ask that you hold any applause for the end of program. There are still quite a few case details that need to be added & others are waiting for improvements to be made. The Sportsman oil tank/ tool box is on it's way and I hope to cut material for the magneto housing today. The motor isn't squared away in the frame either, no real point until I finalize the offset for motor chain line. Same goes for setting up the pedal bracket axle.

I'm pleased that the motor case, at this point and throughout the build, has been seen as credible by those of you who are following my progress. I've attempted to show photos that are representative at each stage, regardless of how rag tag it often looked along the way. My stock comment is that my builds are really ugly until they're not. Of course I understand that even my finished work doesn't appeal to all. I have to force myself to use paint on my bikes and when I do it's bare minimum and not shiny. I like a little plated metal here and there as accent, but endless polished aluminum and chrome just isn't me. I enjoy the bikes of others that are "show" finished, but my 'fresh" builds appear well ridden on completion and after a few months they really are!

I'm not trying to recruit others to build anything that doesn't suit them, rather I promote the creativity that fairly screams self expression, no matter the style.

Build more and have fun.

Rick C.
 

RocketJ

Well-Known Member
Jun 20, 2018
181
360
63
27
Thanks guys, I appreciate the complements. Pete I'd ask that you hold any applause for the end of program. There are still quite a few case details that need to be added & others are waiting for improvements to be made. The Sportsman oil tank/ tool box is on it's way and I hope to cut material for the magneto housing today. The motor isn't squared away in the frame either, no real point until I finalize the offset for motor chain line. Same goes for setting up the pedal bracket axle.

I'm pleased that the motor case, at this point and throughout the build, has been seen as credible by those of you who are following my progress. I've attempted to show photos that are representative at each stage, regardless of how rag tag it often looked along the way. My stock comment is that my builds are really ugly until they're not. Of course I understand that even my finished work doesn't appeal to all. I have to force myself to use paint on my bikes and when I do it's bare minimum and not shiny. I like a little plated metal here and there as accent, but endless polished aluminum and chrome just isn't me. I enjoy the bikes of others that are "show" finished, but my 'fresh" builds appear well ridden on completion and after a few months they really are!

I'm not trying to recruit others to build anything that doesn't suit them, rather I promote the creativity that fairly screams self expression, no matter the style.

Build more and have fun.

Rick C.
I think you're doing an amazing job and really appreciate the attention to detail and the advice you're willing to give along the way. The number one rule I've learned in the medical field is that everything looks uglier before it looks beautiful. This motto translates pretty well to this hobby as well. You've inspired my builds tremendously. I look forward to seeing your progress on this build over the next few months.
 

indian22

Well-Known Member
Dec 31, 2014
4,722
7,697
113
Oklahoma
The photo shows covers, spacers & e-motor mount combination using both aluminum and steel. I bolted the e-motor to the case at both ends and at the base.

Rick C.


aluminum & black 3.jpg aluminum & black 4.jpg aluminum & black 2.jpg
 
  • Like
Reactions: PeteMcP and FOG