Quickie project #2- “1903 Harley”

GoldenMotor.com

Mr.B.

Well-Known Member
Oct 21, 2008
1,329
559
113
Upper Mississippi River valley
The big Davenport swap meet starts tomorrow, and I will be attending Friday & Saturday.

I originally planned two quick builds, but sadly work got in the way and this one will be set aside today for other projects. Just as well as it takes a lot of pressure off to finish and ultimately I’ll be able to make a better bike.

Never the less I though I’d share my progress, I still plan to finish it asap (for me anyway, Ha!)...


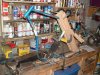
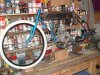
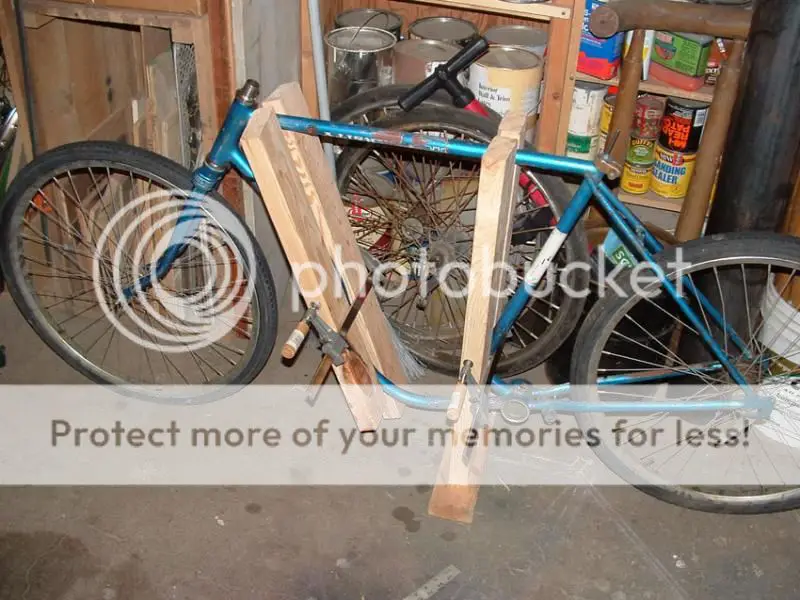
A old Schwinn Varsity frame is the main donor with a little help from a old girls AMF Roadmaster fork & it’s slightly modified down tube. A “vertical” HF 79cc Predator engine will be the power plant.

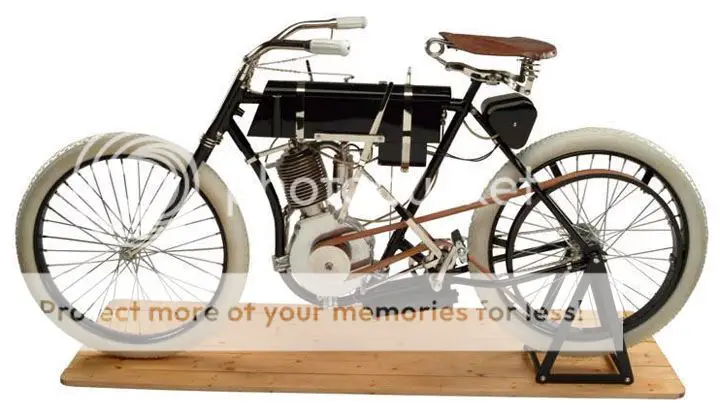
Unlike Excalibur ‘09 this one will be freshly “restoration” painted and not a rust bomb.


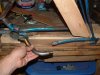
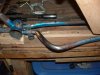
I worked the basic geometry out on the shop floor...


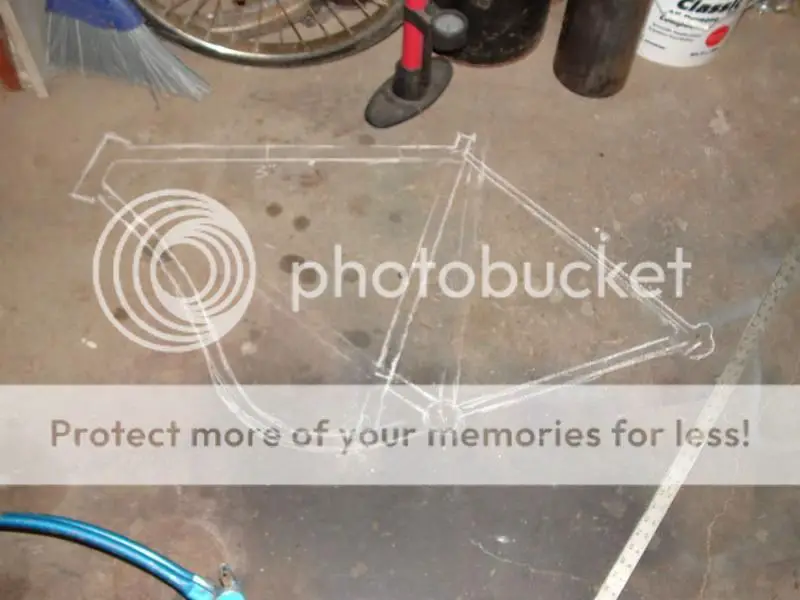
I’ve found using scrap 2 x 4’s really helps keep things true & aligned! For the initial fab I like to use internal sheaves and self tapping screws to join sections of tubing. I’ll strip the paint before welding and sandblast after.
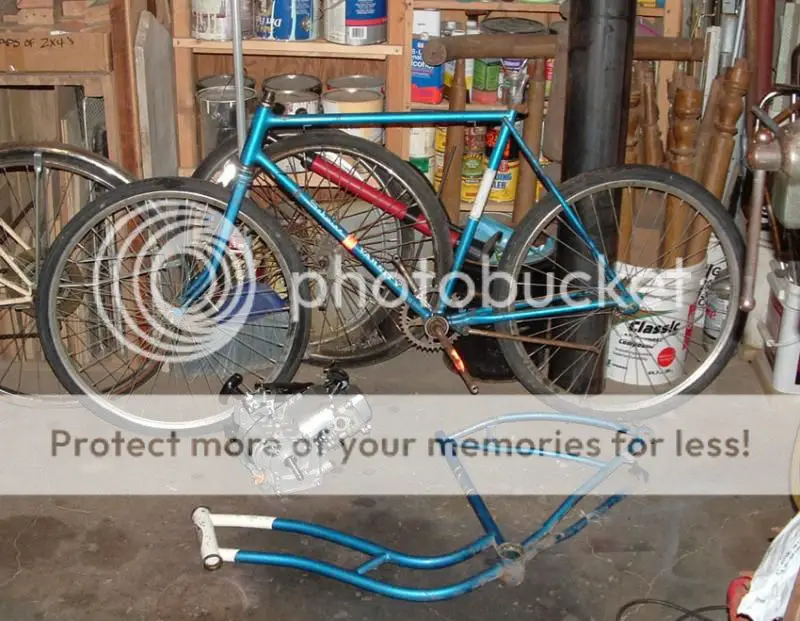
 

Mr.B.

Well-Known Member
Oct 21, 2008
1,329
559
113
Upper Mississippi River valley
I also made a quick wooden jig to help with the rear triangle alignment. Getting the seat stay pulley bulge is where I’ve left off on the frame for now.


But I do have the gas tank fabbed, just a simple 4” square tube with welded end caps. It will be directly welded below the top tube and then covered above with a fake round top oil tank.


This should more than make up for the lack of strength that the true to ‘03 Harley single top tube originally had.

I’ve made 4 wooden angles to center and square the tank when it’s time to weld it in place.

More soon!

-Kirk
 
Last edited:

Russell

Well-Known Member
Apr 19, 2009
1,276
155
63
MA
What type of belt & drive engagement are to going to use?
What size tires?
 

Mr.B.

Well-Known Member
Oct 21, 2008
1,329
559
113
Upper Mississippi River valley
Thanks for the suggestion LR, fortunately I’ve already have a nice set of white 26’ x 2.15 Kenda tires...

Russell, for the large driven pulley I’m going to use a 24” bicycle rim strap mounted the rear rim like the original ‘03 used.

It’s a rolled rim and has a stepped down id that will work good with a #2 V-belt. Lever tensioned idler for the clutch just like the Harley.

I’ll figure out some way to fill the spoke holes, or use long tabs on the straps to cover them like I did for my Excalibur ‘09 build.

-Kirk
 
Last edited:

curtisfox

Well-Known Member
Dec 29, 2008
6,046
3,949
113
minesota
AWESOME! You sure do nice work. Loving it ..........Curt

Keep it up and you will have to build another shed to keep them in
 

silverbear

The Boy Who Never Grew Up
Jul 9, 2009
8,325
670
113
northeastern Minnesota
Signing on, Kirk...
I like the look you're going for, like how you are increasing the strength of the frame by welding the gas tank to the top tube and also like how your simple wooden helpers and clamps keep things in line. I'm just starting my first belt to sheave drive ("kindalikeawhizzer") and am looking forward to it.

I'll be especially interested in your clutch setup.

Also...Can you tell what donor piece you used for the pulley bulge on the seat stay? To my eye lt looks like a larger diameter tubing. Is that one of the down tubes from the girls bike donor? And if so, is the smaller diameter stay inside it (the ends, I mean, since you must have cut away a good bit of the original. I suspect I'll be facing the same problem. I don't think just crimping the frame on my 51 Schwinn is going to be enough. Looking for some guidance into new territory.

I think two main deterrents to belt drive are giving clearance to the belt (modifying the frame) and coming up with the sheave and how to attach it to the wheel.
Benefits (aside from appearance) would be no greasy chain and chain tensioner to deal with, a quieter ride, no expensive clam shell adapter and sprocket to purchase. Clear examples of how to overcome the problems should help others in the future. I like seeing the belt drive motor bikes and always admired the Whizzer ads in magazines as a boy. I so wanted one! This is going to make a great bike, Kirk!
SB
 

Mr.B.

Well-Known Member
Oct 21, 2008
1,329
559
113
Upper Mississippi River valley
Signing on, Kirk...
I like the look you're going for, like how you are increasing the strength of the frame by welding the gas tank to the top tube and also like how your simple wooden helpers and clamps keep things in line. I'm just starting my first belt to sheave drive ("kindalikeawhizzer") and am looking forward to it.

I'll be especially interested in your clutch setup.

Also...Can you tell what donor piece you used for the pulley bulge on the seat stay? To my eye lt looks like a larger diameter tubing. Is that one of the down tubes from the girls bike donor? And if so, is the smaller diameter stay inside it (the ends, I mean, since you must have cut away a good bit of the original. I suspect I'll be facing the same problem. I don't think just crimping the frame on my 51 Schwinn is going to be enough. Looking for some guidance into new territory.

I think two main deterrents to belt drive are giving clearance to the belt (modifying the frame) and coming up with the sheave and how to attach it to the wheel.
Benefits (aside from appearance) would be no greasy chain and chain tensioner to deal with, a quieter ride, no expensive clam shell adapter and sprocket to purchase. Clear examples of how to overcome the problems should help others in the future. I like seeing the belt drive motor bikes and always admired the Whizzer ads in magazines as a boy. I so wanted one! This is going to make a great bike, Kirk!
SB
Thanks Bear!

I simply pounded a tight fitting solid rod into the existing seat stay, then you can bend away without crushing the tube.

The new 1/2” tube on the top end is a match size wise, I think perhaps it must just look larger in the photos because it’s not painted and catches more of the camera’s flash.

But it was actually quite physically hard to pound the rod all the way down the pulley side stay (fortunately it’s just a much shorter inner sheeve on the chainring side).

And then it was awkward make the bends while the frame was in the jig.

If I was to do it again I’d use MUCH more new tubing and bend it before attaching it to the frame. Fortunately while the new tubing is still a tight fit, it does slide over the rod with out pounding.

Hard to beat the quality of the old Schwinn’s but the slightly thicker tube walls can cause a few headaches...

I’ll definitely make the wheel stay bulge off the frame, it will also make it much easier to match the bend of the seat stay!

I haven’t seen your “Kindalikeawhizzer” thread yet, I’ll look forward to checking it out!

-Kirk
 
Last edited:

jehrbear

New Member
Jun 8, 2012
17
0
0
Missouri
I was about to start a "what donor frame for a tribute 1903HD" post, my session timed out, and then i saw this one...question answered :).. I was thinking of using an old girls bike as the primary, but i think the mens bike with a girls frame for donor parts is the way I'm leaning now seeing how this is shaping up.

Can't wait to see further progress on this project!
 

Mr.B.

Well-Known Member
Oct 21, 2008
1,329
559
113
Upper Mississippi River valley
Keep it up and you will have to build another shed to keep them in
Funny you mention that Curtis, I did add a little lean-to to my old shed (room for 3 more bikes, ha!)

Fair weather/outdoor projects & a very rare vacation with Mrs. B. have kept me from bike building lately.

But yesterday I did work on it a little. I finished the lower pulley side wheel stay and redid the top one to better match it.

Here’s a couple of detail shots for of the lower for Silver Bear’s sake.

I also clamped a oversized motor mounting plate, I’ll trim it down later when I have the drive train/engine placement worked out better.

I'm ready for the next round of welding, although with a busy week already planned I don't know when I'll get to it.

-Kirk
 

Attachments

Last edited:

curtisfox

Well-Known Member
Dec 29, 2008
6,046
3,949
113
minesota
One has to get away for awhile some times. if nothing else to recharge the mind.
Hope you had a good time?
The bike is realy looking good always love your simple ways of doing things. Youed sware you have been metal working for years................Curt
 

Mr.B.

Well-Known Member
Oct 21, 2008
1,329
559
113
Upper Mississippi River valley
Doner piece is home made- 3/4” tube over a 5/8 solid rod.

Note: Bending this heavy stuff is hard on vises! This piece in particular sheared the tightening screw on the rotating base. It’s been drilled out and replaced with 1/2" X 6” lag bolt driven into the work bench. And another newly drilled on the other side.

Needless to say it doesn’t rotate anymore, but it’s real solid feeling now...

“-)

Tri-car? The shed addition has a 35” wide door- perhaps...?

Painting all the out buildings is on the to-do list this week, I’ll post pics of the shed if you want, ha!

-Kirk
 

Attachments

Last edited:

curtisfox

Well-Known Member
Dec 29, 2008
6,046
3,949
113
minesota
AWESOME sur looks like fun time

Been waitng for you to paint the big shed out back would like a picture of it

Thats about all i have been doing lately is painting my house, be the last time getting to old to climb latter.............Curt
 

Mr.B.

Well-Known Member
Oct 21, 2008
1,329
559
113
Upper Mississippi River valley
A couple pics for Curtis-

I was able to get at least a single coat of paint on everything, so it will be easy enough to finish in the spring. I found a lot of unexpected rotted wood in the “summer kitchen’s” cupola so repairs took a lot longer than I had hoped...

Obviously colder weather this morning’s snow has finally put a complete end to outside projects...

So the first bike progress to share in quite awhile-

I got a chance to get the frame welded...

But there’s still a long way to go, including a lot of creative staring to work out that drive train!

-Kirk
 

Attachments