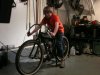
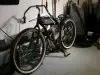
Newbie here, just intro'd myself in the new member section explaining how this all started. Anyway here it is, my first build and I mean my first build of anything. I have no experience, little cash, crap tools, and no time but I was dedicated and busted my butt every min I had available for two weeks so far. I'm loving it and if I can do at least this much anyone can. I'm going to focus on my mistakes and experience so hopefully others can learn from them.
Attachments
-
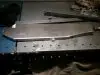
 167.2 KB Views: 305
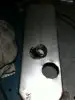