Info and source for replacement studs?

GoldenMotor.com

nightcruiser

New Member
Mar 25, 2011
1,180
2
0
USA
Hello,
I am just about to start my winter tear down of my bike (unfortunately), I plan on pulling the motor apart and replacing all the kit studs with better quality replacements. I have the specs on the intake/exhaust studs, others I don't have and can't get myself until I actually pull them from the motor, so I was hoping you guys could help me out on the specs for some of these studs?
I have a Grubee SkyHawk GT-5 66cc (manufactured 04-20-2011)
So far I know:
Intake/Exhaust studs: M6X28mm
I am pretty sure the head studs are M8X112 (from Gasbike.net webpage), but I know there have been different size and thread head studs so I wanted to ask here if someone knows what I need for my newish Grubee 66?
I know the mounting studs are M6, but I don't know how long they are or if the front studs are the same size as the rear?
I would also like to replace all the flat head screws with allen head bolts, I assume just a M6 allen bolt will work but am interested in any feedback you might have on what to use to replace these screws.
I am also looking for a good source to buy this hardware from. I would prefer to order from a hardware supplier over a kit company, cause I want to get better quality studs and want to order enough to outfit a few motors. I had been looking at Threaded Steel Studs (METRIC) Products - Marshalls Hardware , they seem to have a good selection of hardware and reasonable prices, but I would appreciate suggestions of other/better places to order from if you know of one. I plan on buying grade 5 hardware (hardened steel) beyond that I have no specific requirements. I'm not sure if I should be looking for a coated stud/bolt or just plane grade 5 steel?
Any input and suggestions on good hardware to buy for my motor and a good place to buy it would be greatly appreciated...
Thanks
 

MotorBicycleRacing

Well-Known Member
Jul 28, 2010
5,844
109
63
SoCal Baby!!!
www.facebook.com
SickBikeParts.com has all the studs you need to upgrade.

Please verify your current engine stud size before ordering.

Determine the size you have: 6mm will be the same as engine mounting studs, M8-1.00 will be larger but will still have the same thread spacing when compared side by side with mount studs. Another simple way is to measure 1 cm and count the threads. 1.00 thread pitch will have 10 threads in that 1 cm, 1.25 thread pitch will have 8 threads.
 
Last edited:

nightcruiser

New Member
Mar 25, 2011
1,180
2
0
USA
Also,
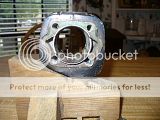
Right now I have one exhaust stud stripped out on my cylinder, the threads pulled out of the cylinder, not the stud. I know there are a variety of ways I could repair this so I thought I would throw out the scenario here and see what you guys think I should do...

I could Heli-coil the hole

I could Time-Sert the hole

I could drill and tap the hole to the next larger size stud

I could buy a new cylinder

Since I don't own Heli-Coil or Time Sert tools this would be the most expensive option for me, I am leaning away from making the investment on a starter kit for either of these products.

I am not opposed to buying a new cylinder body since they are pretty cheap. I see BGF selling them for about $28 delivered on ebay, but I am not SURE his cylinder will work on my Grubee GT-5 66cc? I am also wondering if any cylinders are better than others? I haven't seen any upgrade or aftermarket cylinders available? (just aftermarket heads) I am wondering if there are any better cylinders available anywhere?

The method I am leaning toward the most is probably drill/tap the hole to use the next larger stud. The next commonly available metric stud would probably be the M8, which would probably be too large? I figured I would probably change over to a standard thread stud, but am not sure what size I should go with. If someone has done this already and can pass on some info on the experience, specifically the size stud and thread pitch you used, I would really appreciate it....
 

nightcruiser

New Member
Mar 25, 2011
1,180
2
0
USA
Stripped 6 mm threaded holes are easily fixed by re-tapping to 1/4" 20

Do not run a drill bit into the hole, just use the tap.
Thanks man, that's exactly what I wanted to hear!
If I am gonna change over the one stripped exhaust stud to 1/4" I would like to at least do the other exhaust stud so they are the same. (possibly the intake too) Since these threads are not stripped yet I am wondering what you would recommend I do in that case? To drill or not to drill, that is the question? I'm not sure tapping 1/4" threads over existing M6 threads would work out well, shouldn't I drill the M6 threads out first? BTW, I would use a drill press, not a hand drill, and would set and watch the depth to be sure I don't drill through the cylinder wall... What do you think?
Thanks for your input.....
 

Al.Fisherman

New Member
Sep 9, 2009
1,966
5
0
Calera, Alabama
I have one exhaust stud stripped out on my cylinder, the threads pulled out of the cylinder, not the stud.
I could Heli-coil the hole..that's one option
I could Time-Sert the hole.. that's another option
I could drill and tap the hole to the next larger size stud.. yes another option, but I have a way.
I could buy a new cylinder..no need in doing that.
I am wondering if there are any better cylinders available anywhere? I haven't heard on any available.
Try this...it will work, I know as I have done this as a experiment.
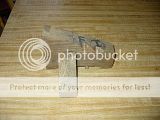
Remove head, make a jig for the head to set on..out of wood.
.......
drilling would be best with a drill press. Now drill the hole for a 6mm, all the war through but stop just short of the cylinder hole itself. The hole will go into the stud hole. Now tap the hole to 6mm X 1.0. Insert a cylinder stud in the hole by the hole you just drilled. Now take the new studs you are going to buy, put a couple of drops of RED locktite and thread the stud in the new hole. Run the stud all the way in up against the cylinder stud, then back out the 6mm stud just enough so you can install the 8mm stud when you install the cylinder. I like to install the3 cylinder before I tighten the 6mm stud, then back out. This way you know that there is enough clearance. You can do the same with a 1/4' 20. Red locktite is so tough I tried to pull a cylinder stud out of the case with a pair of vice grips...no way without using heat.

The jig is set up for both intake and exhaust. The cut away on the bottom is there so I can bolt the cylinder in place. Drilling the exhaust, the intake sets on the wood and reverse for drilling the intake. I would NOT drill any other holes then the needed one. I install ALL my head and intake/exhaust using RED locktite. I know other members use a different color.
 
Last edited:

nightcruiser

New Member
Mar 25, 2011
1,180
2
0
USA
Try this...it will work, I know as I have done this as a experiment.
Remove head, make a jig for the head to set on..out of wood.
.......
drilling would be best with a drill press. Now drill the hole for a 6mm, all the war through but stop just short of the cylinder hole itself. The hole will go into the stud hole. Now tap the hole to 6mm X 1.0. Insert a cylinder stud in the hole by the hole you just drilled. Now take the new studs you are going to buy, put a couple of drops of RED locktite and thread the stud in the new hole. Run the stud all the way in up against the cylinder stud, then back out the 6mm stud just enough so you can install the 8mm stud when you install the cylinder. I like to install the3 cylinder before I tighten the 6mm stud, then back out. This way you know that there is enough clearance. You can do the same with a 1/4' 20. Red locktite is so tough I tried to pull a cylinder stud out of the case with a pair of vice grips...no way without using heat.
Maybe it's just me, but I don't follow what you are saying here at all????
The original exhaust stud was 6MM, these threads are stripped out from the hole in the cylinder, completely gone. So there is no way I can drill and tap this back to 6mm???? I get the part about the red locktite, but the rest doesn't seem to make much sense to me??
 

Al.Fisherman

New Member
Sep 9, 2009
1,966
5
0
Calera, Alabama
When you drill through to the cylinder (into the cylinder hole), and tap there has been enough threads for my test. You can possibility go to a 7mm thread. 8mm if you have to.
 

nightcruiser

New Member
Mar 25, 2011
1,180
2
0
USA
When you drill through to the cylinder (into the cylinder hole), and tap there has been enough threads for my test. You can possibility go to a 7mm thread. 8mm if you have to.
Oh, ok, now I get it. You are saying drill DEEPER into the original hole and I should find enough metal left to tap and reinstall a regular 6MM stud? Looking at my stud it seems the threads have been pulled out from the hole about 1/2" right now, wonder if there is gonna be enough left below that to grab? Fortunately this is the stud on the side that has more metal under it on the gear side of the motor, so it might work out.
One thing I need to ask though, are you suggesting I drill the hole right through into the cylinder wall??? Then thread the stud in until it protrudes through the cylinder wall and then back off until it it clears??? That doesn't seem right to me?
 

Al.Fisherman

New Member
Sep 9, 2009
1,966
5
0
Calera, Alabama
Drill all the way through into the cylinder stud mounting holes...this will be short of the cylinder wall itself. The reason is that the tip of the tap has to go beyond the thread bottom for a good cut. And let the locktite cure at least overnight. Don't rush the process. Actually I like 24 hours. After you install the stud use some standard washers, torque it down to 50 INCH pounds to make sure that it is secure. If not then go to a larger hole, 7mm or a 8mm. If you don't have access to a 7mm stud, just let me know.
 
Last edited:

nightcruiser

New Member
Mar 25, 2011
1,180
2
0
USA
Drill all the way through into the cylinder stud mounting holes...this will be short of the cylinder wall itself. The reason is that the tip of the tap has to go beyond the thread bottom for a good cut. And let the locktite cure at least overnight. Don't rush the process. Actually I like 24 hours.
OK, that sounds more like something I would try. Still not sure what direction I am gonna go, leaning toward just tapping it to 1/4" and changing over to a standard thread.
As for rushing the process, not gonna be a problem it's 30 degrees here today! The chance of getting warm enough weather to ride again before spring is very slim, though I have heard it might it 60 this weekend, if so I would like to ride...
 

nightcruiser

New Member
Mar 25, 2011
1,180
2
0
USA
I just wanted to say THANKS to everyone who takes the time to offer me advise. I try to help out newbies here the best I can, but I am new to this hobby this year myself so my experience is limited, so in turn I rely on those that have been at it longer to help me out. The more I learn the more I can help out others and help keep the mb community strong and growing...