mounting an EZM drive to a HF 79cc engine

GoldenMotor.com
Hi Silverbear,

I suggest using the Browning version and Grainger's part number is Item # 3X263.

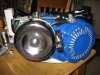
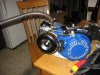
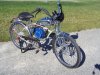
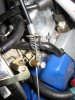
The EZM "Silent Power" drive system is the manual version, whereas the "Q-Matic" is the automatic drive. Both use the same basic layout, but the Q-Matic has been upgraded several times and now incorporates an aluminum drive plate, aluminum bearing support brackets, internal idler system, slotted mounting holes, and push pin cover mounting system. The "Silent Power" is no longer produced and less than 100 were ever sold, and is now considered rare [collector item]. I really liked the "Silent Power", but had to remove for testing the Q-Matic. I still have the original [#2] hanging on the wall in my shop [not for sale], and hope someday to build another bike using the "SIlent Power" system.

The Q-Matic has been installed on many HF builds, and hopefully many will help supply information to help others.

The Q-Matic is available for the HF [or similar motors], and can be ordered with a 2.5" front pulley or without a drive pulley if anyone wants to use the adjustable version. I think the majority that use the adjustable version usually end up somewhere between the 2.5" to 2.75" final settings. The Q-Matic for the lower RPM motors has the Max Torque clutch configured slightly different to compensate for the lower idle speeds, however we stock the parts needed.

Have fun,
 

Fossil

New Member
Mar 15, 2008
228
2
0
Guthriesville Pa
Hi silverbear
Quenton is correct about the adjustable pulley. That is the one I use. I finally decided on a size very close to 2.75". The mount I made works well but needed to be modified to allow the engine to be shifted to the right. There are pictures of my mount before the modification in this thread. http://motorbicycling.com/f6/my-heavy-duty-4-stroke-engine-11745.html I don't have an after picture.
Here are a couple pictures of the engine with the with the muffler and tank off. The air cleaner is from a WC-1 Whizzer engine. You might find one cheap from someone who upgraded to the NE5 engine and carb. I totally disconnected the governor but left the internal parts in the engine. I did connect the governor arm to a spring so the internal parts will have tension on them. I will try to take more pictures this weekend to help clarify my statements. I worked on mine for a long time (with many breaks) so some of the details are not fresh in my mind. I will do my best to help with your build and this thread.

Jim
 

Attachments

silverbear

The Boy Who Never Grew Up
Jul 9, 2009
8,325
670
113
northeastern Minnesota
Thanks to you both for your comments. The adjustable pulley sounds like the best way to go. I'll start with the stock 2.5 one and pick up the adjustable version when finances permit. I also went back into old threads describing your motor mount, Jim and I also read the whole build thread for the Corvette/Greyhound. So I feel like I'm more up to speed with all this. If I may I'll use some of your photos in this How- to thread I was talking about. I already got off to a bad start with it when I discovered something was wrong with my camera this morning and some pictures I thought I had I don't have. I had wanted to document even the simple stuff. Ah well. We'll use what we have and between us will make a nice little tutorial showing how to install the HF engine on a cantilever framed bike.
I think when I get a little further along I'll post the new thread and ask for contributions of photos and commentary, tips, whatever we can put together to be helpful. I know a lot has been written about the Greyhound, but it would be good to have a concise step by step how to do it in one simple thread.
My 65T sprocket is in place, concentric and should work well. I removed the exhaust and gas tank from the Greyhound and tomorrow with disconnect the governor. Any tips on connecting the throttle cable? I haven't really studied it yet, but I imagine a newbie would be perplexed. I also removed the air cleaner and hope by day's end tomorrow to have fabricated an improved version of my "leaping tuna air cleaner". It also will use the stainless steel pot scrubber inside. I had very good results using the original version on the HT motors. Should work here, too. I'll have to get the breather tube connected to it, so that will be different and as I said it needs to be larger so that air intake isn't more limited than the stock one. It will look pretty good and the price will be right. I also cut out the heavy aluminum plate for the motor mount and two pieces of angle iron from a sign post. I need to pick up Ubolts and another hockey puck tomorrow to make the mount, but I can't get too far along until the transmission comes.
Before removing the gas tank and exhaust I gave it oil and then a little bit of gas. I had a lot of trouble getting it to start until I flipped the ignition switch to "on". Surprise. No, I did not read the instructions first. Starts very easily and ran smoothly. I was surprised how long it ran on the little bit of gas I put in the tank. I will also pick up some 3/4" copper propane line tomorrow to see if I can make an exhaust pipe which loops forward and then down under, keeping it well away from the family jewels. (Now I have an old rocknroll song from Jerry Lee Lewis on my brain in a repetitive sound loop...) Anyway, if it doesn't work out then I will order a flexible exhaust kit from EZM. I like the way Dan has run his pipe on his Riverside build. Safe and looks good, too. The new how to thread will get started in about a week when I have everything at hand. Thanks again, you guys. In the meantime I'll keep reading and asking questions. Does anyone have a photo of your throttle cable hook up? Is there any reason to fool with the governor inside the engine or is disconnecting the arm enough? When you use the flexible exhaust kit, do you cut the manifold off of the stock muffler? I checked and a HT exhaust manifold is smaller. Will the flex pipe fit over the cut off manifold pipe?
SB
 
Hi Silverbear,


"Ruffles" has ridges, exhaust pipes should not! Many have used a variety of exhaust pipes on the HF and most degrade the power. The inside of the pipe must be smooth, and if not it causes serious problems with flow, back pressure and pulses. Not only does the LP/propane gas line crush the power it even makes a funny sound.

So far the best for power has been the 7/8" exhaust flex pipe. If possible cut & re-weld the exhaust manifold to exit to the front to avoid running the pipe by sensitive parts of the human body. The length of the pipe is also important and running towards the front and then down will allow enough room to use the longer pipe needed.


Have fun,
 

silverbear

The Boy Who Never Grew Up
Jul 9, 2009
8,325
670
113
northeastern Minnesota
Quenton,
I can't say that I understand how propane line would "crush" the power, but will take your word for it. I would be more skeptical were it not for having the flex exhaust on the HS Motorbike build. It really did make a big difference in power and sound from the stock muffler. I guess there's no reason to think it wouldn't do the same for the Greyhound. So instead of blowing money on the copper experiment first and then ordering the right thing, I believe I'll skip the copper pipe. Thanks for the information.

Rusticoray,
I sure do like the plexiglass cover on your transmission. Did you document anywhere how you did that? The yellow band around the whole transmission assembly, what is that? How did you do it? Good looking bike with either engine.
SB
 

weekend-fun

New Member
Jun 21, 2009
999
0
0
San Carlos CA
Bill,
I wouldn't mind seeing that template either. I'm planning a Greyhound for a 51 Schwinn cantilever this winter. I think Jim Davis knows about this as much as anyone. Hopefully he will weigh in here with some help.
Hey Sam! How's your new school in California?
SB
Wow! Somehow I missed out on this thread!

Schools going good. First year @ junior high, it can get confusing.


Right now I am sitting In my living room working on the H.F. Its a pretty strange sight!
 

silverbear

The Boy Who Never Grew Up
Jul 9, 2009
8,325
670
113
northeastern Minnesota
Hey Sam,
Well we both have our Greyhounds sitting in the living room. I have the bike sitting there, too, along with tools and an engine mount I worked on today. What bike will your Greyhond go on? Mine is a 1951 Schwinn with a cantilever frame. I'll get my transmission toward the end of next week and hope to have it running pretty soon. I think it's a cool motor.
How's California? You like it?
SB
 
Hi Silverbear,

Silent Power is out of production and is rare [less than 100 produced]. The silent power is a manual clutch system, using a steel mounting plate and works well. The original EZM drive had many features removed from later drive systems. The silent power was easier to replace the primary belt, allowed the ratios to reach 3.58 X 1 in the primary, and could be converted to rear belt drive [ala Whizzer style] via installing a pulley. The "Silent Power" required a little more driver skills than the Q-matic, just as does to drive a "stick-shift" automobile. Both systems are built on the same shape & size drive plate and the majority of the parts are interchangeable. Both sytems will leave a stop with out pedal assist [assuming they are using the correct secondary ratio]. Both systems act very similar above 12 MPH, but the automatic tends to buffer the motor & drive system for a smoother ride at lower speeds.

Hope I answered most of your questions about the differences.

Rumor has it the first production Q-Matic was the last silent power modified to accept the rear mounted clutch and the number was 30001.

Have fun,
 

weekend-fun

New Member
Jun 21, 2009
999
0
0
San Carlos CA
Hey Sam,
Well we both have our Greyhounds sitting in the living room. I have the bike sitting there, too, along with tools and an engine mount I worked on today. What bike will your Greyhond go on? Mine is a 1951 Schwinn with a cantilever frame. I'll get my transmission toward the end of next week and hope to have it running pretty soon. I think it's a cool motor.
How's California? You like it?
SB
Mine is a 1950s Rollfast straight bar. The rear chain stays are cracked, so I plan on butting them off and welding on a mountain bike rear triangle.


Right now I'm setting up the clutch. How do you plan to do your throttle set up?

Sam

(PS California gets better by the day!)
 

silverbear

The Boy Who Never Grew Up
Jul 9, 2009
8,325
670
113
northeastern Minnesota
Quenton,
Yes, thank you, that pretty well answers my questions. I kind of wish I had one, just to see what it was like. Maybe somebody will sell theirs sometime and I can pick one up. Not that there's anything lacking in the automatic. I do like it very much and I thank you for designing it in the first place and for your part in advancing motorbicycling. Love my Motorobike.
Sam,
Rollfast will make a cool bike for sure. I notice that the tires in your picture look like they could use some air, maybe a little truing of the wheel, too. Ha!
 

silverbear

The Boy Who Never Grew Up
Jul 9, 2009
8,325
670
113
northeastern Minnesota
Sam,
Forgot to respond to your question about the throttle. I'm new to these motors, too, and am in the process of figuring out how I'm going to go about it. Dan posted pictures of how he did his throttle and I'm hoping to see examples of other builders. Once I settle on something I'll be sure to post photos and make sure you see them, OK? I haven't disconnected the governor yet, either. Have you? I don't even know which thing is the governor. So we can learn at the same time. If you find out first, let me know. If I find out first I'll let you know. Finish your homework? School is important. Stay on top of it and have fun. You're a smart kid, so be smart in school, too. Your "old" friend,
SB
 

weekend-fun

New Member
Jun 21, 2009
999
0
0
San Carlos CA
Sam,
Forgot to respond to your question about the throttle. I'm new to these motors, too, and am in the process of figuring out how I'm going to go about it. Dan posted pictures of how he did his throttle and I'm hoping to see examples of other builders. Once I settle on something I'll be sure to post photos and make sure you see them, OK? I haven't disconnected the governor yet, either. Have you? I don't even know which thing is the governor. So we can learn at the same time. If you find out first, let me know. If I find out first I'll let you know. Finish your homework? School is important. Stay on top of it and have fun. You're a smart kid, so be smart in school, too. Your "old" friend,
SB
I think the governor is the copper colored thing near the choke. I also thing the throttle arm is under the gas tank. Fossil posted his throttle set up in some thread around here. Search HF throttle and I think it's the first result.


And now, to math homework!


Sam
 

Fossil

New Member
Mar 15, 2008
228
2
0
Guthriesville Pa
Here a picture of my throttle connection. The throttle cable runs through a narrow piece of flat stock that is bent and mounted to one of the valve cover bolts.
And for those with a sharp eye yes that is an E-3 spark plug but I forget which number it is. lol
Hope this helps.
Jim
 

Attachments

weekend-fun

New Member
Jun 21, 2009
999
0
0
San Carlos CA
Here a picture of my throttle connection. The throttle cable runs through a narrow piece of flat stock that is bent and mounted to one of the valve cover bolts.
And for those with a sharp eye yes that is an E-3 spark plug but I forget which number it is. lol
Hope this helps.
Jim
Thanks Jim, that's exactly what I was thinking!