CoastalCruiser,
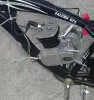
1) Looking straight down on your current set-up...we can say that the clutch arm, (the part that the cable attaches too), is in the "3" o-clock position. Once you have finished your build, and get everything dialed in, the arm will be in the "2" o-clock position.
From new; it is rare that you can "freewheel" the engine sprocket with your fingers. The clutch friction material is a little sticky. Months may have passed from the time the engine was assembled until it's first use.
Get the bike put together. Have a helper pull the clutch lever all the way...don't rely on the clutch lock initially...you can fine adjust your clutch cable later to make the lock effective. With clutch lever pulled, (clutch disengaged), lean the bike over on the kick stand so that the rear wheel is off the ground. Spin the rear wheel by hand.
At this point you will be checking for a number of things. Does the rear wheel spin freely, or can you feel the engine compression while turning the wheel. If you feel a heavy drag, or the engine is turning over; adjust the clutch cable a little tighter and try again.
If after the cable has been adjusted, you still feel the engine turning over when spinning the rear wheel by hand; more than likely the pressure plate is stuck to the friction material. Simply remove the clutch cover...right hand side if you were sitting on the bike. Have said helper pull the clutch lever and use a flat blade screwdriver to pop the pressure plate loose.
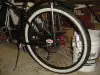
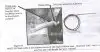
Once the clutch is operational, it is time to check the final drive for problems. The #1 Noob mistake is to build the bike and immediately go for the test flight. You need to check the concentricity and alignment of your rear sprocket BEFORE going for a ride. You may have eye-balled that sprocket 100 times; but things are going to be different once the chain is on. Same procedure...lean the bike over on the kick stand, have a helper hold the clutch in, and spin the rear wheel. Hopefully by now the rear wheel spins freely and any clutch problems were resolved. Spin the rear wheel slowly and look for any abnormalities. The chain should not become tight at any point during a full 360 degree rotation of the rear wheel. If it does...the sprocket is not concentric enough with the rear wheel. A little bit of variance is O.K. Just be sure that the variance is in the direction of loose and a little bit looser. 1/2" topside slack on the tight run, and 3/4" slack on the loose run.
This is how Noobs plow the chain tensioner into the spokes within the first 15 seconds of riding. With bad luck on thier side...there is a 50/50 chance of getting it right...they adjust the chain too tight in the slack run of an out-of-concentric sprocket...when the run comes up on the tight side, it's banjo string tight and the tensioner rotates about the chainstay and into the wheel.
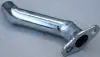
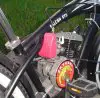
2) Disassemble the throttle assembly. Hold the grip in your right hand...the lower 1/2 shell in your left. Mate the two pieces together, in your hands, as though they were on the handle bars...same orientation. You will notice that there is an imperfection in the molded plastic, (the lower half shell), that prevents the throttle handle from fully returning, smoothly. The plastic portion that the cable attaches too is interfering with the half shell. Use an xacto knife, box cutter, what ever to clear away the material from the lower half shell so that the throttle rotates to the idle postion smoothly.
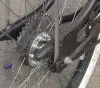
3) There is nothing wrong with the placement of your rag joint assembly.
Jim


 204.8 KB Views: 282
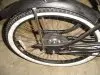 244.2 KB Views: 292
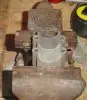
") Ordered on Sunday, here on Wednesday! thanks guys!!
Ordered on Sunday, here on Wednesday! thanks guys!!