Casting Metals

GoldenMotor.com

kicking

New Member
Apr 11, 2010
403
0
0
mississippi
I got play sand at Walmart it works great. Where Walmart got their sand I do not know? I sifted it through a window screen I had less than a hand full of stones. This stuff was already wet to keep down the dust I guess being it's silica sand. I used the special kitty cat litter ground up for the clay
10 to 1..... 10 lbs sand 1 lb litter. This sand gives a fairly smooth finish on the castings. You can look back on this thread and see the results of some of my castings.
I don't use anything special in the sand. I'm trying to do it cheap. I'm spending the money on the steel parts. good cold rolled steel and the nuts and bolts.
I went to Harbor Freight and talked them out of a 6" china vice that sells for $80.00 got them down to $40.00 with out using coupons or specials just some BSing basicly I got the vice at their .
cost.
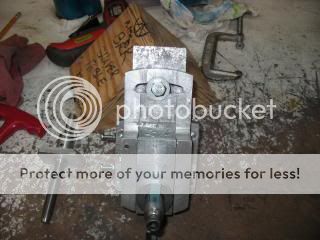
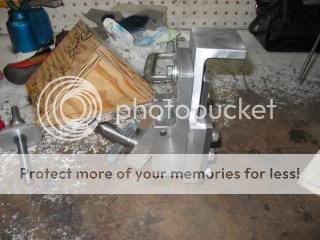
My fist vice is getting loose in the threads I think the casting is going to let go or its getting close to stripping out for it being a 20 year old harbor freight type (4"vice) I think I got my money's worth out of it. I'll still use the 4" vice until it craps out, but now with this 6" I have more capacity
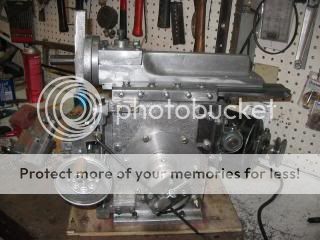
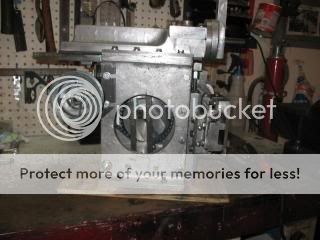
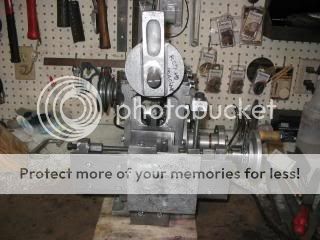
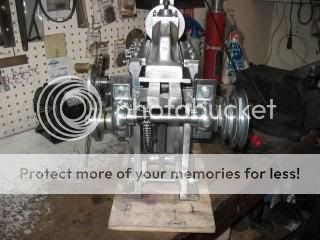
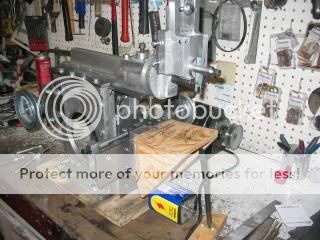
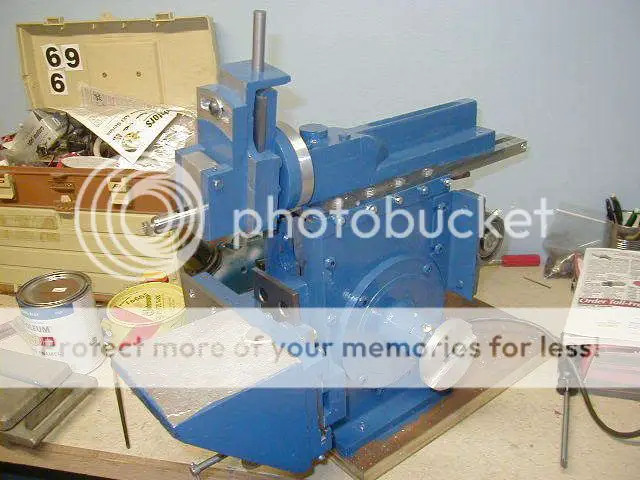
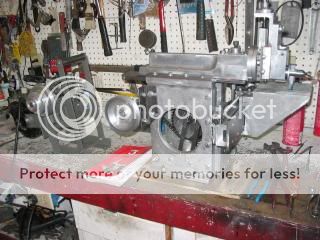
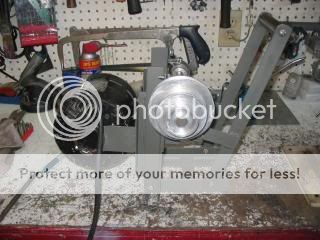
for making the shaper and mill. I'm going to cast some soft jaws for the vice soon. I plan on casting the sheaves for the shaper using the lost foam patterns, I hope to be able to make them with the grooves in place, with the pulley shaft hole by using a 5/8"" steel mandrel in place. Once cast drive the mandrel out with the press. Should be "very little machining needed"
famous last words.
To make the sand firm for cores I think you need sodium silicate(water glass) mixed in the sand then set the core with Co2 gas. co2 gas I think can be made from vinegar and baking soda but I'm not sure. When I get to making cores I plan on using molasses to make a baked sand core. The way to do it is in the Gingery books.
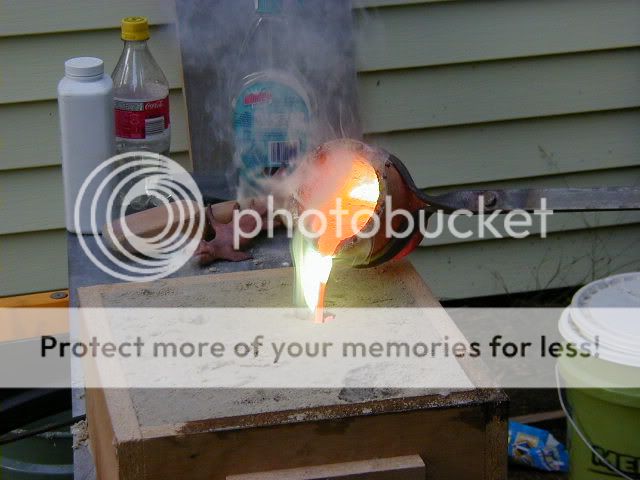
I've used some very damp sand due to the very low humidity where I live to help keep from having steam inclusions in the cast part just use a coat hanger wire. push it down to the pattern spaced about 1" apart all over the pattern top and bottom, on the bottom after venting with the wire I lightly rub over the holes cause if you don't the liquid aluminum can leak out of the mold. I found that out by loosing most of the metal in one casting it set the grass on fire good thing it was on the grass and not on the pavement. Did I say casting it fun?!!!
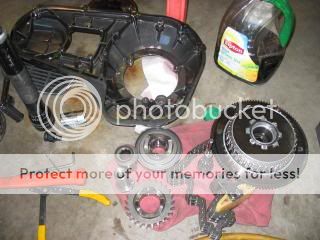
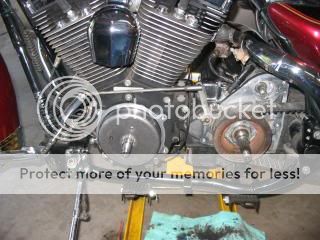
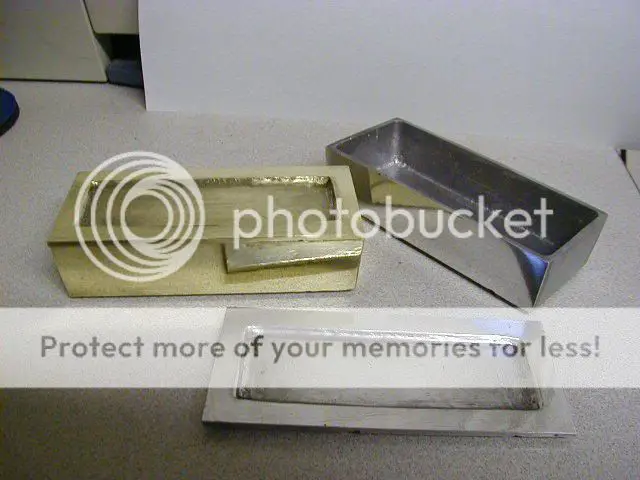
To just melt metal and pour them into pigs or ingots . Make a ingot mold out of scrap angle iron weld the iron into trays if you watch the video of me casting you will get the idea of how to make that ingot mold no need for sand. Pop cans are a lot of work to melt from what I've heard so I haven't done many. I do melt down aluminum foil and all the aluminum shavings if I had aluminum cans I'd do them too. I have some aluminum pots and pans to cut up to melt along with kitchen utensils that are aluminum. I seen where one guy was using a log splitter to bust up transmissions and engine blocks to melt that gives me some ideas!
Don't be afraid to experiment but do think what the result could be before you do something strange. One of my biggest fears is spilling aluminum on my feet or getting a blast from the furnace from a oil smoke cloud. I'll do a cold practice run on a pour with all the tools just to make sure I do not have a tripping or stumbling hazard first.
Have fun and be careful not paranoid.
I'm not sure what you are talking about "static shock"????
static shock is just an fancy word for flame flare up and spiting out of an object out of an molting hot extrusion , it is floating around especialy at utube . i know some guys brave enough to melt in an used can that beans come in for a one shot melt... not me amigo , not me , i am not that brave . i break up trnsmission by open pit fires , and rims too , i have to burn off here any way limbs and stuff . i just throw them on top of the fire and sit in lounge chair . if you have an yard you can dig in you would love the pit.. i will post pictures soon i hope
 
Last edited:

Norman

LORD VADER Moderator
Jan 16, 2008
2,606
7
38
71
pampa texas
Ok I know what your talking about "static shock" when melting your aluminum if you put the part to be melted on the furnace lip beside the furnace opening let it preheat that will drive out water. before you toss it into the pot.
I've used tin cans for crucibles as a kid but not for large melts. I use steel pipe sch40 right now as that is what I happen to have. I weld on a 1/8" thick plate for the bottom. I hope to find some kind of clay or chemical for a wash to help keep the steel from scaling too much as each firing making the steel thinner. I may break down and find the clay or refractory to make crucibles.
Cast iron is maybe a better metal for aluminum melting but finding a good sized pot at a cheap price is not going to happen for me anytime soon unless I can find one at a flea market somewhere. May have to make a larger furnace most cast iron pots I've found are too large to
fit my furnace.
Menard's has fire bricks and furnace refractory the brick is for less temp than I want to use something like 2000 degrees. I checked them out the other day but I didn't buy anything there, was just looking. I need to go out in the boonies here in Texas and see just what kind of clays are here might find something that will work so I'd spend less money for making a larger furnace. I'll need to do some reading and research.
I have about 75 to 80 lbs of cement left over from the first furnace even after fixing the craters in the driveway.
 
Last edited:

kicking

New Member
Apr 11, 2010
403
0
0
mississippi
crucibles arent that expensive anyway, on this site you can get em for less than 50 bucks


Foundry Crucibles
not bad price on crucibles the best i have found on the web and the guy answered my email on availability, the site dont come up when i punch it in at the bbb list or has an veri sign or any thing on the page, dont mean it is an bad or unsafe site, i was thinking if i ordered an crucible i would use an green dot card , i was looking at the Graphite crucibles my self . but the lifting tongs and pouring shanks are expensive . and you must get the right size tongs and shanks for the crucible. An A16 crucible will hold 10 pounds of Aluminum , but if i did get one i might just drill an hole on each side near the top of it and use an threaded rod to fish through the holes and lift it with an hooked shaped rebarb bars on each side. Will an stainless steel pot from Family Dollor do for a while ? what do you think norm ? stainless steel pot from family dollar ? cans take up a lot of room in your pot unless you mash them . i would like to make an hand crank gear masher or somthing to mash them . I am afraid to try to shread them into shards with my limb chipper , have shreaded plastic bottles though. cast iron is heavy and scales . i get them at the flea market when about 40 dollars for an big one thats too rusty to cook in , they work but are heavy, and i will advise to watch the handels for wear and rust , thinking about trying an stailess steel pot from Family Dollar . its large and light , just dont know if i will get my 15 bucks worth out it and its safe ?
 
Last edited:

Norman

LORD VADER Moderator
Jan 16, 2008
2,606
7
38
71
pampa texas
stainless should work ok. I don't know how long it will last I'm still using home made steel crucibles they are cheap and easy to make( plain old steel welded together). Yesterday I melted down a sewing machine, it was made of aluminum, I also melted down an old iron, a heavy old aluminum cooking pot, a aluminum cooking skillet along with assorted kitchen tools made from aluminum. It was hotter than yell in Pampa temps reaching up to 100 I even got a little sun burned.
The shaper is coming along I have the ram installed, finished up the crank now I'm installing the rear jack shaft to drive the crank. I still have a bunch to do but its coming along.
I ordered and received book 6 dividing head and deluxe accessories it has a bunch of goodies to make. I'll be busy for a long time.
 

Norman

LORD VADER Moderator
Jan 16, 2008
2,606
7
38
71
pampa texas
I'm almost done with building the shaper. I have to cast the table and some hand wheels. Most all of the machine is done or close to it. Still lot of small things to do.
One of the big things left to do is take the parts that I can't machine here at home to the airport and use a friends lathe to turn some of the parts that won't fit on my lathe mine will swing only a
6" dia. and I need to turn some that are about 7" dia. I need to make about 6 cuts on a part that is on the down feed they are over 6" in dia so that work shouldn't take too long to do.
Photos of the shaper.
side view

other side

front view

back side
 
Last edited:

Norman

LORD VADER Moderator
Jan 16, 2008
2,606
7
38
71
pampa texas
more photos of the shaper.
cutting head or as it called the clapper box.

side view here the cutting tool is kicked out as it would be on the return stroke when cutting

clapper box sitting almost where its supposed to go when I get the machining done

here is the wood pattern that will soon be cast in aluminum then mounted on the cross slide.

I'm getting close to the end!!
 
Last edited:

GearNut

Active Member
Aug 19, 2009
5,104
11
38
San Diego, Kaliforgnia
I am still trying to figure out how that machine works. I have never heard of a shaper before.
Your work is impressive, especially considering that you made it in your back yard!
Some year I want fabricate my own hit-n-miss engine, casting and all, done in my back yard.

Thank you for the up-date! You are an inspiration to us all!
 

Norman

LORD VADER Moderator
Jan 16, 2008
2,606
7
38
71
pampa texas
The shaper cuts metal in a straight line, these machines are considered out dated now days by
being replaced by metal mills.
The ram moves forward to cut metal on the table on the back stroke the table is automatically moved to the left by around 0.002 to 0.007" and on the forward stroke the tool but will plane off
a small amount of metal.
The stroke is adjustable the speed is adjustable. The amount of cross feed is adjustable.
You can raise or lower the table or the cutting head. You can swivel the cutting head and the table.
This thing cuts only on the forward stroke and in a straight line. You might be able to google metal shaper and see on in action or maybe even u-tube.
I've only seen one in operation once in a factory in Hamilton, Ill. where I worked for a while Dadant &Sons. bee keeping supply house. The machine shop had one and it was cutting slots in a roller making large cuts, smoking hot metal chips were flying off that thing and making a loud racket, it was impressive and looked dangerous to be around, sort of mid-evil type of a machine,kind of the reason I wanted to make one. The one I'm building is small compared to the one I watched, my machine would fit on its table with room to spare.
Norman
 

Norman

LORD VADER Moderator
Jan 16, 2008
2,606
7
38
71
pampa texas
I did the last casting today. The shaper's table ,it came out good. So all major parts are made all thats left to cast is handles and accessories. Still need to build the motor drive pulley stuff, it will be welded and bolted together that will be easy compared to the metal casting.
Then I'll will start learning how to make it work. I'm redoing some small stuff as I didn't like
how some of it came out so still a bunch to do but it is close to being done, sort of.
So have any of you started casting anything or making a machine or casting parts for your bike?
Norman
 

Thud

New Member
May 26, 2010
205
0
0
West Michigan
Norman,
Great job on the shaper! Are you tired of drilling & tapping holes yet? LOL. I know I was.
Here is a photo of one i did a few years backat about the same stage as yours:

I never did finish the auto feed ratchet mechanism. The shaper now resides under a bench & is getting dusty. I stole the drive motor off it to power another machine. It does work very well on small prts that need squaring up or an internal keyway.
I will warn others though that casting can become a hobby onto itself. It is a lot of fun & very satisfying to concieve & then make a part all the way through. here are a couple more pictures of other castings I have done.


This is my favorite photo of a brass pour.


Looking foward to seeing some parts made on the shaper. (& more casting projects)
catch you later. T
.wee.
 

Norman

LORD VADER Moderator
Jan 16, 2008
2,606
7
38
71
pampa texas
very nice Thud. The drive mech. for the table feed is a little tough to get right I'm redoing the drive cog. I didn't get it right the first time so trying it again 32 1/8" dia holes to drill again and file into a sq tooth. I made a paper pattern this time glued it to the metal so it will hopefully guide me better on cutting the teeth.
I'm not tired of the drilling taping . I don't like the scraping I get the purssin blue every where .
My scrapers are a pain to use I don't seem to get the thing sharp enough or at the right angle.
 
Last edited:

Norman

LORD VADER Moderator
Jan 16, 2008
2,606
7
38
71
pampa texas
The shaper is about finished I'm waiting on the 8" sheave to show up then need to get a couple of belts then see how it will work. I built the motor mount this week end. I also tore into the Harley to fix a chain case leak which was a small leak but made the drive belt and muffler nasty.
The Snake said we are going to go to Sturgis this year so I'd better get the bike fixed. so I though I'd show you some more boring photos of what I've been up to.

The shaper temporarily mounted on the work bench. The release lever is in the back position where if there was a belt on the sheaves from the motor mount to the shaper the belt would or should be tight. To adjust the belt from the motor to the 8" sheave the motor's mount is adjustable up and down.


motor mount in the released position. The motor is off a sump pump so I also had to make the motor's mounting bracket, redneck built, hose clamp on one end and a muffler clamp on the other end.

Here is where the 8" sheave will go once it gets here. If you look at the top right of this photo you can see the release handle its "Chrome"!!!! The only chrome part on the whole thing. The sheaves on the shaper and the motor assembly were cast and machined right here at the shack. I bought the 8" sheave cause I can't machine one on my lathe it will swing only a 6" item. I guess I was lazy I could have cast one and machined it at the airport on Fred's lathe.
 
Last edited:

Norman

LORD VADER Moderator
Jan 16, 2008
2,606
7
38
71
pampa texas
The Hog being fixed?


Its leaking either here mainshaft seal from primary chain case to tranny or....

here the starter shaft seal, but can't see any reason for it to be leaking the seals both look fine but I'm going to change them. Its leaking red automatic transmission fluid which I run in the chain case. So I know the tranny isn't leaking cause I run Royal Purple gear oil in the tranny.

All of this had to be removed to get to those seals none of it was hard to remove just a bunch of thing to take apart and clean.
 
Last edited:

Norman

LORD VADER Moderator
Jan 16, 2008
2,606
7
38
71
pampa texas
What the bike looks like with the chain case removed.
You can see the round thing on the engine shaft that is the alternator rotor and under it is the stator. I replaced those last year due to letting a Harley shop work on my bike(Rapid City HD), big mistake they broke the stator wires by replacing a voltage regulator that I did not need. I had a fuel injection problem so they replaced the voltage regulator instead. The head temp sensor was bad, they couldn't figure it out, I changed out the complete fuel injection system and the ECU (Thunder Max fuel injection system with auto tune) so now I can trouble shoot my bike with my lap top. No more will the Harley shop work on my bike if I can help it. They may change a tire if I'm on the road and have a flat, they will nail you about $300.00 for a flat so if I can fix it myself on the road and limp home to fix it right I'll do it or haul it home. Some Harley shops the HD stands for hundreds of dollars so I try to stay away from them I support the Independent shops when and if I need parts most of the time, I just don't like the Harley boutiques shops that seem to be the way the shops are run now days. We have a good one here in Pampa... "Finish Line" is it's name. Jim is the owner and a real good guy to deal with.


Last edited:

GearNut

Active Member
Aug 19, 2009
5,104
11
38
San Diego, Kaliforgnia
Norm, the portion of the mainshaft that the seal lips ride on is a pressed on sleeve.
I really do not know how many miles you have on your bike, but if they are high, the leak could be a combination of worn seal lips and metal worn away from the sleeve thus reducing the pressure that the sealing surfaces have against each other.
discoloration on the sleeve is ok, but if there are any perceptible wear rings on it, replace it too. It takes a special puller/ installer to do the sleeve.
 

Norman

LORD VADER Moderator
Jan 16, 2008
2,606
7
38
71
pampa texas
I checked that the thing looks and feels new. I don't see or feel any wear on any of the parts?
I'll check them with a mic to be sure. It could be leaking from one of the mounting bolts as they are sealed with silicone. One bolt was not as tight as it should have been. They were factory installed as far as I can tell. I really figured the hard to get off part on the main shaft would show some wear but it didn't?
I'll probably be chasing a mystery leak could be the seals were getting a little hard the bike has 45,000 miles on it.
 
Last edited:

Norman

LORD VADER Moderator
Jan 16, 2008
2,606
7
38
71
pampa texas
The bike is fixed "All better" so now back to metal casting and shaper building with a little side tracking to fix my home made bench top sander. I'm going to use the pattern from the shaper's side plate to cast a disc then machine and bore it to fit the sander replacing the particle board dics that I built the disc out of. Hey I built the sander in 1982 its worked good for quite some time
now. A metal disc should last longer than the wood disc. I might just build the whole thing out of aluminum and retire the old sander which was built with the particle board. I'll be able to use the shaper on it to machine the table and the other parts if get my rear in gear.
I guess I should grab the camera for this one, for some show and tell, so you guys can see what you can do with casting your own parts. Well at lest that's the plan for now?!!!
Off to the man cave!!!
Norman
 

Norman

LORD VADER Moderator
Jan 16, 2008
2,606
7
38
71
pampa texas
The sheave showed up today. I finished up the shaper made a angle iron mount to mount the shaper and motor on. Got 2- 1/2"by 32" A belts. Got it up and running, planed off the shaper table with it and then started to play with the shaper. I started cutting a scrap block of aluminum learning how to make the machine kind of work? Oiling the heck out of the bearing and letting all the parts get to know one another, I spent about 8 hours running this thing and I had fun!!!!!
Now I got to do thing things I was going to do, fix the sander, I'll have to cast a form to make a vice for the shaper along with the other stuff I want to do.
Its hot here close to 100 and the humidity has been high so I may get lazy,go ride the hog or the mb for a while or sit back in the easy chair and pet ol Rufus he'd like that!
If I can get Ilikeabikea to come over maybe he can get some video of the shaper working.
Oh I'm pretty happy with the way the shaper works seems to cut nicely, got aluminum shaving all over the shop.
Norman
 

Thud

New Member
May 26, 2010
205
0
0
West Michigan
congrats Norm,
Its a whole new level of satisfaction don't you think? I enjoy little contests we have over at back yard metal casting's forum. It really helps to build some foundry/pattern making skills. The current challange is to cast a bell. they just moved the dead line out to december..I intend to donate a set of patterns for the gingery mill for the prize pool.
Here is a link if you havn't been there. (I post as Todd there)
BackyardMetalcasting.com - Lionel's Laboratory :: View Forum - Castings and Casting Practice

Our last challange was to see how thin we could make a functional casting.Here is a pic of a brass & aluminum storage boxes all polished up:


Looking foward to seeing your next project. Be safe & enjoy. T
 
Last edited: