New 700c fixie build in progress

GoldenMotor.com

Davezilla

New Member
Mar 15, 2014
2,705
10
0
San Antonio Texas
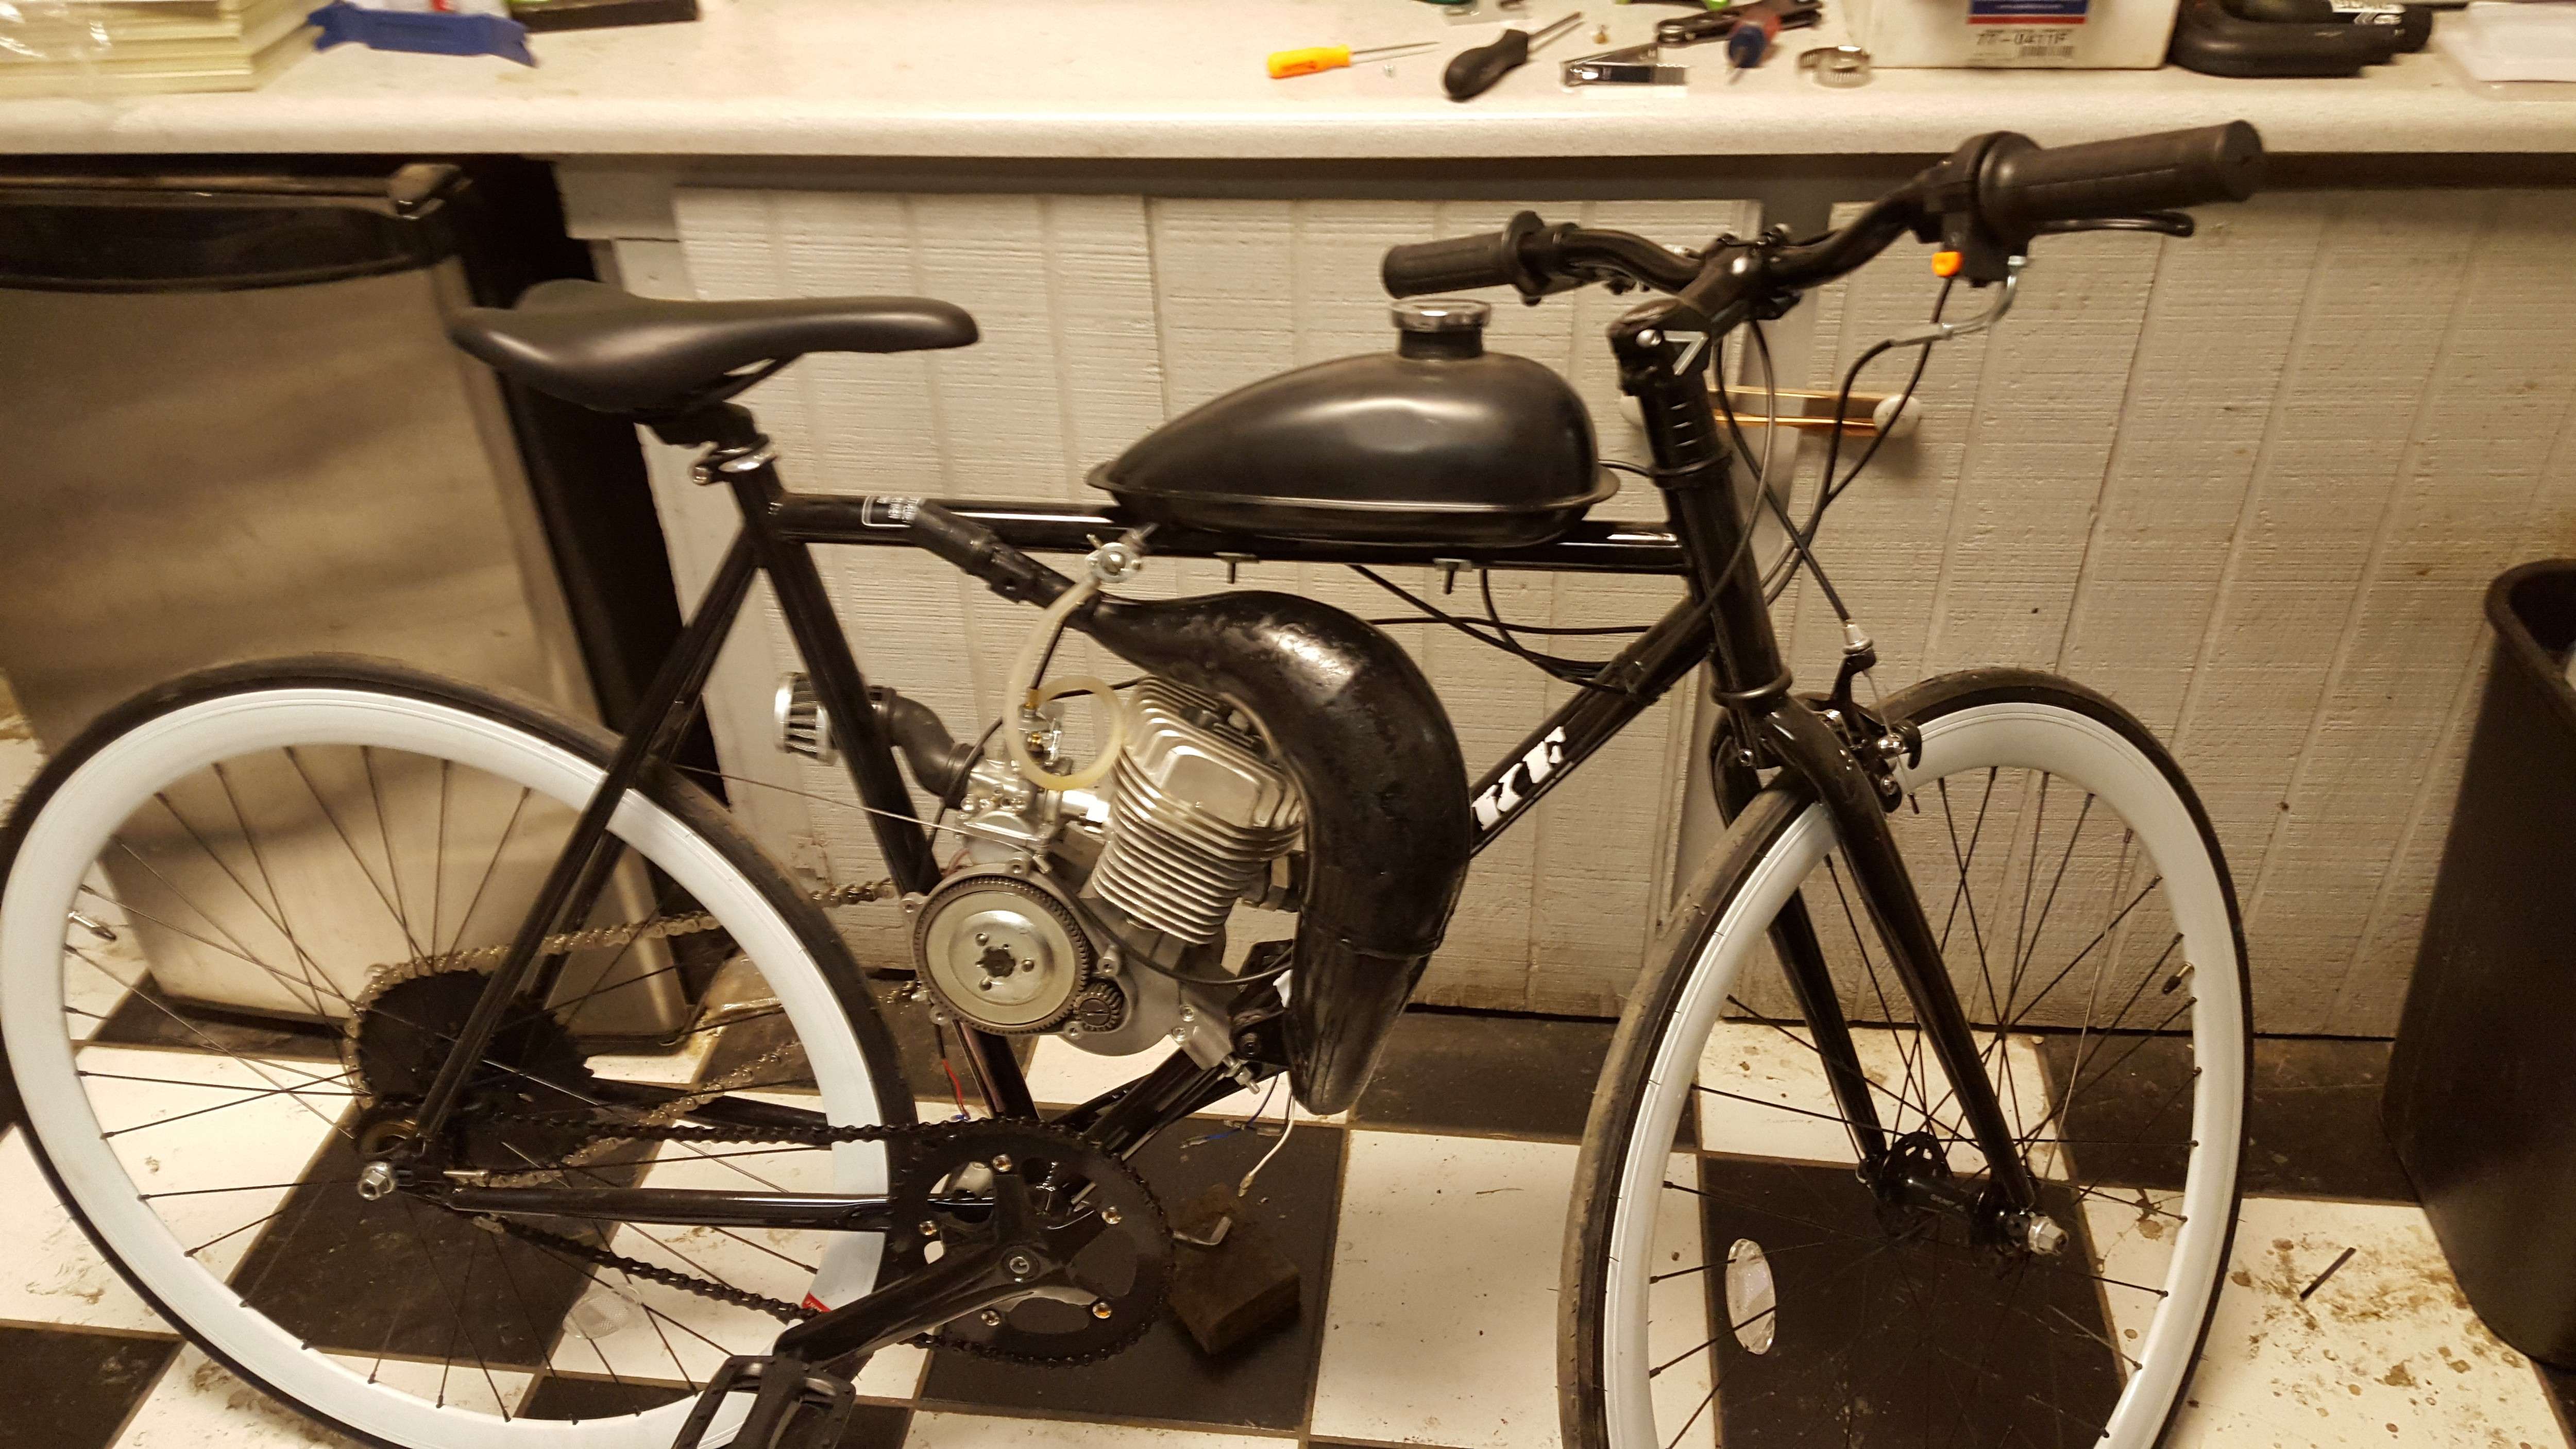
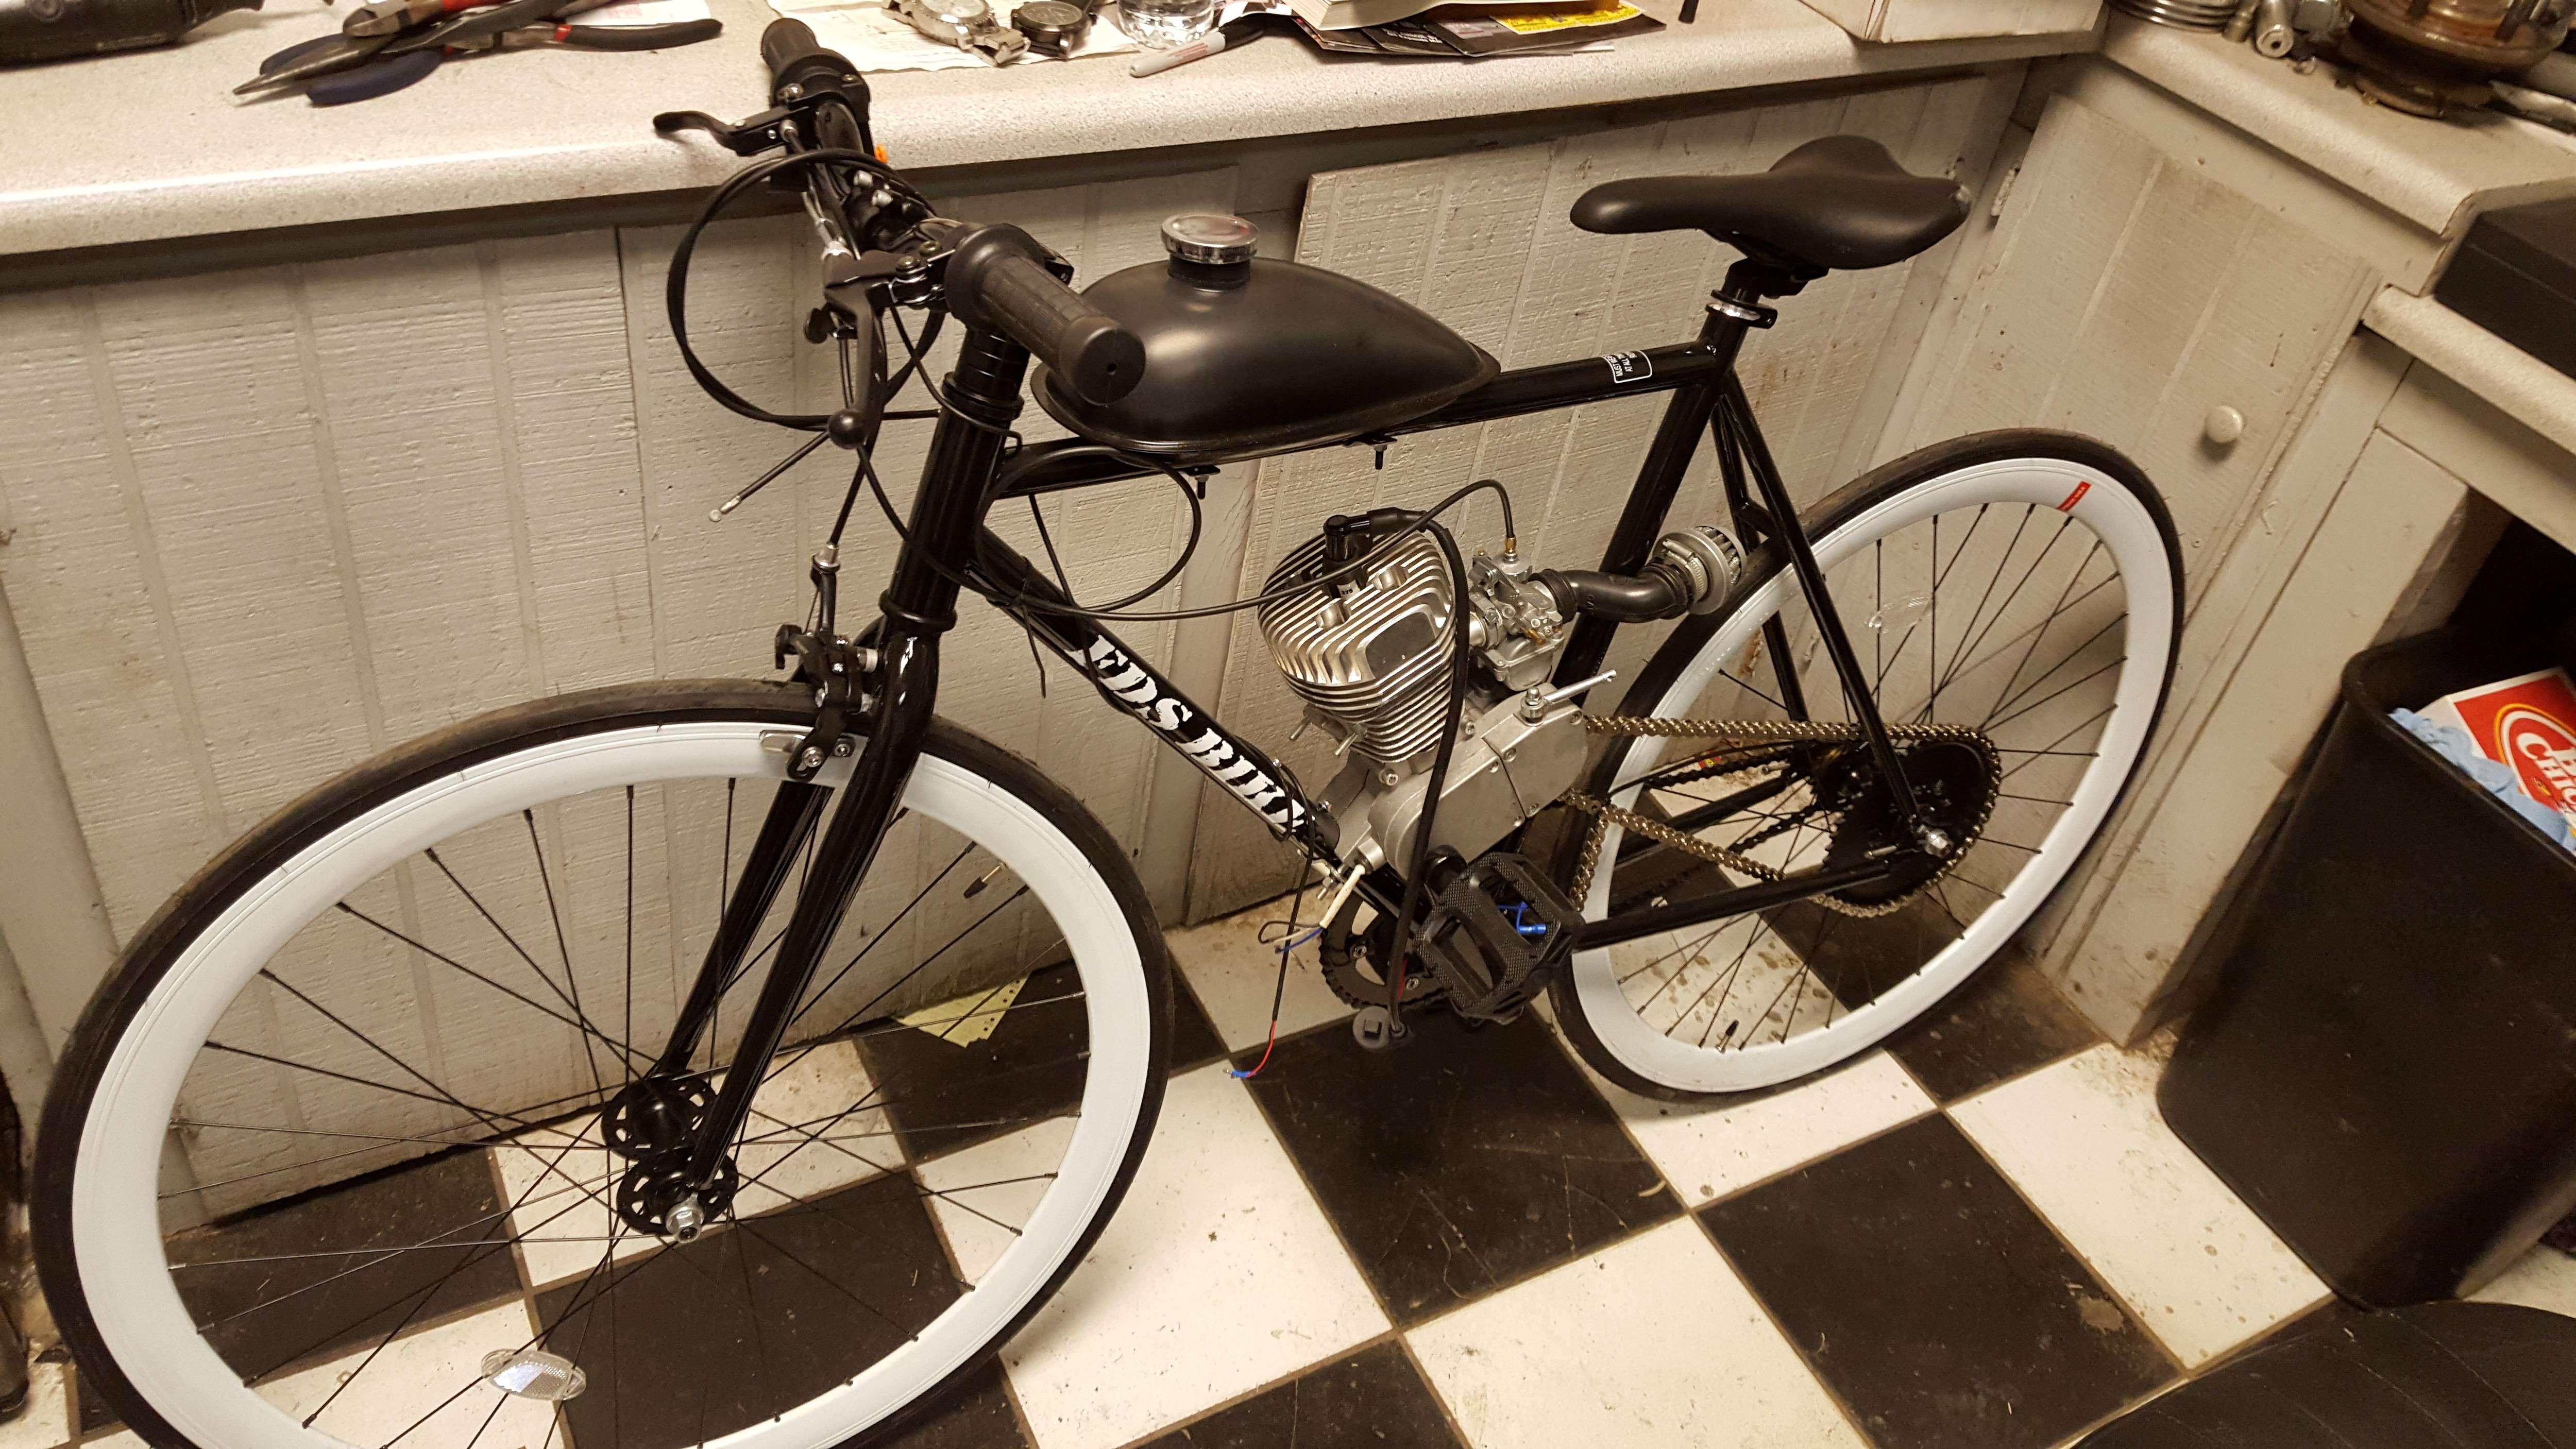
With my mountain bike down for frame repairs (which turned into frame replacement) and the stingray project temporarily on hold I decided to build another one so I have one I can get around on until I get the mountain bike back on the road... I also wanted something different so I went with a 700c fixie road bike. Instead of just taking my engine out and putting it in this one I went ahead and built a whole new engine for this bike and set it up to rev high.
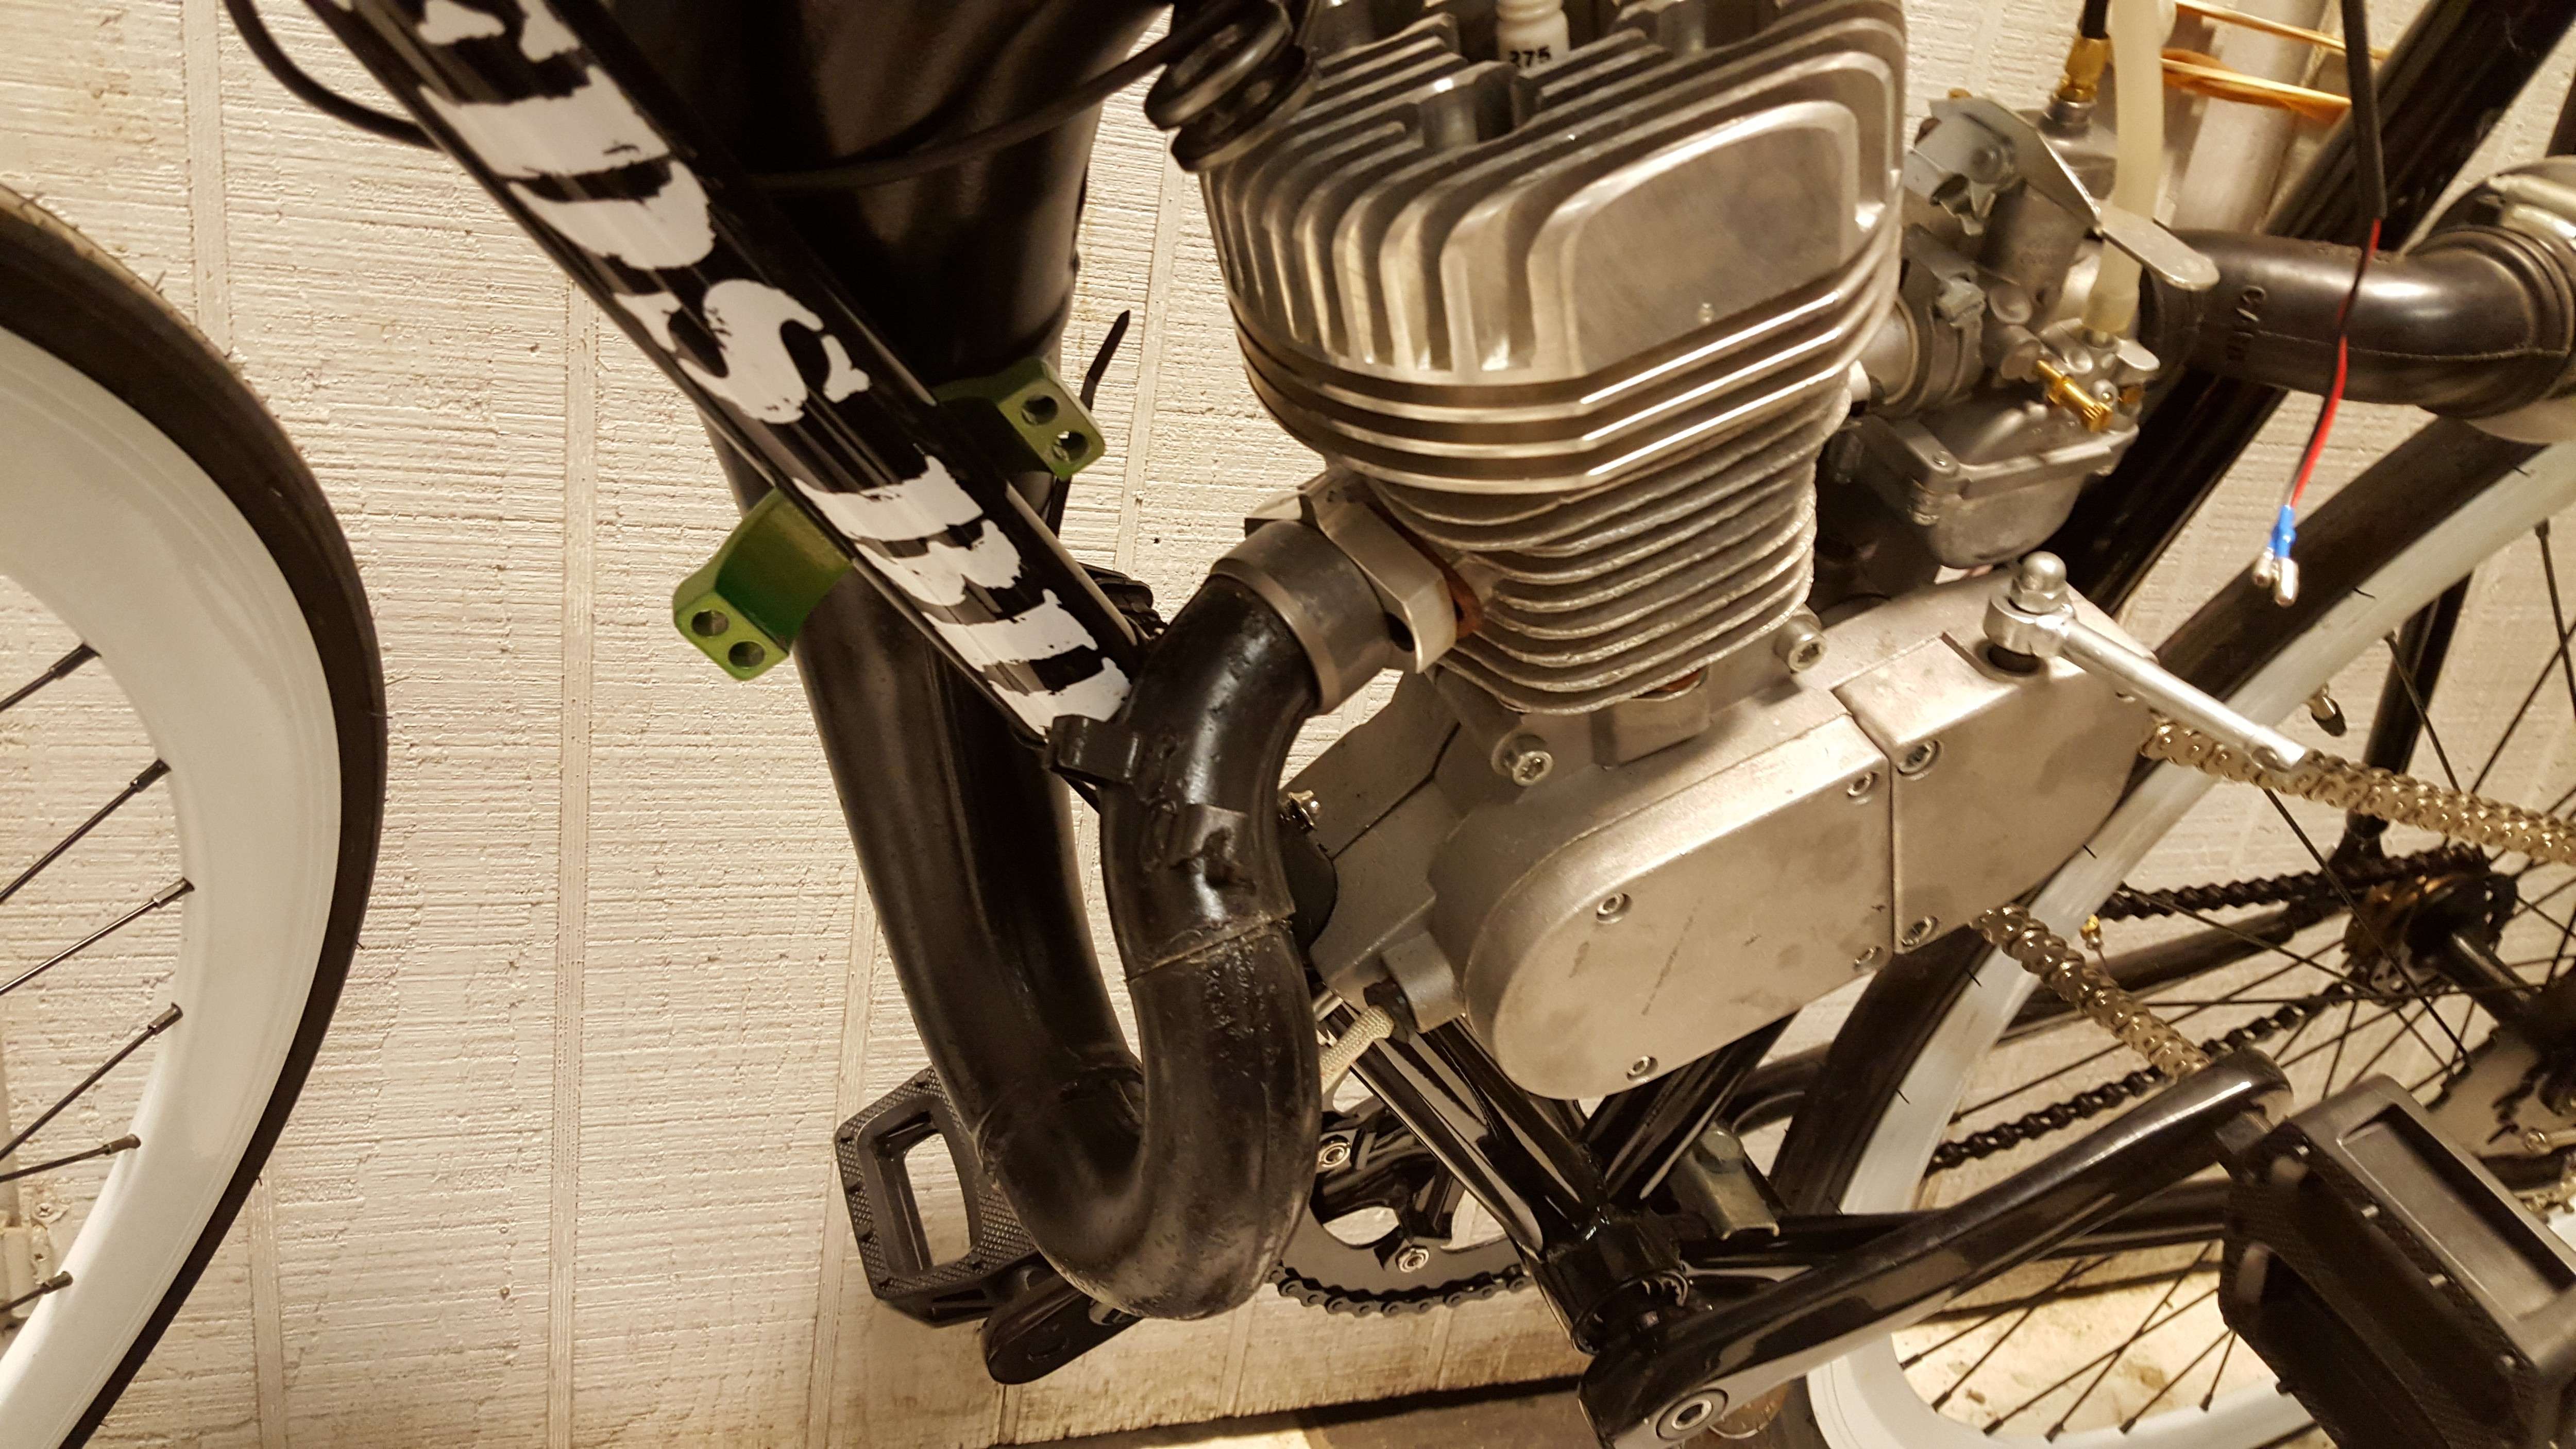
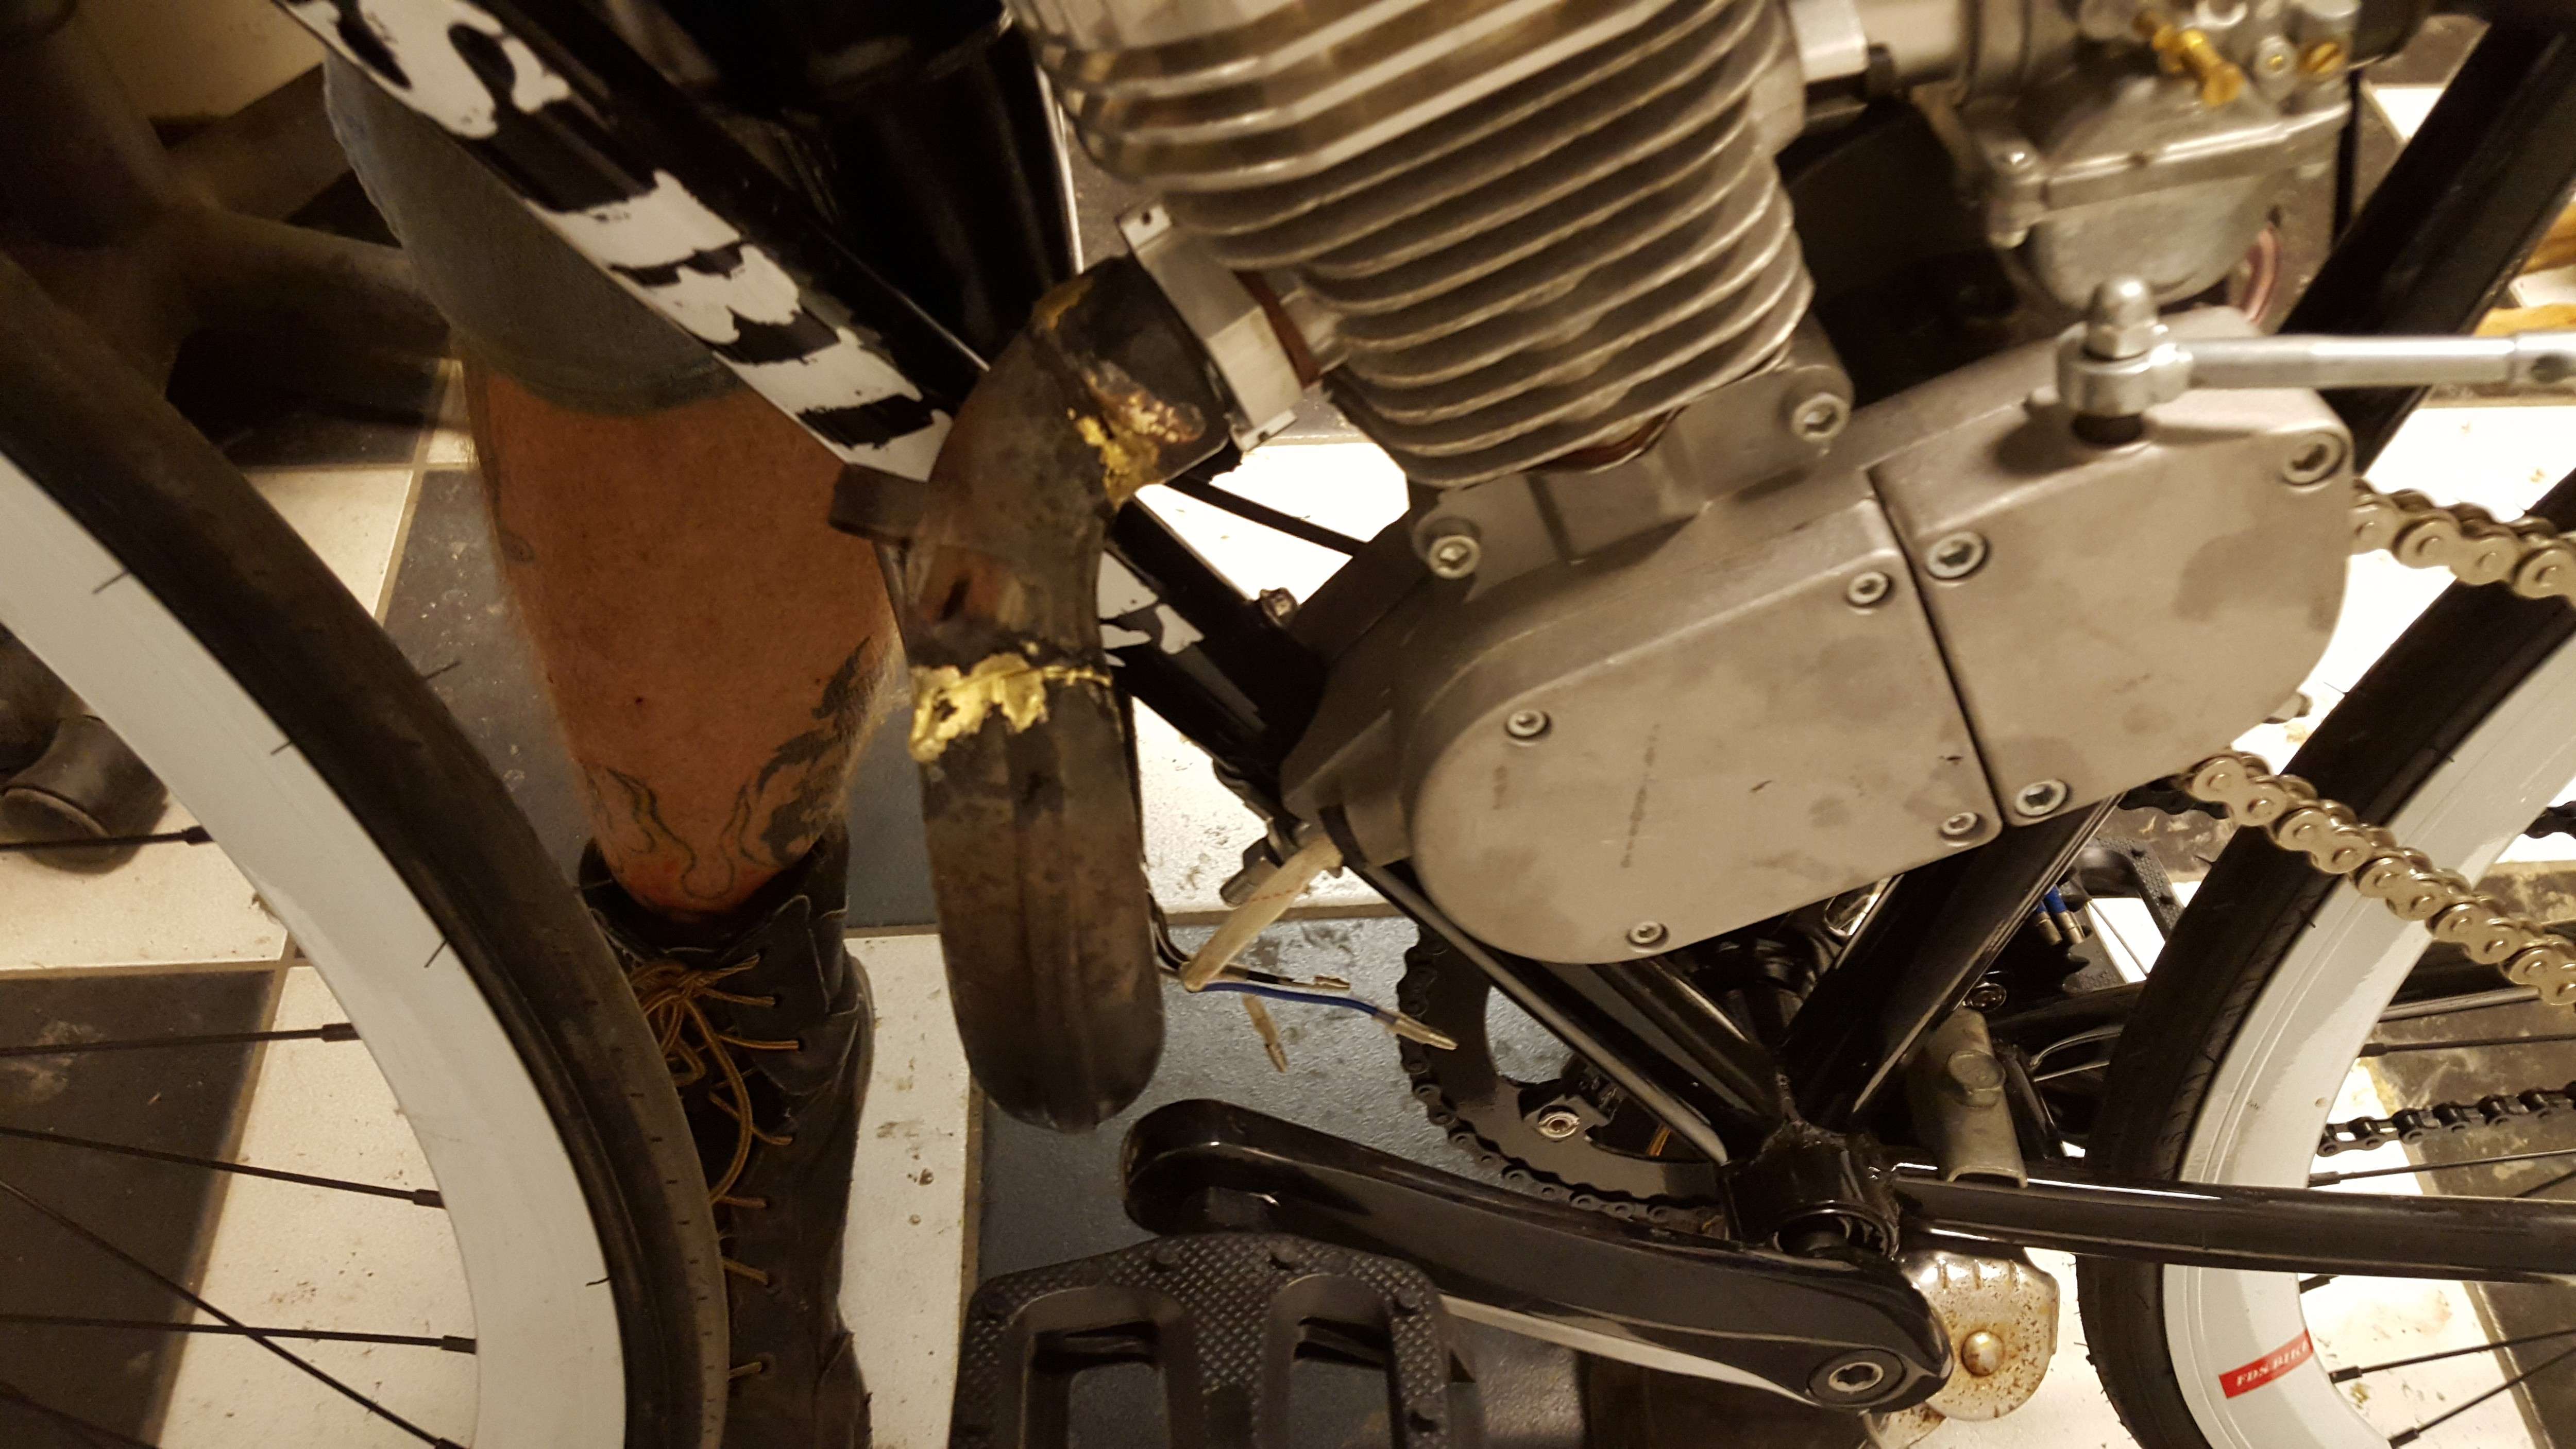
The rear sprocket wouldn't fit in the usual manner so I carefully enlarged the center hole in a 44 tooth sprocket until it fit over the lip on the fixed cog on the flip flop hub, welded it to the smaller cog and now it just screws on and then is locked in place by a second nut that's left hand threaded. No rag joint or adapter needed and the chain alignment with the engine came out perfect.
This one has the forged dropouts with built in chain adjusters which also made setting up the chain tension and rear wheel alignment super easy.
Even tho this bike is being built so I can take my time on the other 2 so they can be as nice as possible I'm not taking any shortcuts on this one either, it's just going together quicker since minimal modifications are needed.
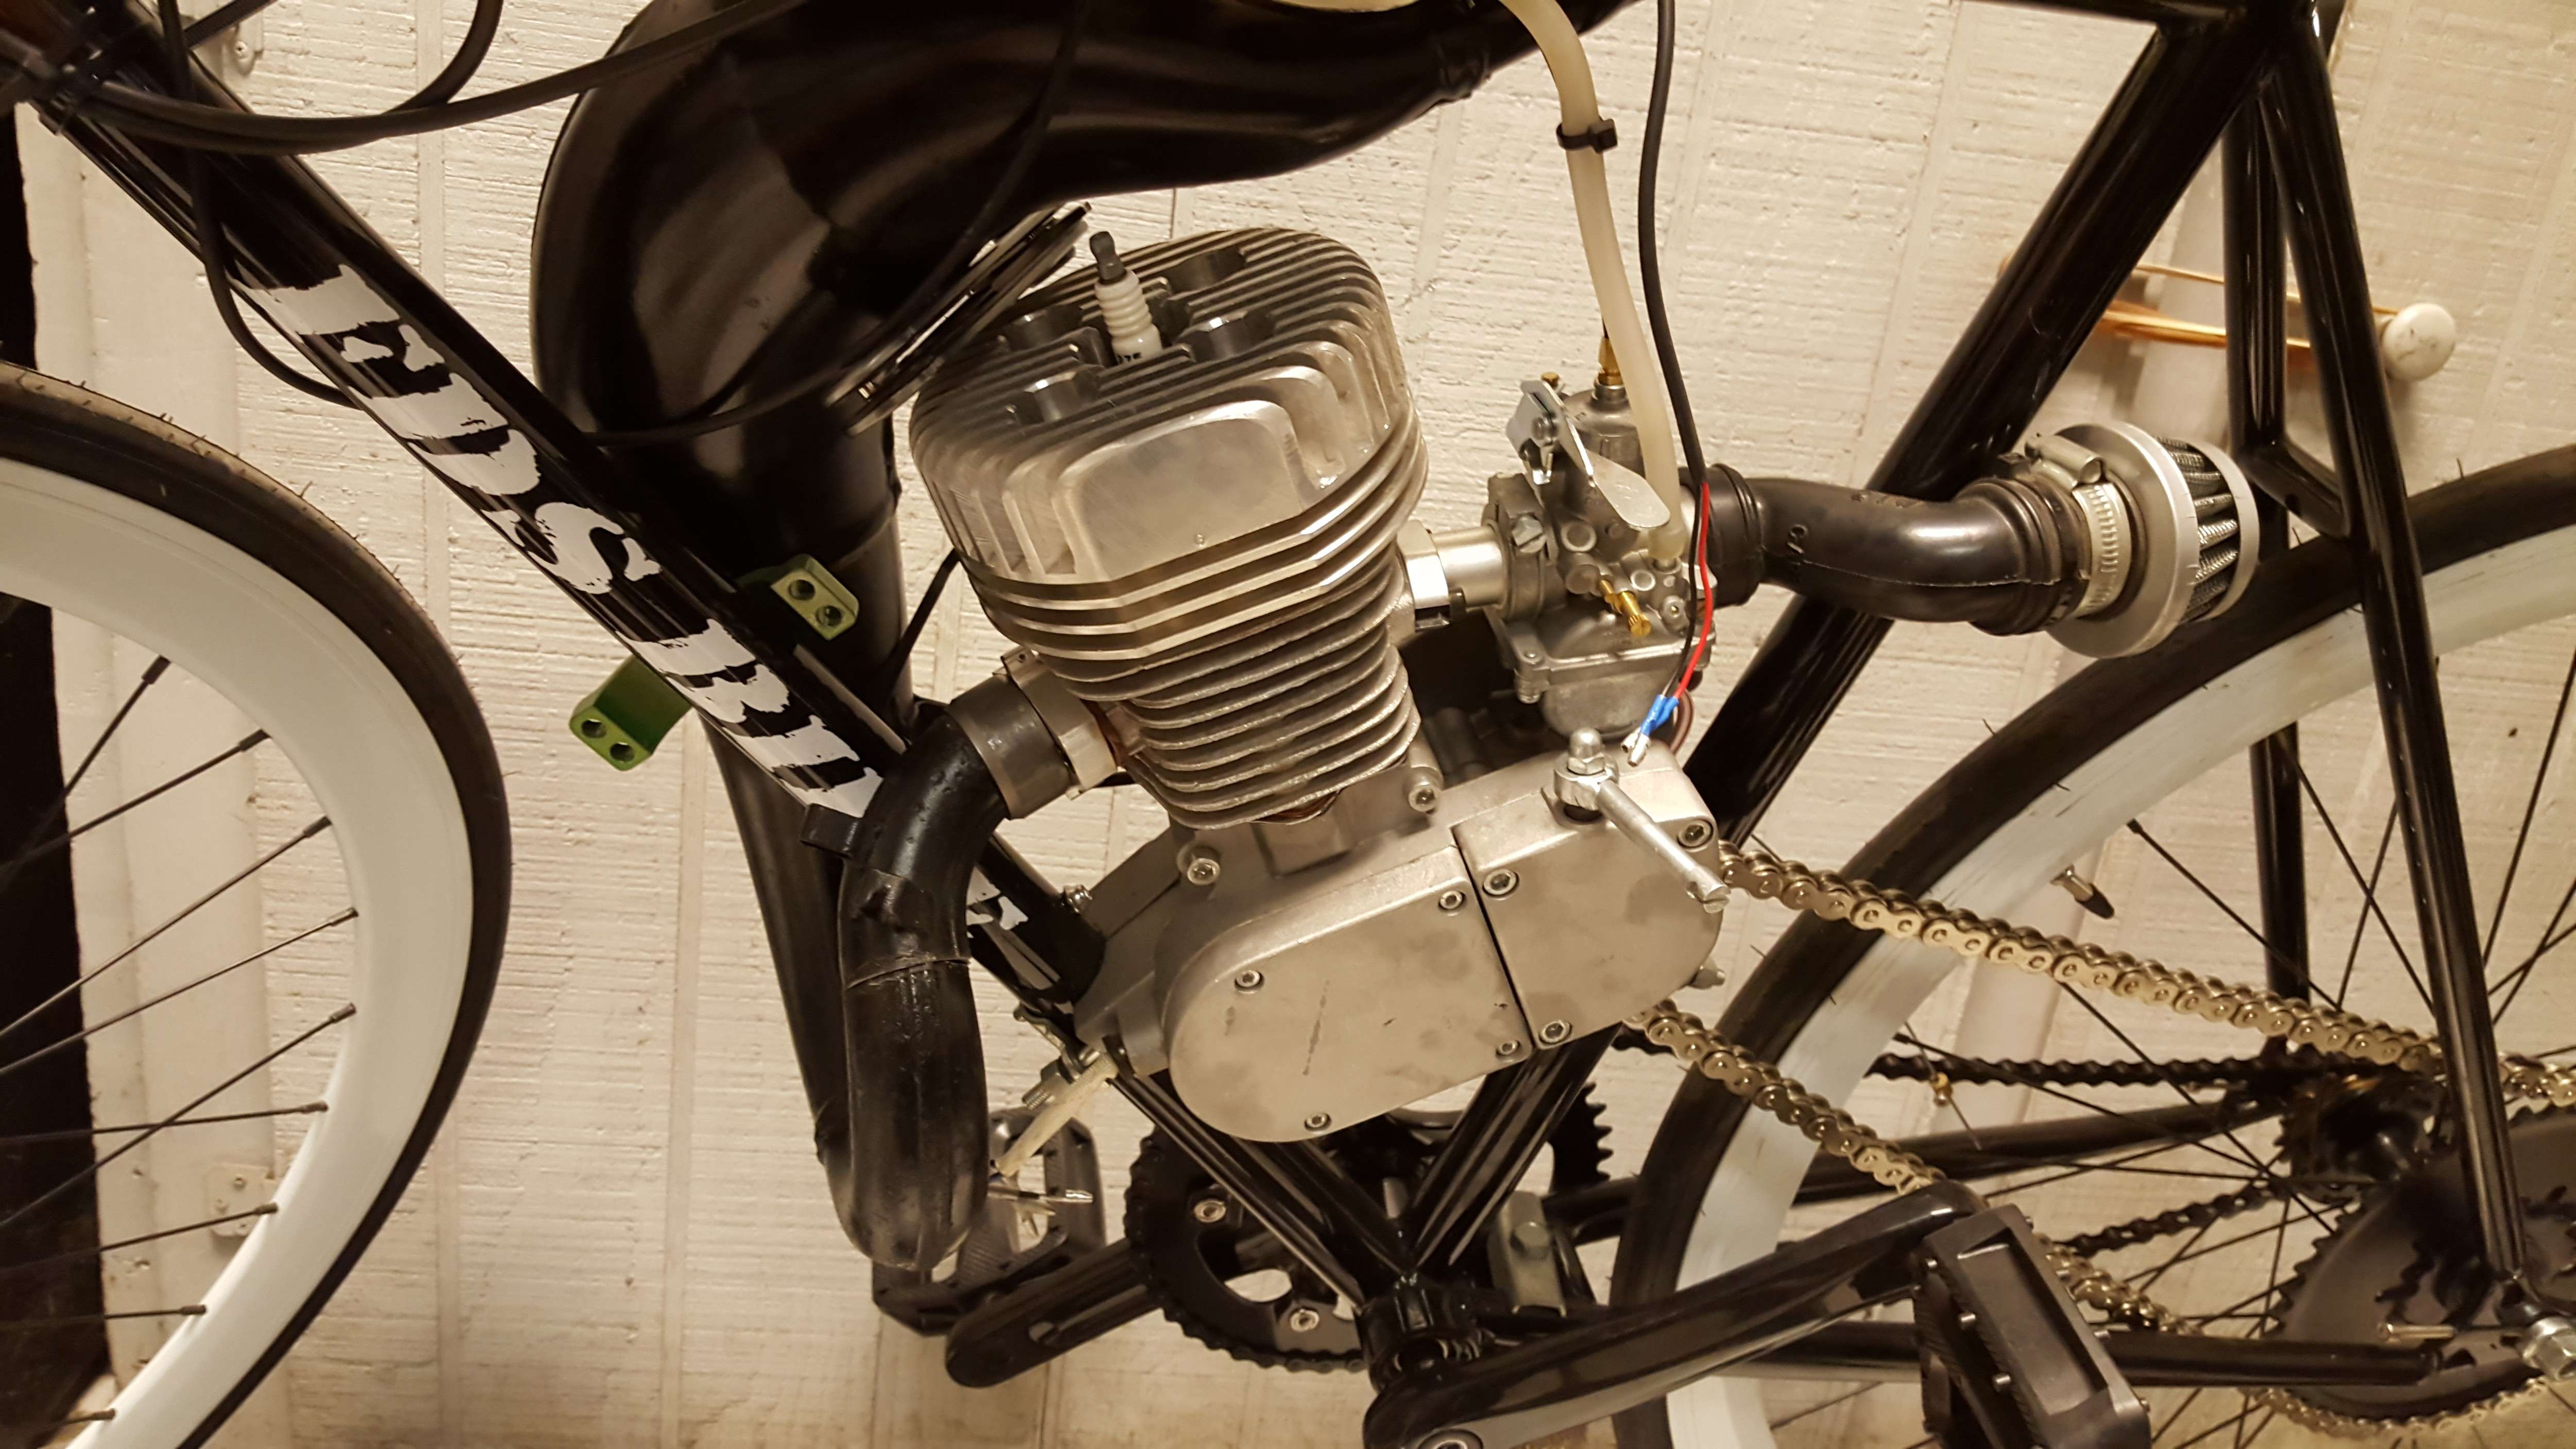
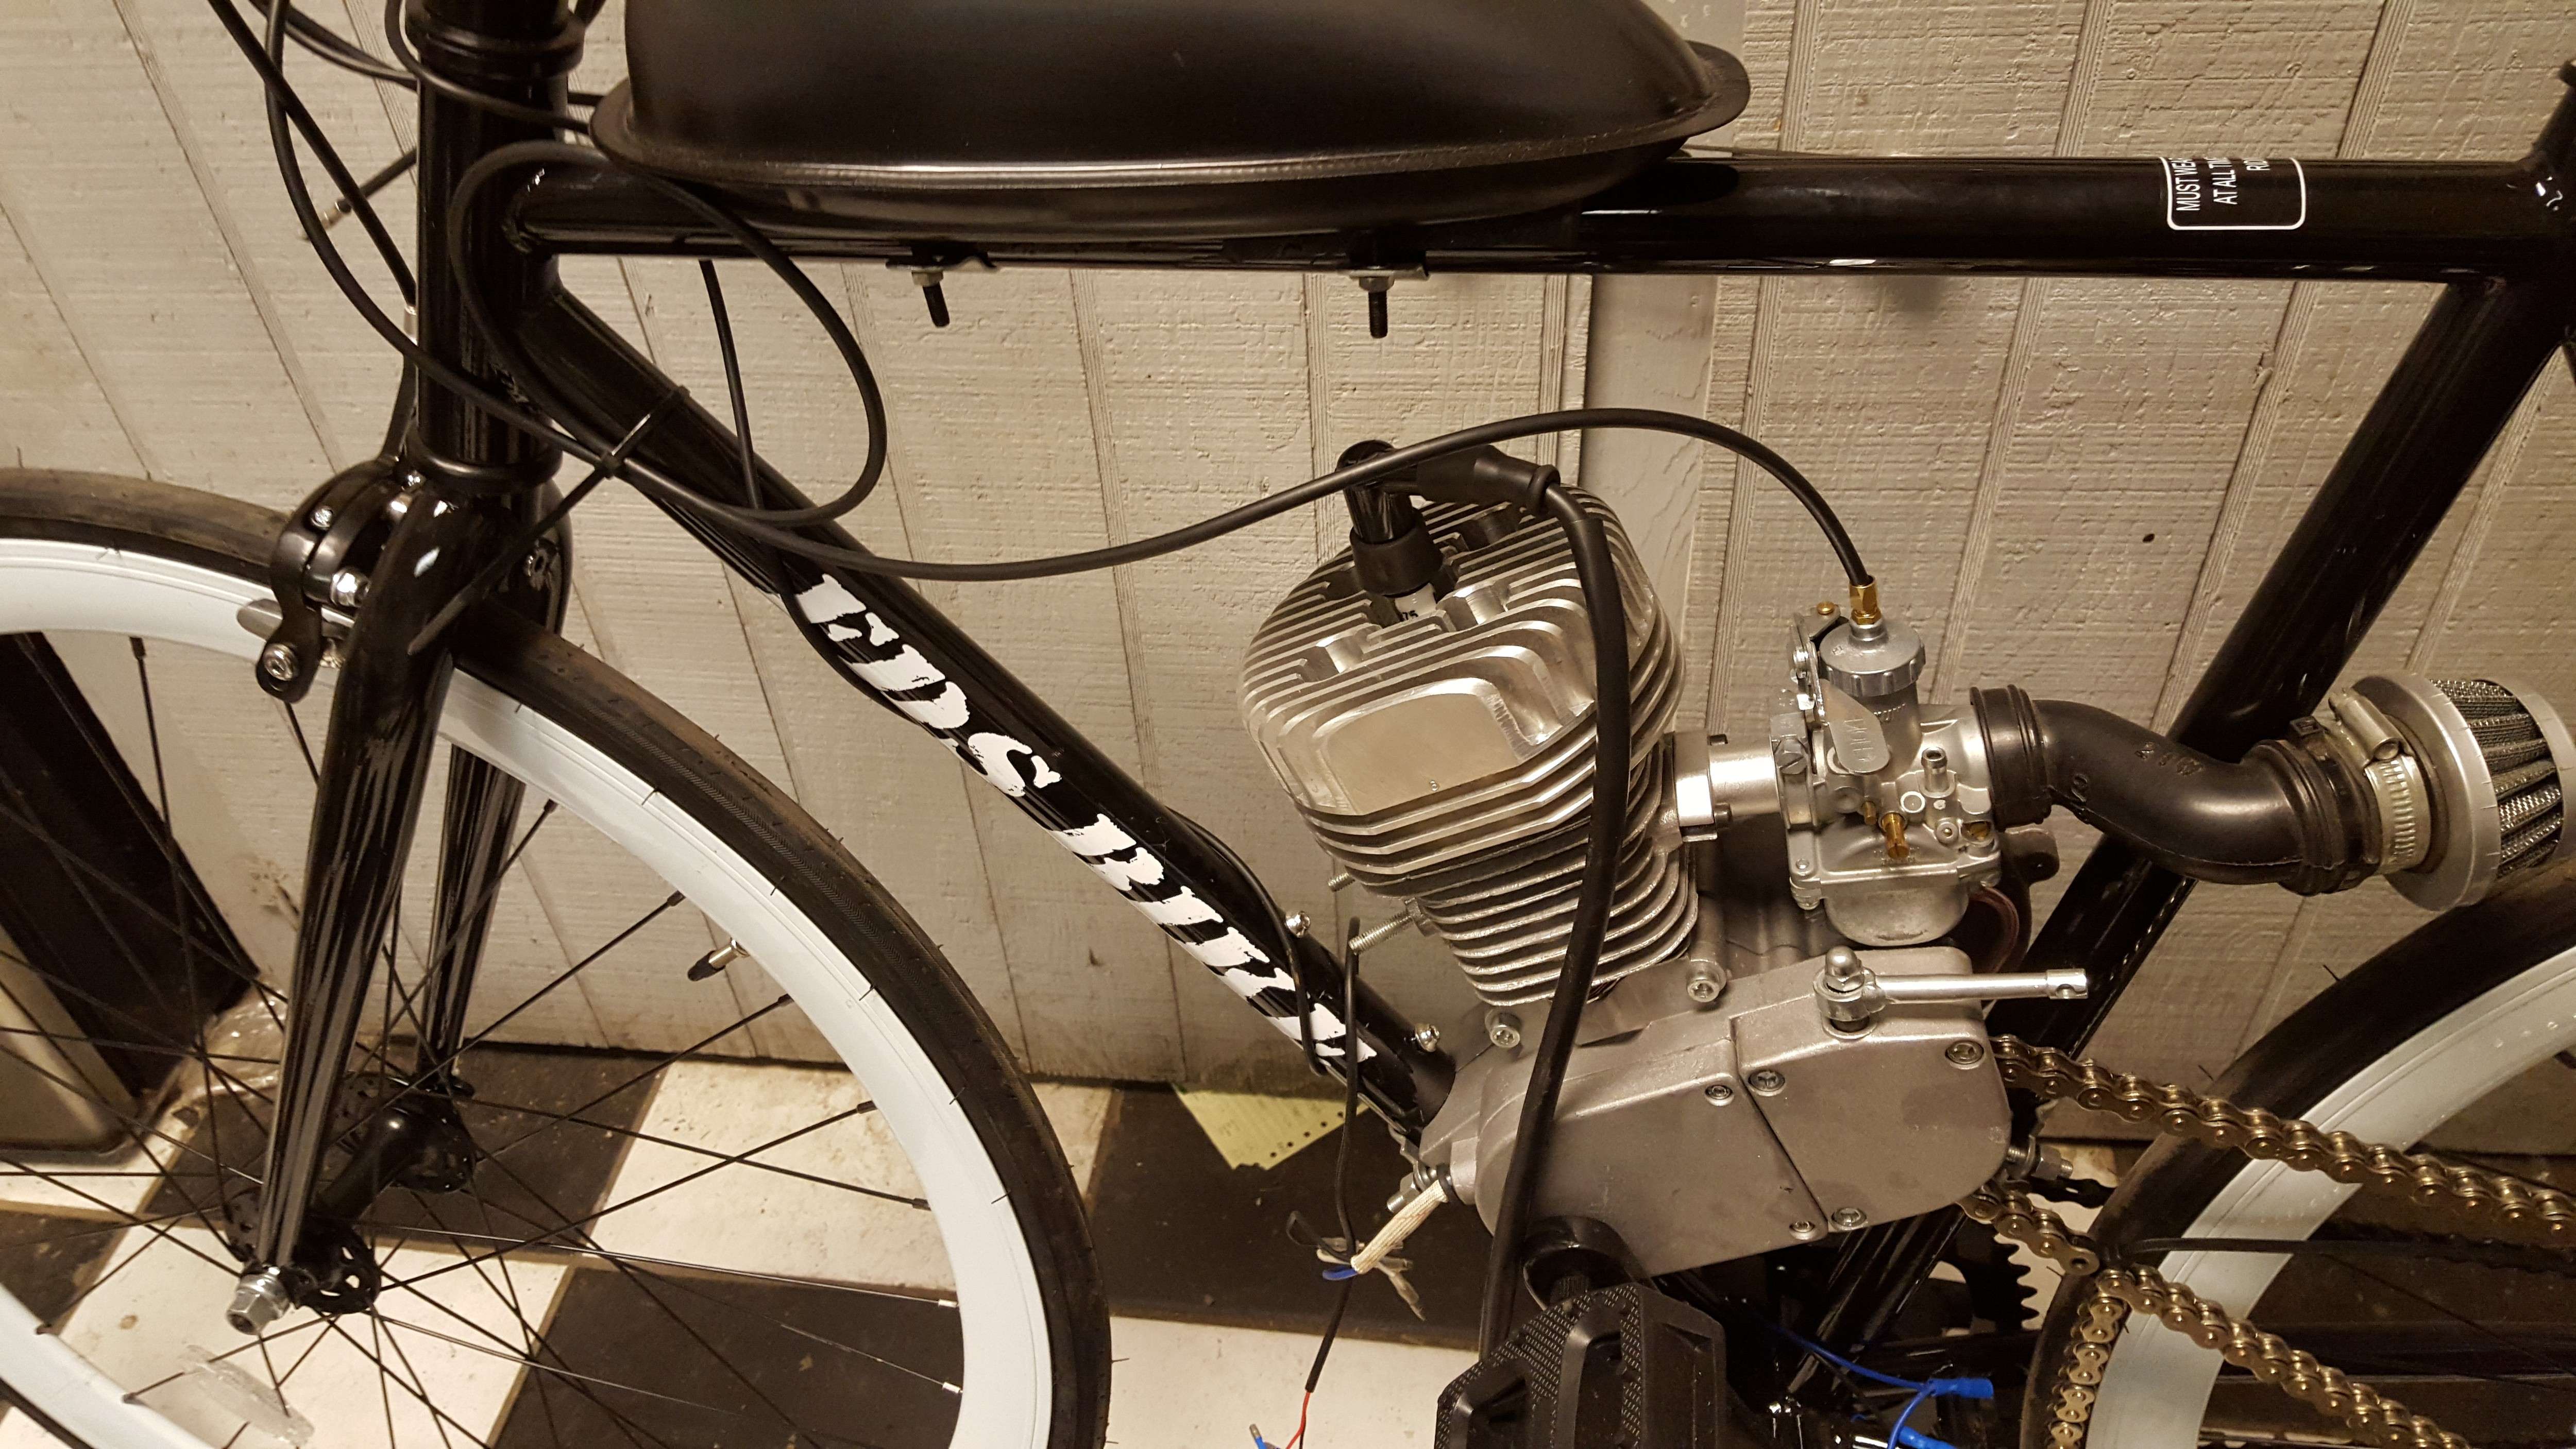
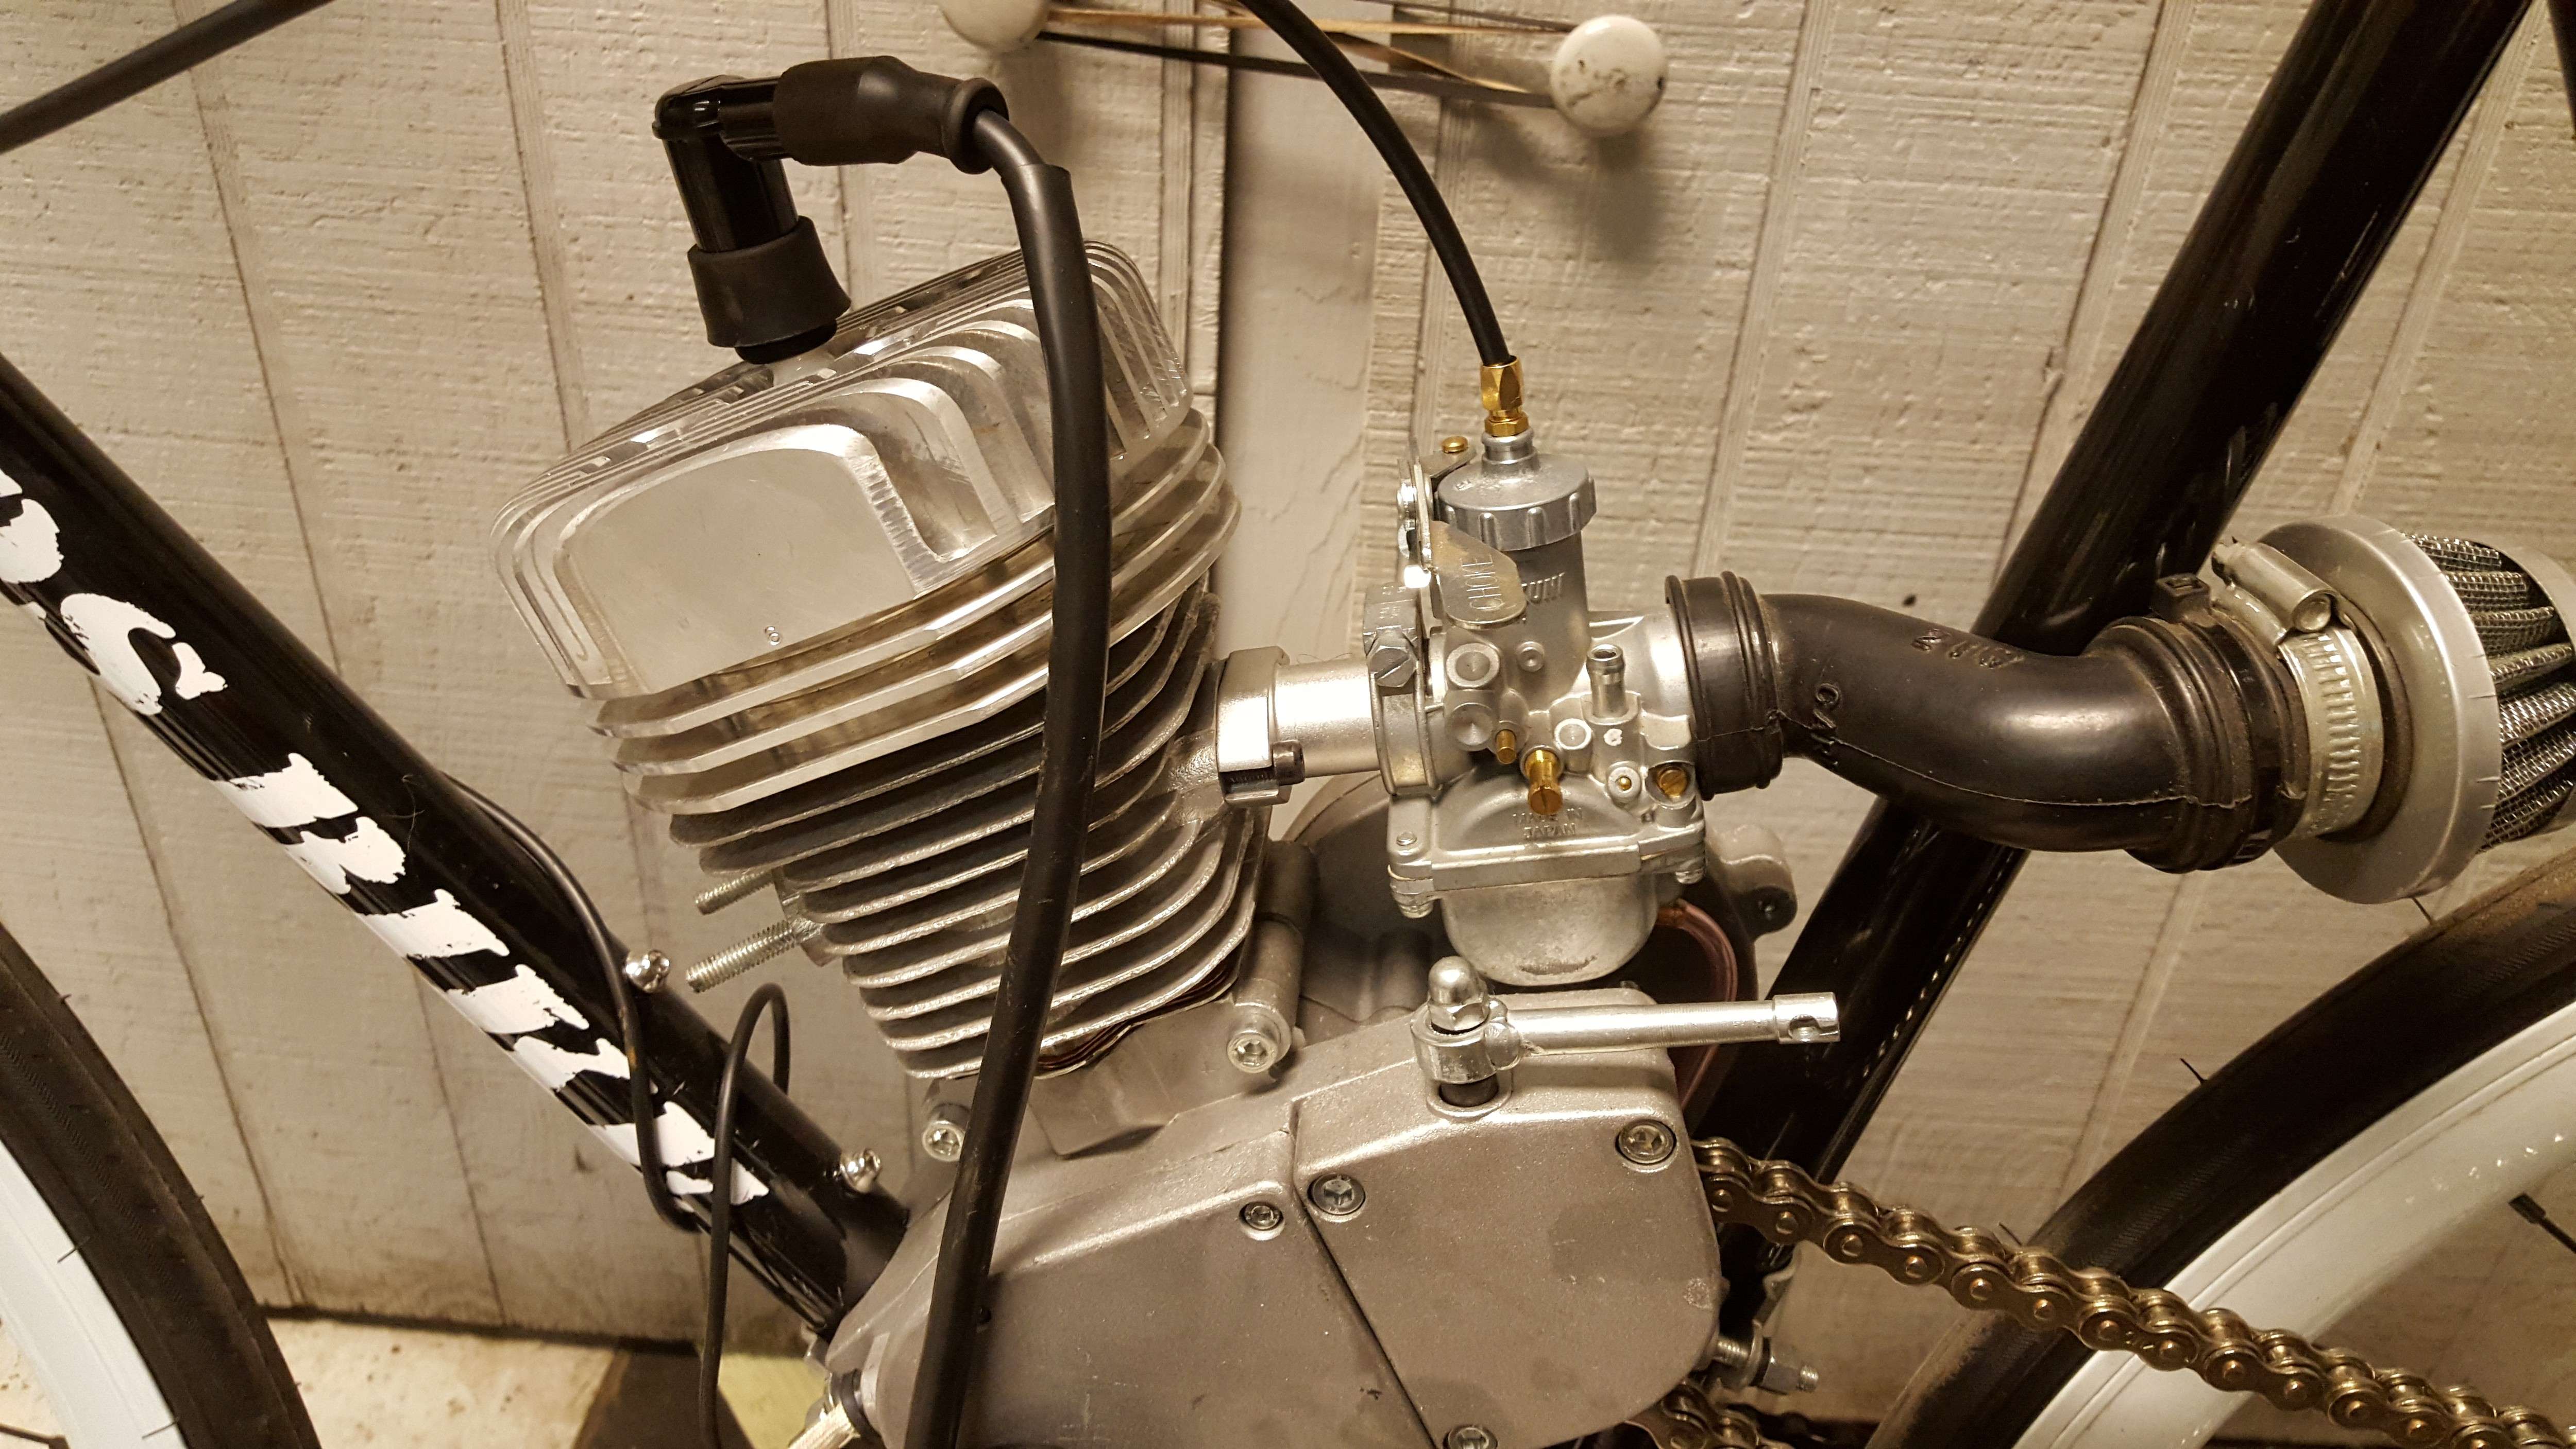
The chain is a KMC nickel plated 415H and it fits just right using a half link so no tensioner will be needed, the engine is a Dax bottom end with one of my ported jug's with the straight transfers, a 6cc Fred head, and an 18mm Mikuni to get enough air and fuel into the engine to take full advantage of the port work. This one has the exhaust port widened to 29mm and the roof raised 2mm to get the exhaust duration I wanted and the intake was also widened considerably with the intake floor lowered by 5mm . I also widened and re aimed the transfer tunnels as well as cleaning up any and all casting ridges then I raised the jug 2mm by using a 1mm spacer sandwiched between a set of copper base gaskets to increase transfer duration without giving up any blowdown. I'm working on making a KX65 pipe fit the engine and the bike so there will be no restrictions in the exhaust side either. Still deciding on what to do to quiet everything down but will most likely use a moto cross type silencer off an 80 to 125cc dirt bike.
I will buy and test fit a few different silencers then decide which one gives the best performance and runs the quietest.
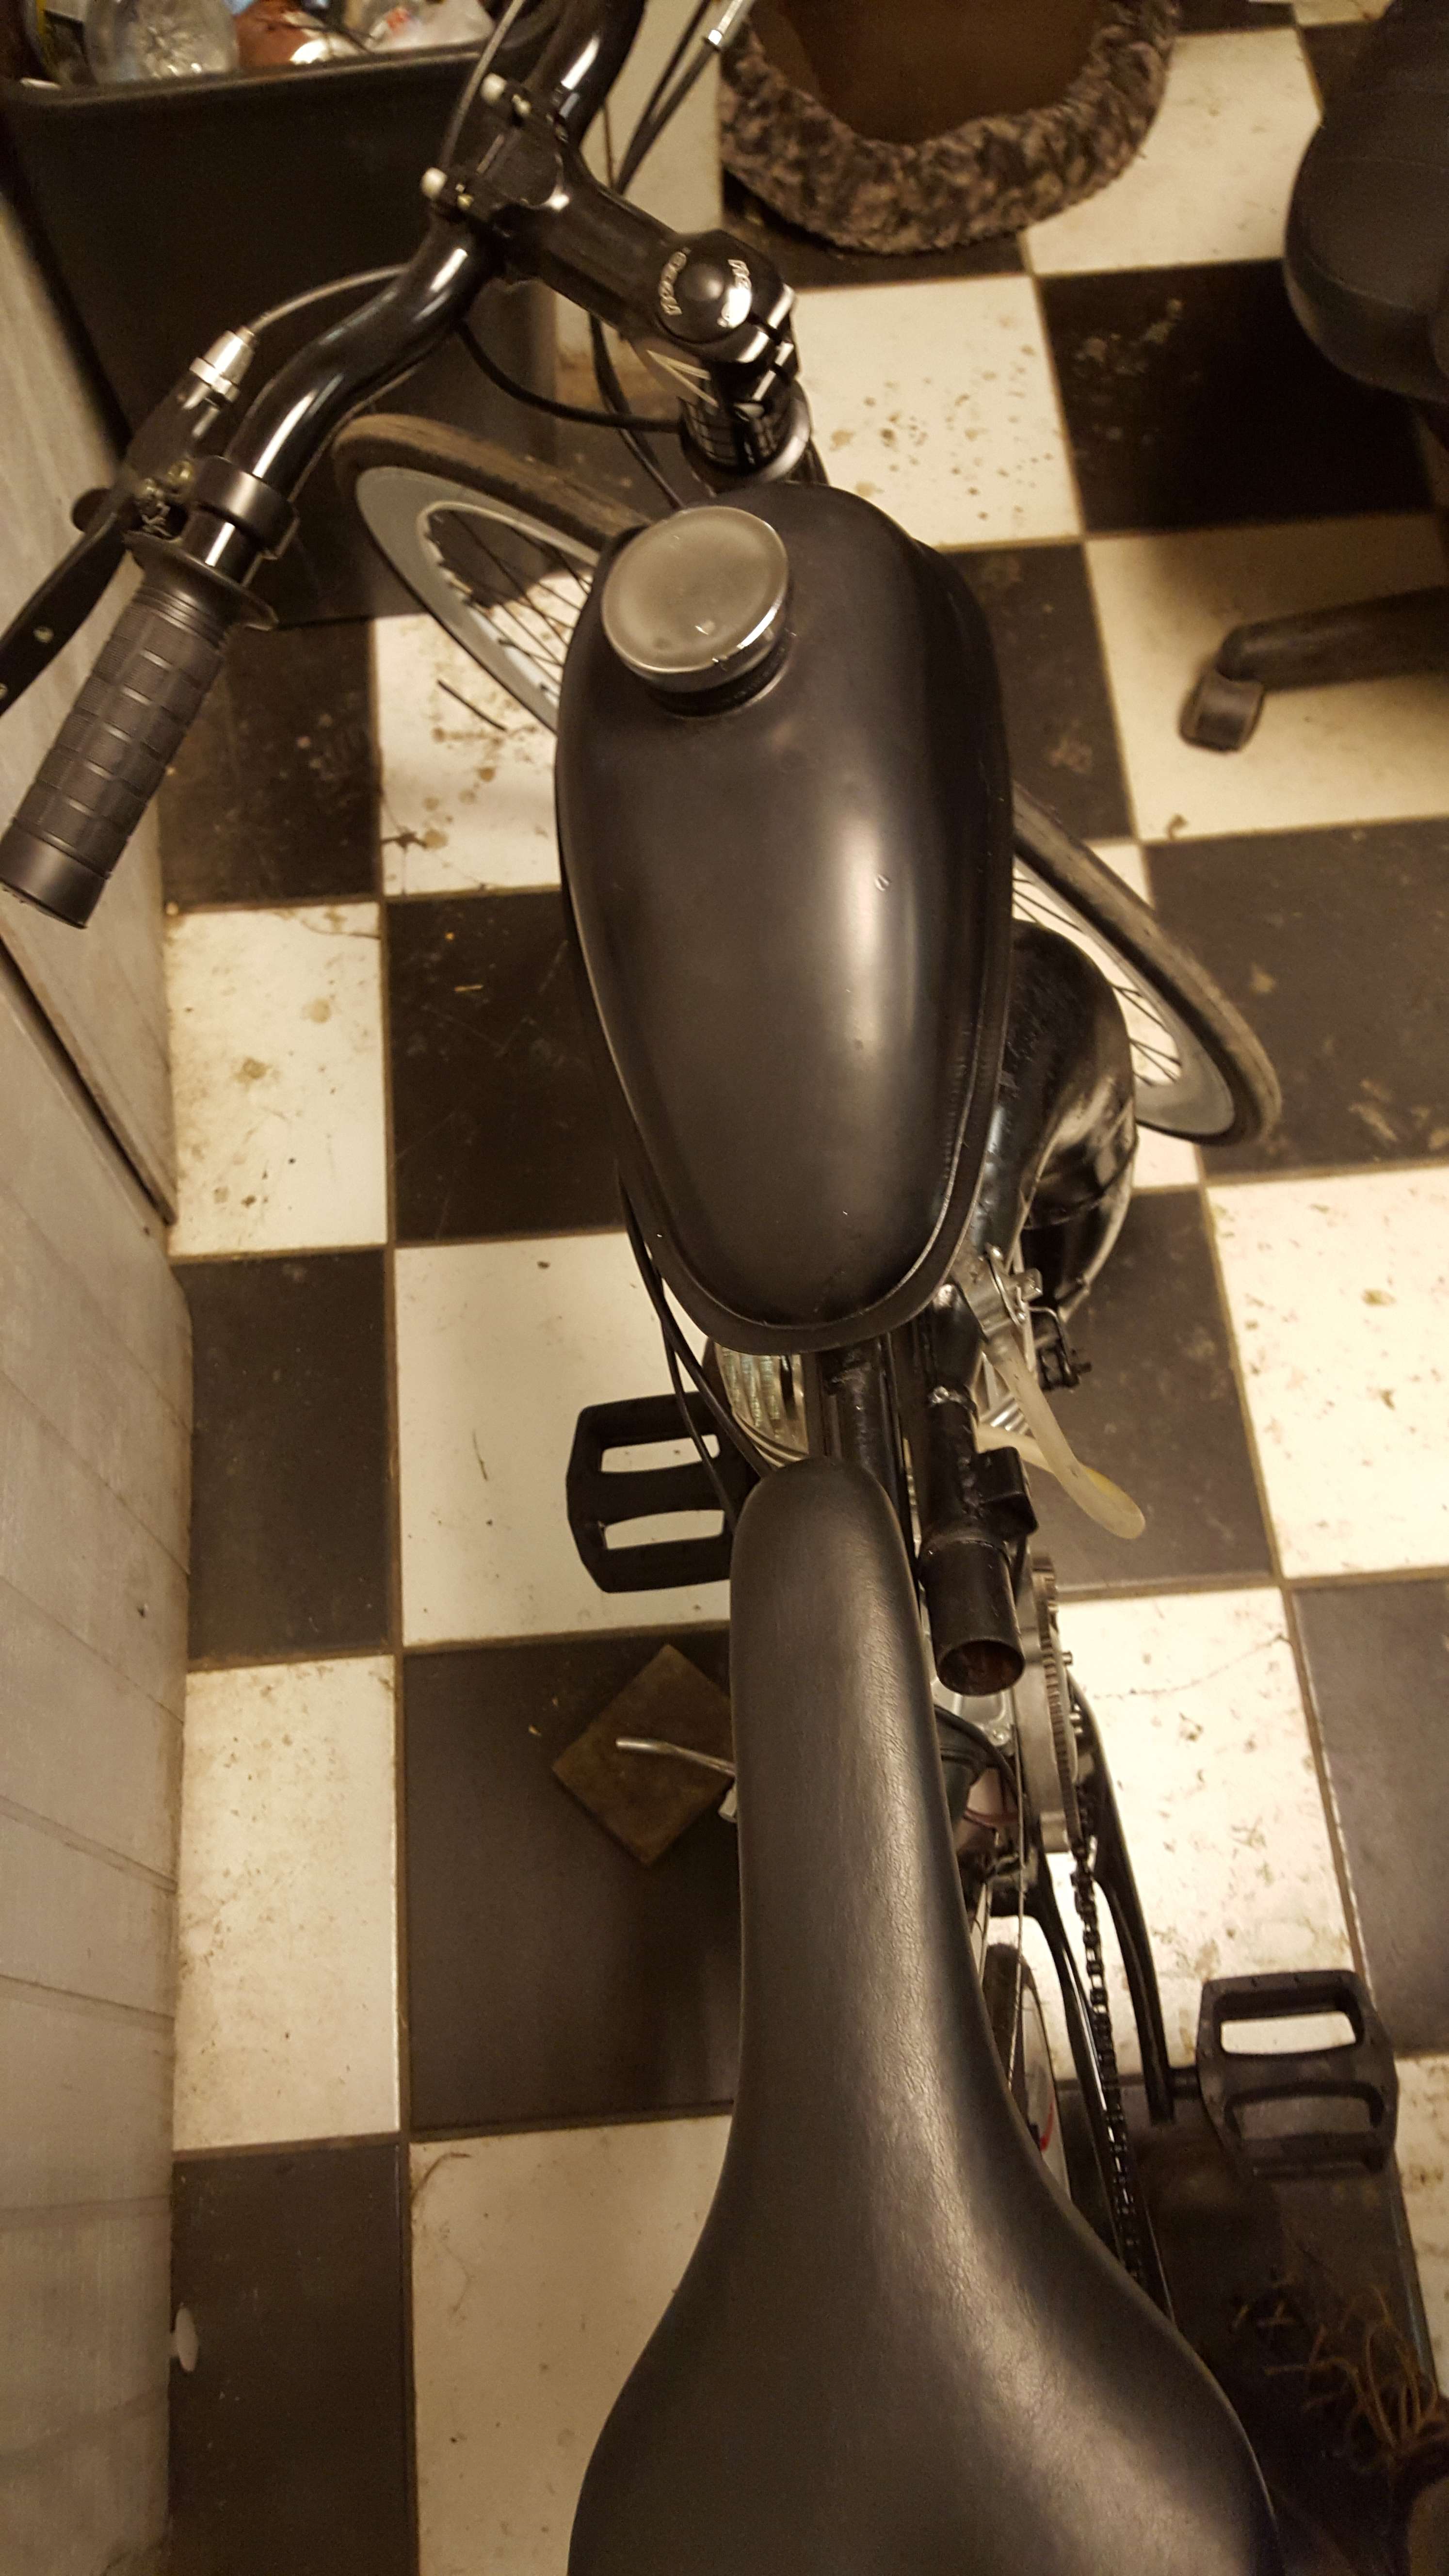
I'm also planning on switching to a cloud 9 seat and possibly a suspension type seat post as well as a suspension stem if the ride is too harsh since this one uses really narrow street tires and they need to be inflated to 110 psi so they are rock hard as well.

Here are a few pics of this project as it sits today, I can only spend about an hour a day on this one since I get really busy really fast once I open up shop for the day and usually end up working late every evening so the only time I got is when I get to the shop an hour before I have to open up.
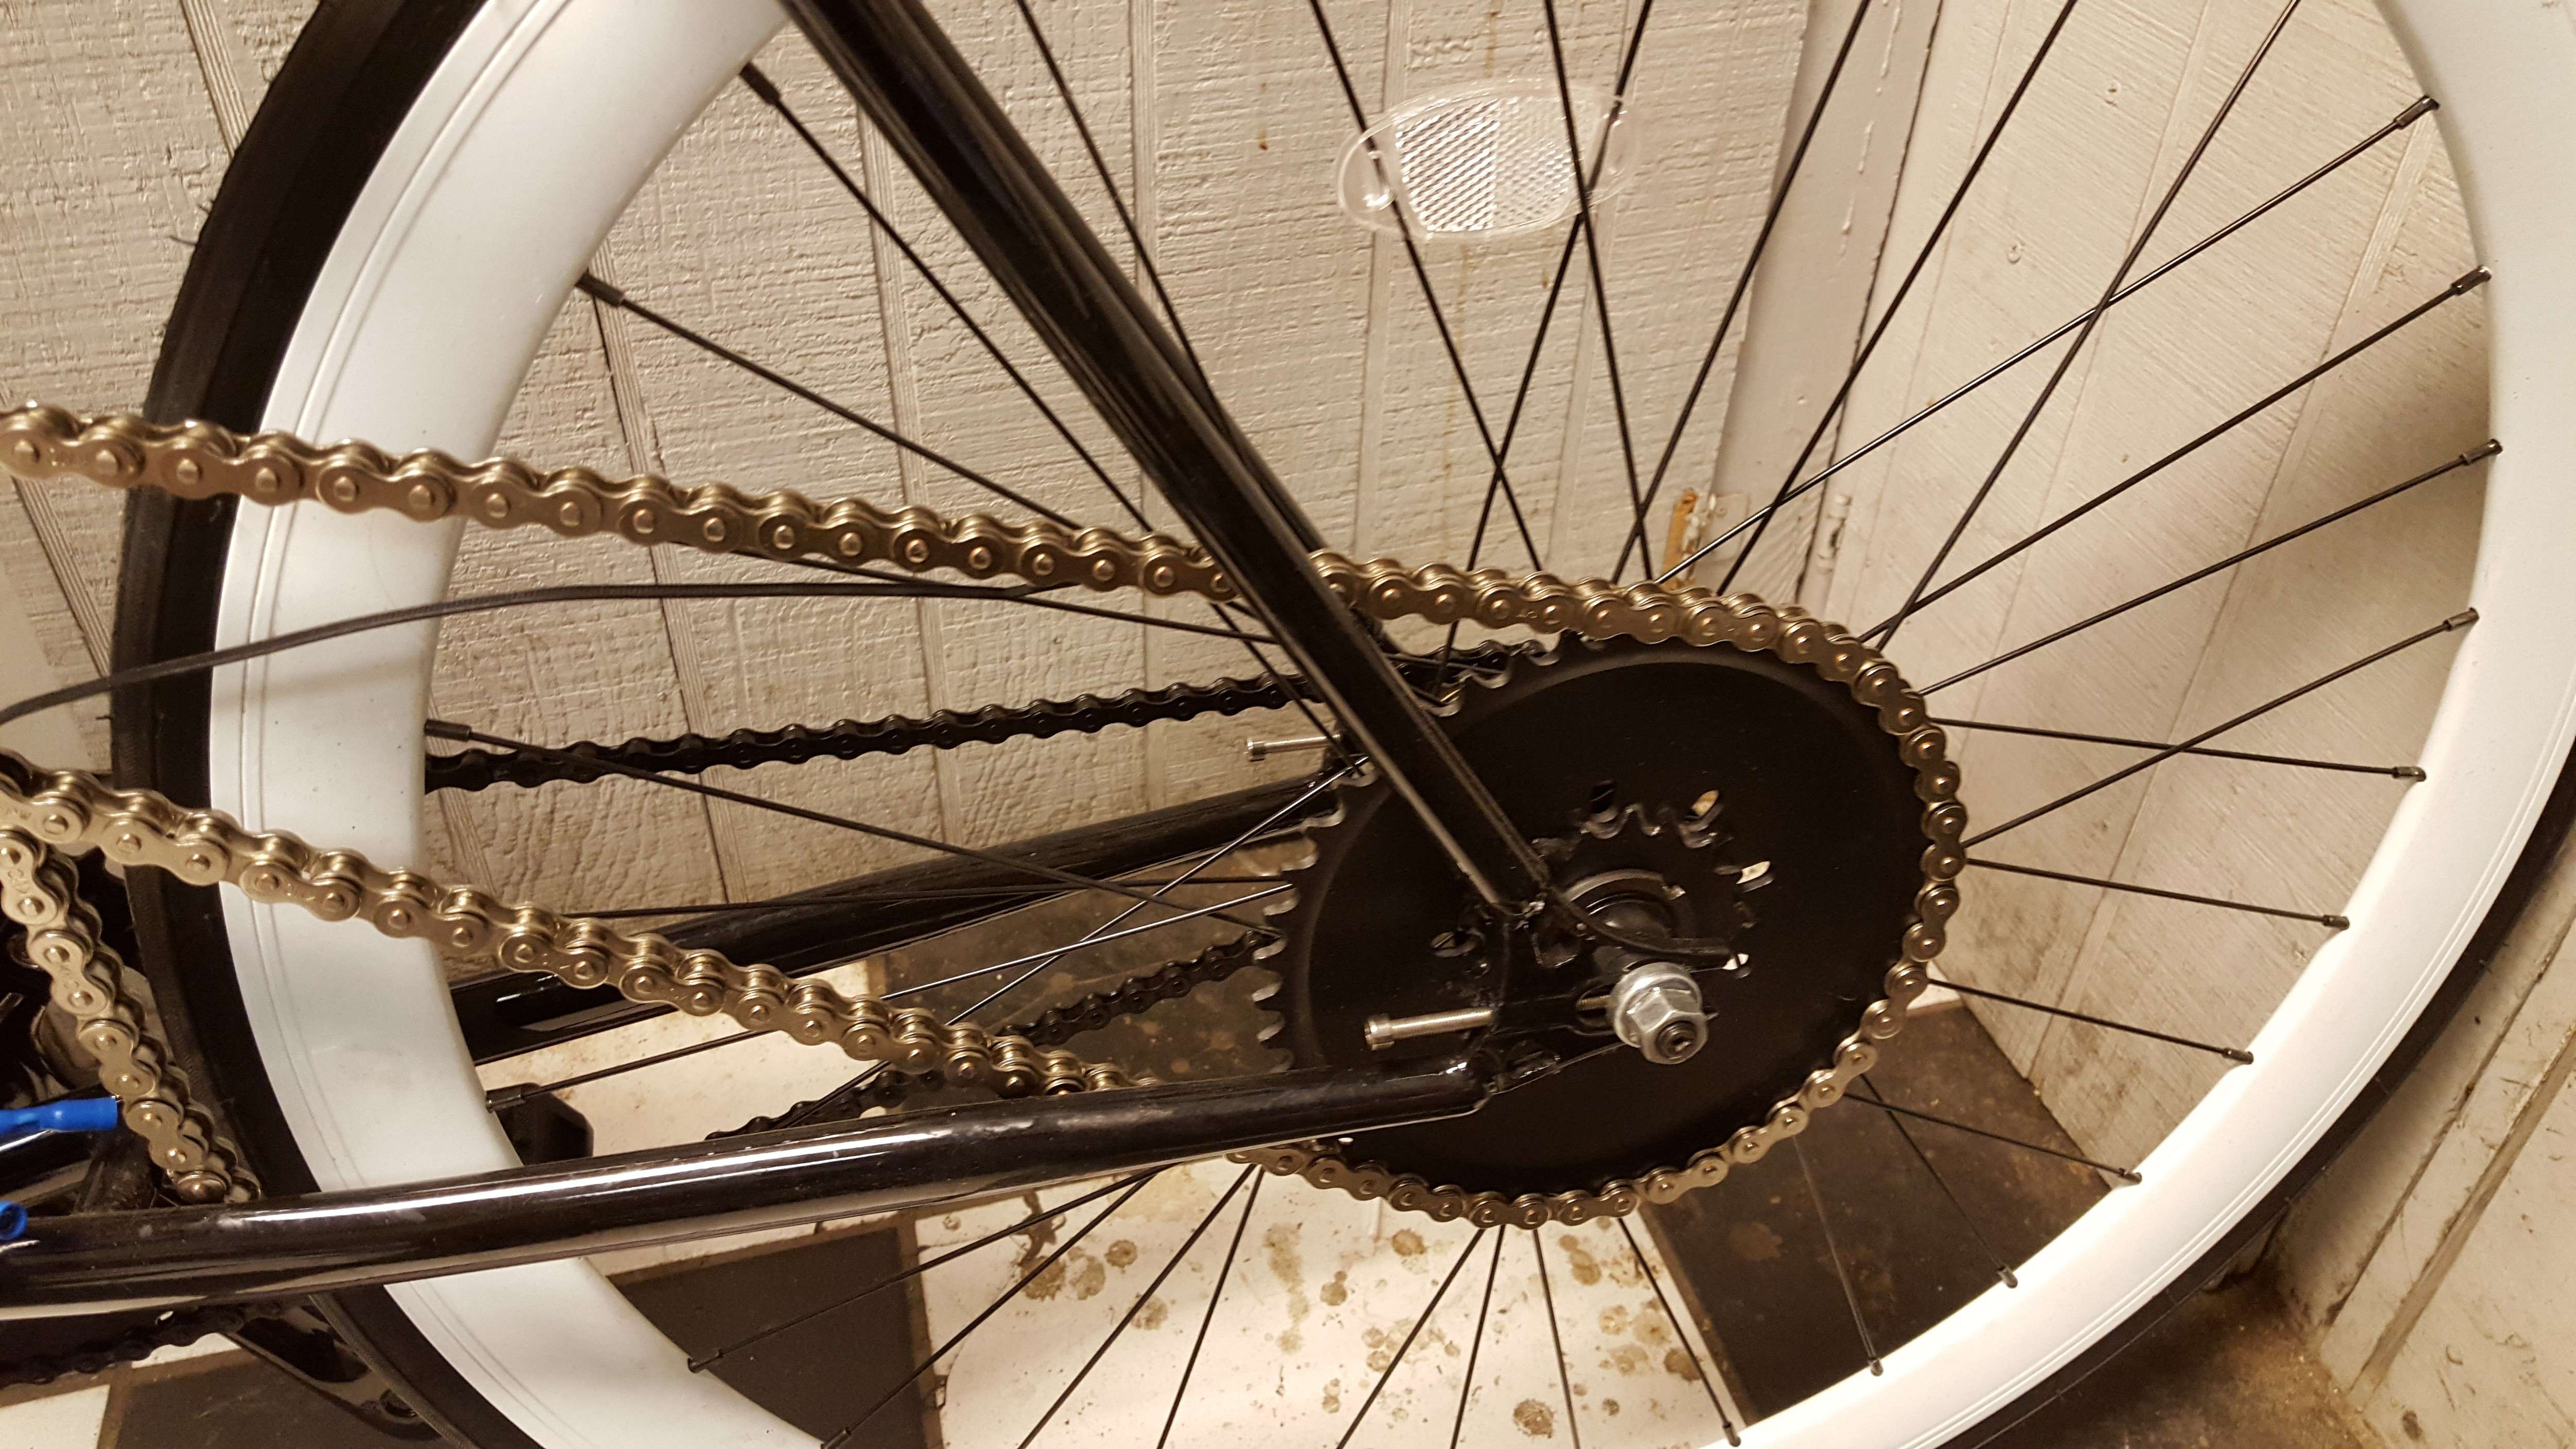


Last edited:

Davezilla

New Member
Mar 15, 2014
2,705
10
0
San Antonio Texas
So today I started cutting the chain to add the half link but noticed that the rear sprocket can still unscrew and move even with the left hand threaded jam nut so I'm going to have to pull the rear wheel again and get the sprocket to screw on tighter as well as give it a good dose of red locktite then put the jam nut back on. About the time I got a few tools gathered up I hear a car idling outside and it was a customer wanting an inspection, I went ahead and did the inspection, went back in to start on the bike and sure enough, here comes another customer to drop off another car, got him situated and it was time to open up shop so not much progress this morning... hopefully I will get all that taken care of tomorrow morning then it will be ready to set up the cdi and kill switch route the fuel line and it should be ready to start by this weekend if all goes as planned... I'm still way too busy to work on it after I open up shop or after I close up for the day since I've been working 2 to 3 hours late every night... as long as I can get there an hour or so early it should be ready to run this weekend...
 
Dec 11, 2014
628
14
18
Tucson
Awesome bike!!!! One thing on the 700's they will actually have the least rolling resistance, and fewest flats if inflated to 90 to 95 psi. It's opposite of how it feels but we did extensive testing along with the results found by the pro cycling teams. What seems to happen is the higher pressure makes the tire actually skip causing more friction and at around 90 the contact patch stops shrinking and the casing just gets harder contributing to more flats and not reducing friction. Just a bit of science that goes against how the bike feels.
 

Davezilla

New Member
Mar 15, 2014
2,705
10
0
San Antonio Texas
Yup... I know about the low rolling resistence... even with the single speed and geared kinda high it's not that hard to pedal at all, and the large diameter tires go over small bumps and road imperfections easily and smoothly. The last road bike I had was back when I was a lot younger I had a 27" motobecane 10 speed race bike and that thing was quick, it had about a 1/4" wide contact patch on the road but the high contact pressure kept it hugging the road like it was on rails, I remember locking the rear brake would leave what looked like a pencil line on the pavement for a skid mark, and with it's ultra low rolling resistance it was real easy to get it going fast in high gear.. at least 5 mph faster than I could pedal on any of my other bikes I had at the time.

Now for this one, I got it mainly because I knew how easy it was to get that old Moby to go really fast by pedal power and this one has the same chericteristics... except it has skinnier tires that are slightly taller and take about 30 more psi air pressure to fill them up so this one has even less rolling resistance than the old Moby. My mountain bike was hitting 42 to 43 mph the way I had it set up so I built a new engine based on what I did to the mountain bike's engine, but set up to make more power and at a higher rpm, this engine has better port timing and much much larger ports, an 18mm carb, and a KX 65 pipe compared to the mountain bike's stock NT carb and modded KTM50 pipe. I'll be using a 44 tooth rear sprocket on this one as well, but the slightly taller wheels should help gear it up just right and I'm hoping to get it over 45mph with that gearing since I like the good top speed, but also like to have good acceleration to go with it so that's the reason for keeping the gearing nice and low and setting the engine up to turn some more serious revs.
 
Dec 11, 2014
628
14
18
Tucson
Once you have that set up dialed in you are going to need a steering damper, leathers, full face helmet, and maybe a drag shoot depending how fast you want to stop. In all seriousness you are making way more power than me and mine would leave the line un assisted, accelerate with traffic, climb steep hills, with a 36 tooth rear sprocket on the 700c wheels. The fixie style bikes really fly with these motors.
 

Davezilla

New Member
Mar 15, 2014
2,705
10
0
San Antonio Texas
Having 3 motorcycles I got the protective gear needed for speeds above 40mph like the full face helmets, gloves, and body armour which will be worn during speed testing since I already know what a crash can do to someone, even a low speed crash can break a hand or an arm or sprain something bad enough to keep ya from being able to work for weeks... and now that I'm self employed an accident could cost dearly.

Back to the bike, there hadn't been much progress in the past few days since the shop has been so busy lately, I did get the chain set up and ready but I still need to pull the rear wheel and take the sprocket back off so I can add the red locktite then put the jam nut back on with red locktite as well. Once this part is done it'll be time to install the ignition and kill switch etc, fuel line, fuel filter, and then go back to setting up the engine. I'm going to order more copper base and head gaskets since they hold up and seal better as well as keep their thickness after torquing. I'm also waiting for some exhaust parts I ordered from crmachine.com to connect the kx pipe to the engine easily since he makes a really nice outlet and header setup that uses o rings to seal the connection and springs to hold the pipe in place, this will help prevent cracking but will save me some fab work as well. I also need to look around for a dirt bike silencer that's not too restrictive so this one will be quieter than the mountain bike was with an open KTM pipe with no muffler, it wasn't annoyingly loud, but you could definitely hear the bike since the sound bounced off the pavement it was pretty loud while riding it.
I'm going to see how stable it is without a steering damper and may add weights to the bar ends if it only vibrates a small amount, but if it does pick up a steering wobble a damper will be needed.
 

Davezilla

New Member
Mar 15, 2014
2,705
10
0
San Antonio Texas
Ok.... long time no post, but long time no progress... until today when I set up the exhaust, I'm using a KX65 pipe and it fit really close, just had to cut it in one place and re clock only one bend to get it to fit perfectly. I was going to make my own flange adapter and header to connect the pipe as smoothly to the engine as possible, but looking on Fred's site I found something useful... a kx pipe adapter with a billet header connector so I just needed to weld his adapter end to my pipe after I got it set up, then it slip fits into place and seals with 2 O rings then it's held in place with springs so it has a small amount of flex to prevent cracking.
I still need to re clock the stinger just a little so it points straight back but I'm happy with the way the pipe fit and looks and kudos to Fred for making this adapter setup, I was making my own out of steel plate stock and it was taking forever to cut out and port match etc, then I still needed to make a second flange and adapter to bolt to the adapter plate, with his setup, the adapter is aluminum and machined very nicely, the O rings go inside the weld on adapter that goes on the pipe so it's a little backward from what I was doing by using the original O ring slip fit and a larger diameter pipe coming off the head. This also makes things more compact and easier to port match, how durable it is will be found out later, but it looks and fits great... not to mention it save me a lot of time and it should last just fine as well.

Here are the pics...
Here's the kx pipe after I cut it and re clocked it for a trial fit before brazing the pipe back together... I got I zip tied in place and I'm using other parts to support it and keep it where I want it to permanently sit.


Here's a closer shot... here you can see where I cut the pipe and turned it to match up to the steel header adapter, the aluminum adapter is already permanently installed to the engine with allen bolts, I'm using an 1/8" thick copper gasket I cut on my cnc, I only made 3 of these so far and mapbike is the only other member who has one besides me... the thicker copper gasket seals really well but also makes a perfect port match since this will be done with the adapter and gasket installed and torqued, the thicker gasket also eliminates the need to trim a cooling fin to allow the adapter to fit, Fred recommends cutting back one cooling fin so the spring tabs will clear but the thicker gasket and a little trimming of the spring tab let me install this without cutting the fin.


Here it is after I marked everything and brazed the parts together, now it fits very well and the pipe doesn't touch the frame or any other parts, it's about 1/4" from the frame at the tightest point. I'm going to make a billet mount bracket for the other end of the pipe after I re clock the stinger...I didn't install the O rings yet since it has to come off and go back on a few more times before all is said and done... the kx pipe is a very close to perfect fit with only needing to cut off the factory end and cut the pipe about 2" down the header to re clock and re weld... I chose to braze the pipe back together since it was quicker and more convenient than breaking out the tig welder, and brazing is very strong just like welding, if this was stainless I would just leave it bare metal since brazed pipe looks really nice after cleaned up, this will be re painted with semi flat black hi temp ceramic paint.


This is just to show how little the pipe sticks out to the sides... it's just barely the width of the tank so no worries about getting my calf branded while riding... I may heat wrap the stinger to the silencer but no need to wrap the rest of the pipe since it's all out of the way well enough.... nevermind the dirty floor... it gets that way fast everytime it rains or the dog tracks who knows what into the office...


And here's a shot of the other side of the bike just to see what it looks like installed...


After I get the exhaust completed I need to take the pipe off, remove the jug for match porting, install the piston rings, install the cdi, then route and trim all the cables and wires to keep everything clean and neat looking. This build is getting a Lot of customer attention sitting in my office in different stages of completion so I'm taking the extra time to make sure everything looks and fits perfectly, this was supposed to be a quick build so I wouldn't be without a bike while building my stingray and fixing the mountain bike, the stingray is on hold right now since time is too limited to make any real progress and I want to build a big enough powder coat oven to powder coat that frame. The mountain bike is coming along but I took the new frame all the way apart for paint and I'm installing new swing arm bushings, powder coating the small parts, and looking for a good rear shock to replace the cheap one it came with. The new frame is aluminum so I will be making some billet mounts so the engine can't damage this frame, and it will also be getting a kx pipe like this one when the time comes to put the engine in it. I'm going to use the same engine that was in the silver mountain bike but I'm going to put a new jug on it with better porting, it went 43mph already but I'm shooting for 45+ with better acceleration so the kx pipe and a 21mm carb along with bigger ports will do the trick...
 
Dec 11, 2014
628
14
18
Tucson
Looks awesome Dave! I am in the middle of my first MX pipe conversion. I am going a different route and turning the pipe to run down and under the bike. I hope it comes out half as clean as your pipe. Again, great work.