Cyclone Tribute

GoldenMotor.com

MarkV

New Member
Jun 14, 2010
20
1
0
Austin, Texas
Howdy,

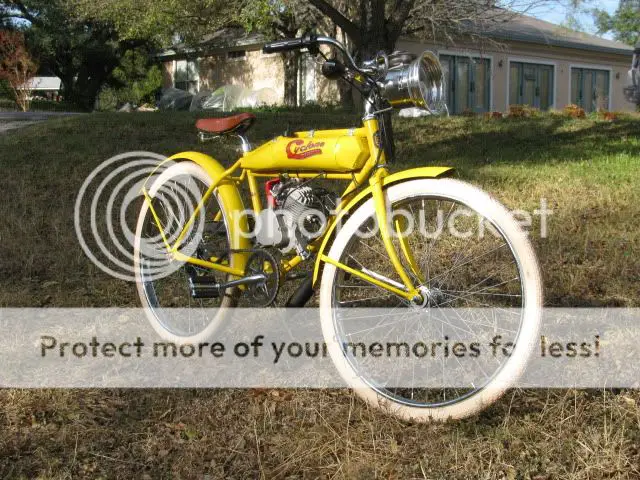
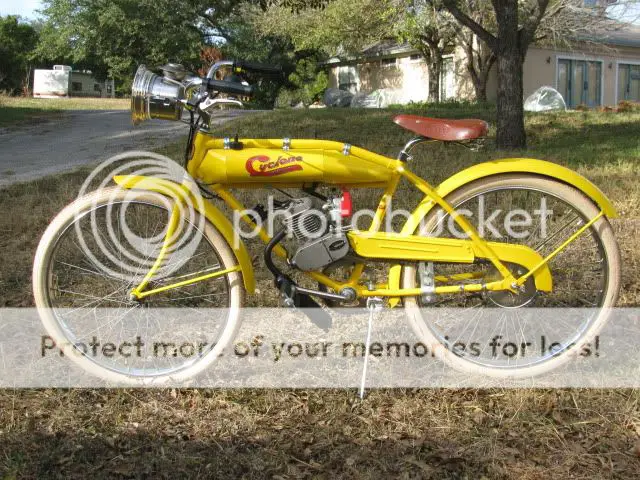
I think it is about time to post photos of my nearly completed Cyclone tribute bike, so here goes.


Here are some photos of the real thing:


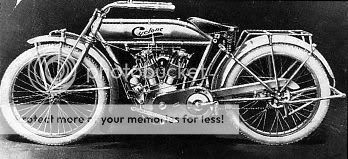
By the way, since these photos were taken, I've added a replica taillight that I made which looks like a carbide taillight, but is actually made from a LED flashlight and the vent stack off of a kerosene lantern.

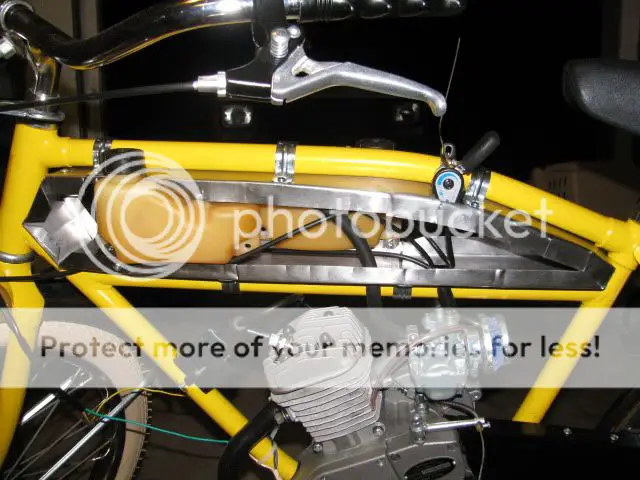
This was my first build, but I benefited greatly from the experience of Hoodoo, as well as from all of you on the motorized bicycle forums. As you can tell, I started out with a Worksman Newsboy and added a Grubee Skyhawk engine. One of my main goals was to avoid welding, as I don't know how.

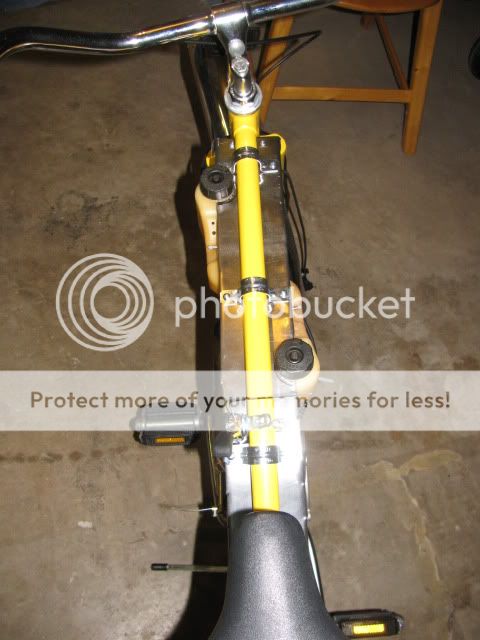
I am currently trying to correct the chain rubbing on the fender, but am finding the tolerances are very close and tough to get just right. The chains on both sides are rubbing the fender, despite the fact that I significantly notched the fender on the powered chain side when I first installed the motor kit. I can bend the fender on the pedal chain side in further, but I've only got a small gap to work with, split over both sides. Even if I get the fender adjusted perfectly, the long chains allow a bit of side to side motion that may still let the chains slap the fender occasionally.

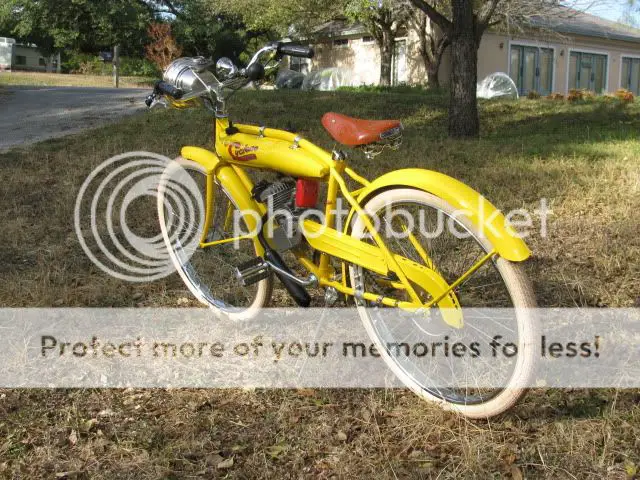
I intend to paint the rims and add a rear-wheel mounted dropstand next (removing the modern kickstand of course). I am also in the planning stages for making a rear luggage rack that resembles the historic one and will let me carry a useful load. - In theory these bikes are intended to allow us to carry tools and misc. items back and forth around the Kingsbury Aerodrome. (More info here: Pioneer Flight Museum )

Potential future modifications include replacing the stock handlebar stem with a more historic looking one, installing a springer fork, swapping the lay back seat post to one that lets me lower the seat a bit further, replacing the stock air filter with an open element filter, and swapping to an expansion exhaust.

MarkV
 

MarkV

New Member
Jun 14, 2010
20
1
0
Austin, Texas
kipharley,

I know that they made dark blue Cyclones too, but most were yellow. Yellow was the signature color for the company.

Three-Wire,

The gas is held in two leaf blower gas tanks that were found in a Goodwill store. These tanks are linked together via rubber fuel line through a brass T fitting and then down via rubber fuel line to the fuel filter and then to the fuel cut-off valve on the carburetor.


I made the outer tank from 4 inch diameter galvanized steel duct pipe that I found at the local building supply store and some sheet metal that I had lying around.

I cut the sheet metal into a strip approximately 5 inches wide, and as long as I could. Using sheet metal pliers (available at most home supply stores), I then bent about 1 inch of the edges up on either side, forming it into a flat sided, flat bottomed channel 3 inches wide and several feet long. Holding the channel alongside the opening in the frame of the Worksman bike where I was going to install it, I marked the length of the bottom of the opening in the frame on the channel, then trimmed the flanges back at an angle at that point so that the channel could be bent to fit the angle of the bike frame. I repeated this for each side of the frame and worked my way around the opening, checking to see that the bent channel would fit inside the frame as I went. As the top tube on the bike frame is curved, I cut notches in the flanges of the channel every 2-3 inches, which allowed it to then be bent into an approximation of a curve matching the frame. I worked the channel all of the way around the opening like this and then cut it off with an approximately 2 inch tab that overlaps back onto the end of the channel where I started. I screwed the tab into the end of the channel with sheet metal screws. It helps if you have a sheet metal hole punch to make the starter holes for the screws. The end result of this was a channel bent and fitted inside the frame opening of the bike. This channel then becomes the frame for the gas tank cover. I attached the tank frame to the bike using 1" EMT conduit brackets and sheet metal screws. My brother and I then installed the leaf blower tanks and fuel lines and test drove the bike to make sure there were no leaks or other problems.


The duct pipe comes pre-split down one side. I used this factory cut edge as the top edge of my tank's side skin, crimping flat the flange that is along the edge using the sheet metal pliers. I screwed the duct down on the top of the tank frame, then I eyeballed how far out I wanted the tank to curve outward and trimmed the bottom edge of the duct pipe to allow for this curve, plus an approximately 1/2" overlapping flange. Next cut vertical slits from the top and bottom, to within about 1/4 inch of each other, at either end of what will be the cylindrical center part of the tank. (Look at photos of old pre-WWI Indian motorcycles that have lost most of their paint, and you will see these vertical seams where they were soldiered together. Cut your seams at the same locations; approximately 3 3/4" from the front and 8 1/4" from the rear. This may vary a bit from bike to bike.) I then screwed the bottom edge of the center cylindrical section through its flange and up into the bottom of the tank frame. Now the tricky part - the tapered ends. Basically, you bend the end of the tank cover over with your hands until you can hold it in contact with all of the edges of the tank frame. While holding it in this position, mark the contact points on the outside using a sharpie pen. After you've drawn these lines, add 1/4 to 1/2 inch flange that will overlap the tank frame. Now cut along the outer lines you marked for the flanges. You can bend the flanges to fit the shape of the tank and then screw them to the tank frame, tucking in the overlapping metal at the joint between the central cylindrical section and the tapered end. Cutting slits in the overlap at this joint can help it fit the curve a bit better, and the slits will be hidden when the overlap is tucked in. Repeat this process for the other end of the tank, and repeat the process on the opposite side, and you are done with the fabrication.

You can caulk any open seams with a flexible, paintable caulk. Prep the tank, prime and paint it. I made my own tank stickers from photos of originals that I found online, but that process is another story...

MarkV

brnot

EDIT - I added some progress photos of the tank frame that show the inner leaf blower tanks. In these photos the fuel line was just loosely stuck into the tank frame and was not connected to the tanks yet. I subsequently ran the fuel lines and cleaned up the control cable routing. Also after these photos were taken, I ended up having to swap to an earlier style carburetor with a simple choke lever instead of the cable actuated choke, because both the throttle and choke cables on the new 2010 carburetors come out side by side on top of the carburetor and bind badly against the bike frame. The old style carburetor only has one (throttle) cable coming out on the top, making it a simple matter to cock the carburetor at a slight angle and eliminate the binding issues. Besides, I like the traditional choke lever on the carburetor more anyway. I don't know why they went and complicated the new carburetors. To paraphrase Henry Ford "parts not found on the vehicle never break and cost nothing to manufacture" and Mr. Scott on Star Trek "the more they overwork the plumbing, the easier it is to stop up the drain." - Simplify!
 
Last edited:

Three-Wire

New Member
Aug 12, 2010
64
0
0
Goddard, KS
Thank you for the description and pictures of your tank build. Very creative and an awesome finished product! Again, excellent work!
 

darkhawk22

New Member
Aug 17, 2010
733
8
0
Acworth, GA
I like the idea as well. I actually tried to hide a metal paint thinner can in a tank and when I got everything together and tried to fit it back onto the bike it was too big! UGH! I might be able to modify the tank and get it to work but it will take some time.