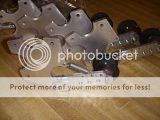
Tensioner - Chain wrecked

GoldenMotor.com

CallMePavz

New Member
Jun 16, 2012
24
0
0
ESVA
Well, I was told one of the biggest problems with beginners was with the chain tensioner, and boy was that on the money...

Been riding the bike since Thursday, and haven't had so much as a hiccup. I even took a dry run to work to be sure it could handle the distance (6-7 miles) without issue and adjust my commute time. Handled terrifically.

Today was the first day I decided to ride into work on her, and I'm lucky I'm alive and uninjured!

With less than half a mile to go, I hear a sound like the chain scraping against something. Before I can even slow down, POW. The rear wheel locks up and skids to the right. I manage to regain enough control to straighten out and brake to a halt.

Surveying the damage, the chain suddenly began to rub against the corner of the tensioner mount, quickly leading to the chain breaking. It then lodged itself between the drive sprocket and its housing. This, in turn, caused the motor to be partially wrenched from the frame, shearing the lower mounting bolts (the up-tube clamp is intact).

Current required actions:
1) Replace chain
2) Remove and replace sheared bolt from lower mount
3) Replace spark-plug cap


What should I do about the chain tensioner? Should I do away with it? Should I move it? I had to put it in the vice and hammer a bend in it to get in line with the chain, but maybe that just wasn't enough?
 

Bicycle Motor Fun

New Member
Sep 17, 2011
89
0
0
Warren, Michigan
Well CMP, you were very lucky that you weren't seriously hurt do to that drive chain mishap! I believe that a drive chain tensioner is required; some others say not. Chains will stretch as they wear, and some sort of adjustment will be required. When using a plastic roller adjuster, a simple one bolt adjustment is all that is neaded. When I first got my new motorbike build running, the bolt on frame tensioner that was supplied in the kit, was the first problem that I encountered. When starting the engine, a lot of stress is placed on the bottom run of chain and tensioner. As much as I tried to tighten the two bolts on mine, it would still move toward the spokes! Therefore, I decided to make up one of my own and weld it to the bicycle frame. I used the original plastic roller, bearing and bolt and since doing this; I have never had any more problems with the chain tensioner in the last 100 miles that I put on the bike. I have attached a photo of my bike so you can see mine. Hope that this helps you out, have fun with it, BMF

PS: I tried to attach a photo of my tensioner, but my photo is to large to attach and I don't know how to reduce its size. Sorry
 

nightcruiser

New Member
Mar 25, 2011
1,180
2
0
USA
I am one who rides without the tensioner, haven't had a single problem since, and no chain stretch so far or need for adjustment. I run #41 chain which makes the kit chain look like it belongs on a cheap toy (IMHO it does!). I would recommend you get some #41 chain first off, you're not gonna break that one! It sounds to me like your tensioner survived the incident? If so, then maybe just a weak chain was your issue?
I didn't like the chain tensioner because it caused lots of drag and noise, and the roller kept slipping down letting the chain loosen requiring adjustment constantly. Fortunately for me the rear tubes on my bike are oval, so I never had the problem of the tensioner rotating into the spokes, though I read about others having this experience, compared to that you got off easy! Just imagine that metal bar jammed in your spokes at high speed! Reason enough to do away with the tensioner if you can IMHO.
If your bike frame and chain angle allows, I would try to run #41 chain with no tensioner. To sus out my situation I first shortened the kit chain to the size needed to run without the tensioner (cause the cheap kit chain was much easier to shorten than the #41). Since my frame doesn't allow the rear wheel to be pulled back to tension the chain it was iffy whether it was gonna work out for me. Shortened to the shortest possible length the chain was just a bit too loose, so I made a solid steel shim that I placed between the motor and the rear motor mount (not between the motor mount and bike tube!). This shim tightened up the chain just right, so I pulled the kit chain off, counted the links and then made up the #41 chain to have the exact same length (the link length on the #41 and kit chain is exactly the same, but the #41 is quite a bit wider, though it may seem overly wide it rides smoother for me than the kit chain on the standard sprockets). You can also get half links of chain to help get the chain to the right size if you prefer that over using a shim (if needed). I prefer to mend the links rather than using a master link, that would be your call though, I assume the #41 master link would be plenty strong (while the kit master link is usually the first place of failure). If you do not use a master link keep in mind you will have to pull the motor sprocket to remove or install the chain.
Over 1,200 miles on my bike with the #41 chain and no tensioner and I have had no problems, required no adjustments. I have basically been able to forget about the chain, which is a relief for me, cause it was the chain tensioner that I had to mess with more than anything, seemed like every ride.... So I say good riddance to the tensioner! Not only has the maintenance gone way down, and risk of getting a steel bar jammed in your spokes at high speed eliminated, but the ride is SO much smoother now with less noise and much less resistance when pedaling with the motor off. HUGE improvement for me, I was very unhappy with all those aspects before I removed the tensioner.
 

CallMePavz

New Member
Jun 16, 2012
24
0
0
ESVA
Thanks, guys!

Heading to the hardware store tomorrow for a reverse screw to get out the old bolts from the engine's mounting bracket, and replacement hardware.

Thankfully, this is an agricultural area so I should have no trouble finding drive chain. I'm going to try for #41 as suggested, and forgo the tensioner.

Hopefully, they'll also have some kind of simple sparkplug caps. Mine was pulled off the wire, but also got cracked up pretty bad.

Can't wait to get her running again. Not going to lie, that break has left me a nervous nelly!
 

nightcruiser

New Member
Mar 25, 2011
1,180
2
0
USA
My kit came with a spare spark plug boot, so check the misc parts bag to see if you have a spare. That said, they are pretty useless...
I replaced the whole plug wire and boot with a regular automotive wire. The plug wire just screws down onto a wood screw inside the CDI (no joke), that is how it makes the electrical connection, it is also glued into place to some degree or other. If you rotate the wire as if were a nut coming off a bolt it may unscrew for you, mine was in there good and broke off on me. I used small tools, knife, nail, whatever, to pick the old rubber and glue out of the hole until the wood screw was revealed and area was clear enough to put a new wire back on there.
I got my wire at the automotive store, asked them at the desk for their box of single wires, sorted through them until I found one with a right angle plug boot on both ends that was about 4ft long. I think it was designated a coil wire. I cut it in half and had a quality wire and boot for two CDI's for only a couple bucks! Plug wires come in a few different diameters, I didn't pay attention and got lucky, but you might want to pay attention to make sure the wire you get is the same size as the one on your CDI.
To install the new wire just screw the cut end of the wire down onto the wood screw in the CDI, making sure the conductor is screwing onto the wood screw to make the electrical connection. Put some silicone on the outside of the wire before you install it (but make sure it doest get on the wood screw) and put a nice coating of silicon around the outside of the wire where it meets the CDI when you are done. When it's dry your good to go. You wont regret it, the stock wire and boot are just garbage....
 

allen standley

Well-Known Member
Oct 22, 2011
1,126
238
63
Bangor, Maine
If you can slide your wheel back and forth to adjust pedal chain tension, here's an easy fix. Go to tractor supply and get a # 41 chain and a half link. On your sprocket ragjoint Lose the 2 piece section of metal, put the full circle rubber against the backside of your sprocket place the split rubber piece behind the spokes backed by the 3 metal pieces- this will bring the sprocket closer to the spokes. Throw that damn chain tensioner/guide away. If your bike has dropouts this may or may not help....
 

CallMePavz

New Member
Jun 16, 2012
24
0
0
ESVA
Thanks again, guys.

Went into town and ordered some #41 chain and a fresh sparkplug boot. Should be ready to pick up in a day or two.

Also picked up a small easy-out, removed the stud, and remounted the engine.

I'm thinking about keeping the chain tensioner, but replacing the cheap, plastic wheel with a small sprocket. Not entirely sure, yet, but I keep being told that removing the tensioner from the equation can be too much stress on the drive-sprocket and cause problems.

Would love one of those tensioners Al posted, but I haven't found one on Ebay.

Blech. I'm already sinking more money into this project than I expected to...
 

Bicycle Motor Fun

New Member
Sep 17, 2011
89
0
0
Warren, Michigan
I run a 415H chain using a home made tensioner with roller with absolutely no problems. The 415H chain is strong and its rollers are 3/16" wide unlike the #41 chain whose rollers are 1/4" wide. A narrower chain means more clearance with the rear tire sidewall and fits both sprockets better. BMF
 

CallMePavz

New Member
Jun 16, 2012
24
0
0
ESVA
Well, chain replaced and the bike is put back together.

I modified the tensioner so as to keep the actual mounting plate out of the way of the chain.
Chain was good. A bit wider, being #420, but solid fit.

Pedaled her up to speed, just to make sure everything was holding. As soon as I let go of the clutch...

The tensioner was pulled into the spokes...

One spoke was slightly bent before I stopped. It's a bit loose, having bulged out its connection point at the wheel a tiny bit. The tube on the frame where the tensioner was mounted seems to have a slight bend, but nothing I think should be an issue.

I am roarin' mad, but I've only myself to blame. In a hurry to get her running, I neglected to do what I should've done. The wider chain JUST fits into the plastic tensioner-wheel, so it must've ramped up onto the side-walls (because the clamp was TIGHT to the frame).
I should've either replaced the wheel with a bearing-cog from the local auto/farm supply store, or replaced the tensioner entirely.


I just don't know what to do, now. I'm losing faith. It's hard to go from something working PERFECTLY for a week, to suddenly being a constant source of heartache. :p

Is one loose spoke going to be too dangerous to drive if I properly tension the chain?
 

kallsop

Member
May 2, 2009
106
1
18
CT US
Back in my in frame China Girl days, I would wrap one layer of old inner tube material around the chain stay under the tensioner mounting bracket, then tighten the bracket bolts really tight. Never had a single problem with the tensioner moving, but I did worry about it because it is a really dumb design. I would plan to get that broken spoke fixed ASAP, and if it was me, I'd still ride but take it very easy.
 

CallMePavz

New Member
Jun 16, 2012
24
0
0
ESVA
Well, the wheel seems okay for the time being, but I'm definitely going to take it easy.

I did away with the chain tensioner. With some serious elbow grease and a bit of cursing, I managed to remove one link from the chain and replace the master. It's tight enough that I don't need the tensioner, but has just enough play that I'm not worried about stress on the drive-sprocket.

I'm taking it VERY easy, though I picked up a Schwinn bike computer at Walmart (ON CLEARANCE! HUZZAH!), and just HAD to test that out. Topped out at 30mph (assuming accuracy of the unit). On a longer straight-away, might even get up to 35, though I don't think I ever want to try!
 

kallsop

Member
May 2, 2009
106
1
18
CT US
I did away with the chain tensioner.
That's a good option too :) Check the 4 engine mounting bolts frequently. They want to vibrate loose, or shear off. Those bolts are the achilles heel of the engine.

Constant speed isn't necessarily putting a lot of stress on the spokes. Rapid acceleration or braking, or big potholes, try to avoid all those.
 

Bicycle Motor Fun

New Member
Sep 17, 2011
89
0
0
Warren, Michigan
This is for CMP: I believe that a chain tensioner is necessary for an easy adjustment for chain wear. As chains wear, they get longer and therefore, will require some easy way for adjustment; this is where the chain tensioner comes in. The one supplied with my engine kit never worked for me; when starting the engine, the bottom run of the chain pulled the tensioner in towards the spokes! Shimming the engine and all of that other stuff, is a waste of time and the wrong way to go about it. The solution I found, was to make my own using the original plastic roller, its bolt, nut and bearing. I then welded this assembly between the chain and seat stay, being extremely careful to get it in the exact alignment and position to do the job. See my photo. I have about 100 miles so far on that mod using 415H chain with its master link and not a problem. As for the master link; you want it! Let's say, that your little engine craps out and you have a way to pedal to get back home. You can pedal turning the drive line over with extra effort, or just take pliers, remove the master link, put the chain in you pocket and now you have a easy ride home! Then while you have the chain off, it can be clean and lubricated. That is what I do! BMF
 

2door

Moderator
Staff member
Sep 15, 2008
16,302
175
63
Littleton, Colorado
BMF has the solution. If you have to run a tensioner then it should be attached to the chain and seat stay, spanning the space between. I've welded mine but others have had good luck clamping their's at each end. Whatever, it's a lot better than the single point attachment of the kit tensioner bracket, which is a disaster waiting to happen.

Tom
 

maniac57

Old, Fat, and still faster than you
Oct 8, 2011
4,484
22
0
memphis Tn
If you use a tensioner, I STRONGLY recommend you tack weld it to the tube to keep it from rotating. I've done this on all my builds (4 so far) and have not had a single incident other than chain related issues. (cheap chinese crap chain)