

Merkel Board Track copy
- Thread starter Goldy
- Start date

Sorry for getting you all excited and then leaving you hanging. Well, don't die just yet...had to put the projects on hold for now until the first part of motorcycle season slows down...I WILL get back to it fairly soon though. Herm and I were talking about having symptoms of 'project withdrawal'...still up to my ears with motorcycles, but will soon have to make a little time to tinker with the other fun stuff too.
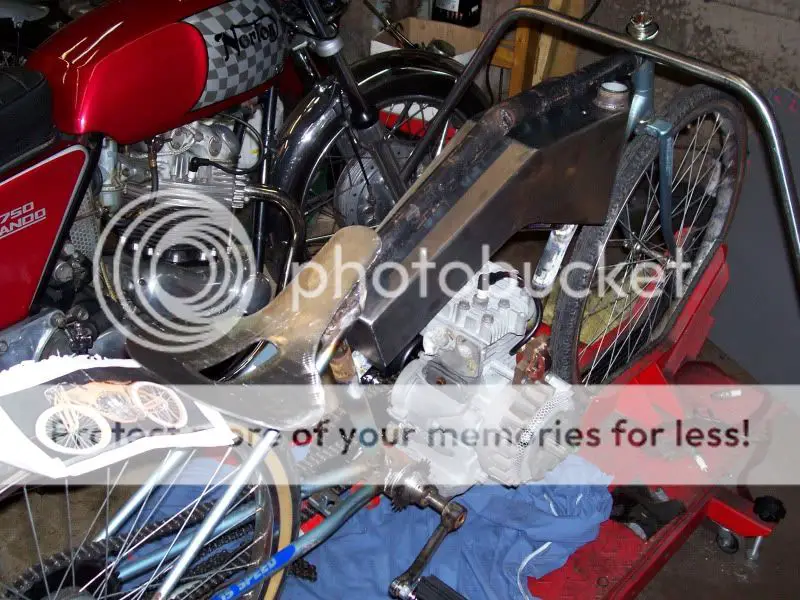
Got a few hours to poke around on my own the other day, so drug the Merkel project out of the shed and did a little more fiddling with that. Got the engine mount in place (see photo) Also got started with some machining work on the primary drive spindle and removed the large sprockets from the right pedal crank and most of the sprocket cluster from the rear wheel.

Glad to see you have found time to work on this, ive been patiently waiting. LOL. You always seem to have good ideas and the number of DIY builds seem to be dropping off lately..... cant wait to see more
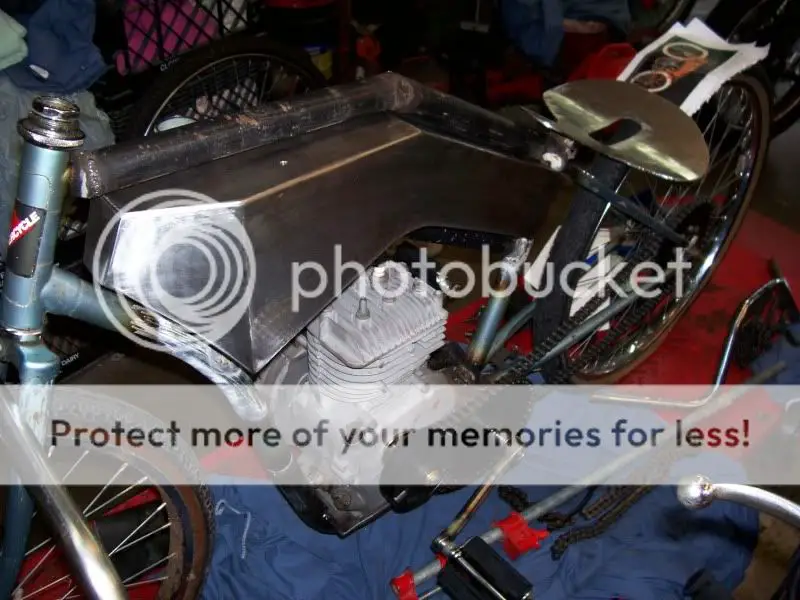
Ok, didn't book too much work this week, sort of a vacation. Anyhow the extra free time gave me plenty of opportunity to get some real progress done on the Merkel. The primary drive quill and sprockets were first on the list, they can be seen in the photos with the large and small sprockets attached, you can also see the oilite bushings in each end that the crank spindle rides on.
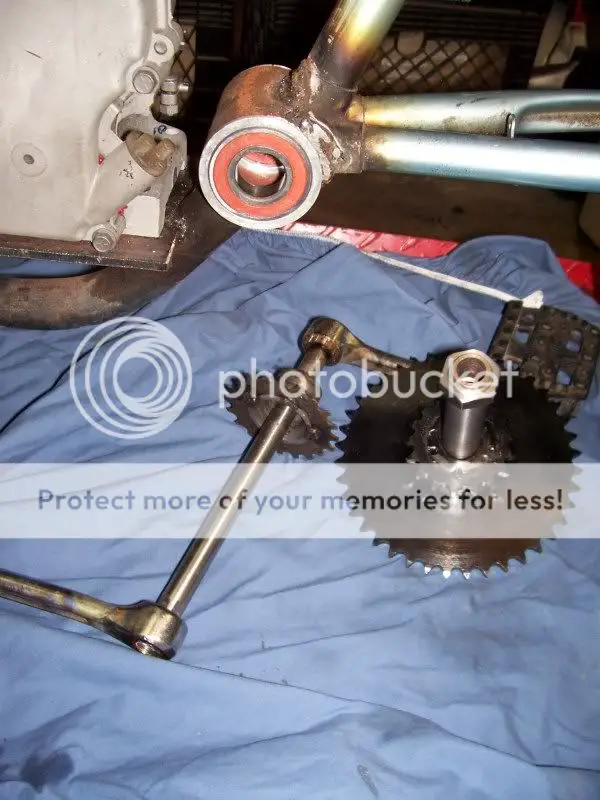
Next came the crank spindle it's self and the drive sprocket used to pedal the machine (above). It all seemed to fit together nicely and the cranks were bent slightly outward in order to provide clearance between them and the clutch on the left and the flywheel on the right.
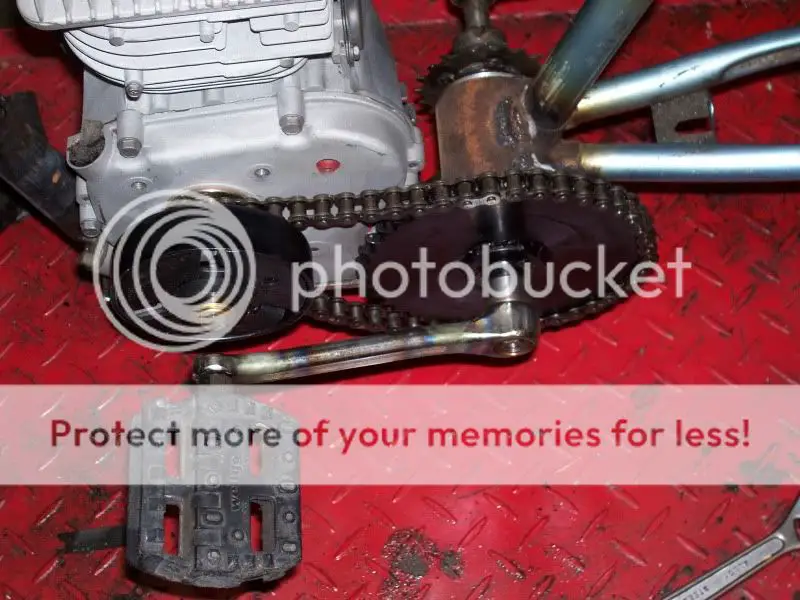
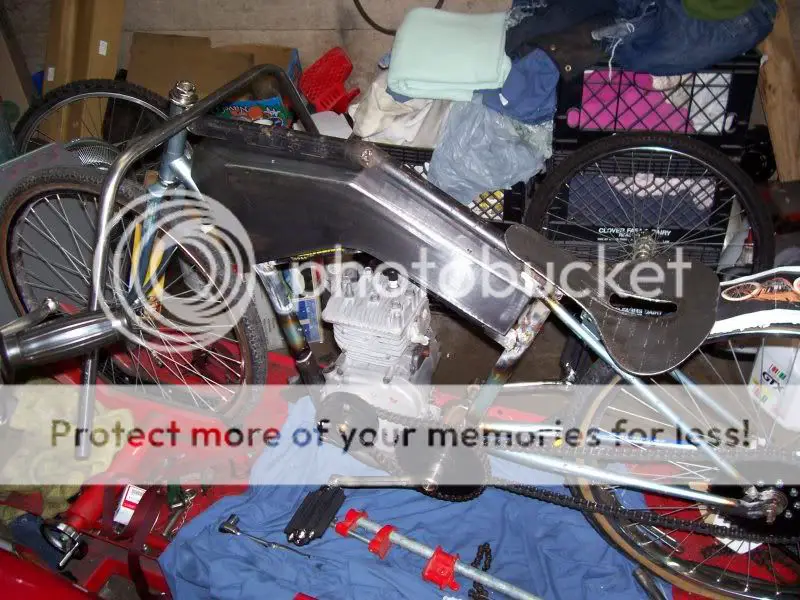
With all that loosely in place it was time to tackle the rear sprocket. I was going to weld a flange to the hub as I did with the BSA build, but after examining a 'donor' wheel and sprocket combo it was decided to use that instead as there was very little needed to do other than close in the rear forks slightly to accept the narrower hub...and there was a nice coaster brake, which will keep the handlebars clean of extra levers and improve the overall look of the finished machine.
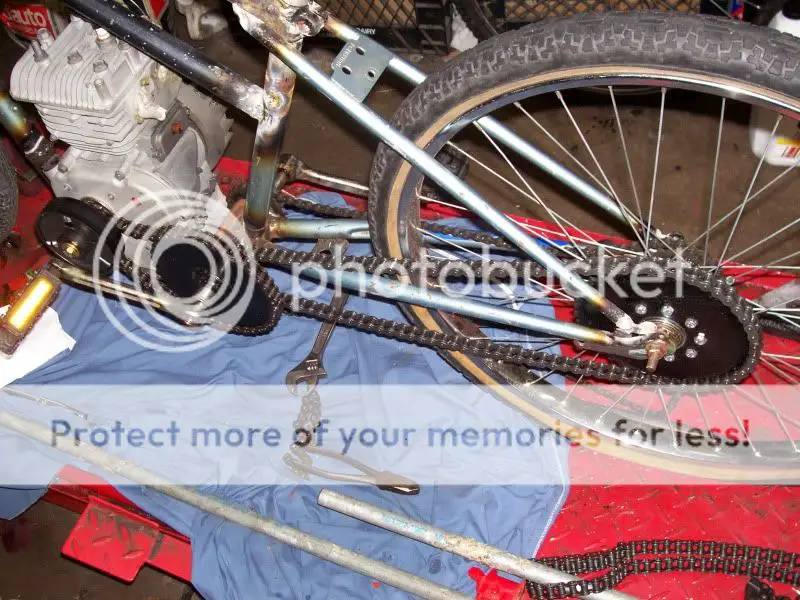
This last shot is an overhead view showing the layout of the chains.
Next came the crank spindle it's self and the drive sprocket used to pedal the machine (above). It all seemed to fit together nicely and the cranks were bent slightly outward in order to provide clearance between them and the clutch on the left and the flywheel on the right.
With all that loosely in place it was time to tackle the rear sprocket. I was going to weld a flange to the hub as I did with the BSA build, but after examining a 'donor' wheel and sprocket combo it was decided to use that instead as there was very little needed to do other than close in the rear forks slightly to accept the narrower hub...and there was a nice coaster brake, which will keep the handlebars clean of extra levers and improve the overall look of the finished machine.
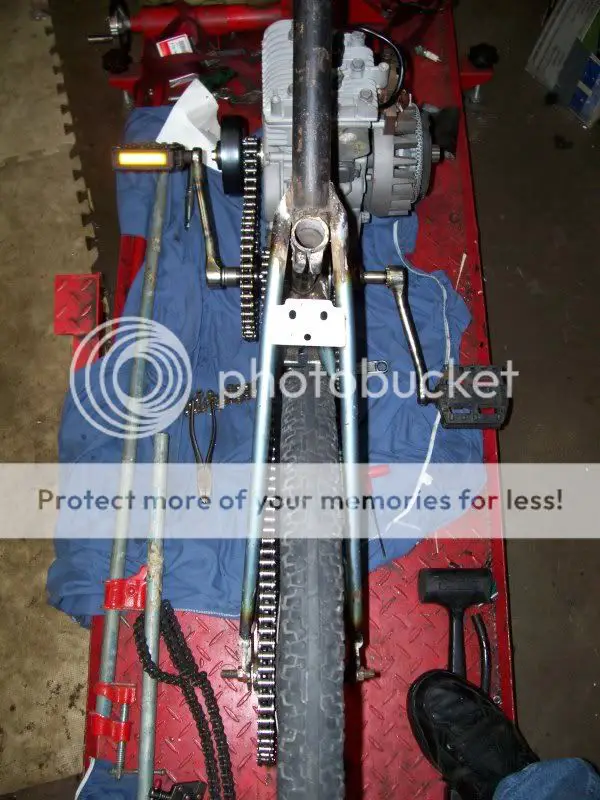
This last shot is an overhead view showing the layout of the chains.
Very cool, im still trying to wrap my head around how it works. I can see this design catching on. Nice work as always Goldy
As another poster said earlier, You're another builder on my watch list. Anxiously awaiting further progress pictures.
It took me a few minutes to figure out how this worked, ingenious. It's this type of ingenuity that piques my interest in this hobby. Great build!
Thanks guys, but don't give me too much credit...just adapting a very old design to a new build.
Herm dropped off some of the parts he had been helping out with/ waiting for yesterday...I had to share them...especially the fuel tank, an absolutely perfect piece of work. It was done by one of his friends who runs a sheet metal shop, a true artisan...he also bent the 7/8 Stainless handlebar tubing for us. Sorry for the poor quality of the photos, shop is getting a little crowded in that corner.
Looking great Goldy. I really like how having the cranks and jackshaft are located in the same spot really cleans up the look. Makes a massive difference. I would copy your idea, however im not 100% clear on how youve done it..... if you feel like educating us with a little explaination and/or pics would be handy.
Thats a very nice looking tank. I like!!!!!!!!
Thats a very nice looking tank. I like!!!!!!!!
Great craftsmanship, Goldy! using the BB for a quill carrier...
Should work very well.
Herm's tank is beautiful!
The bike will look very much like the old Merkel.
Best
rc
Should work very well.
Herm's tank is beautiful!
The bike will look very much like the old Merkel.
Best
rc
This is for you Harry...
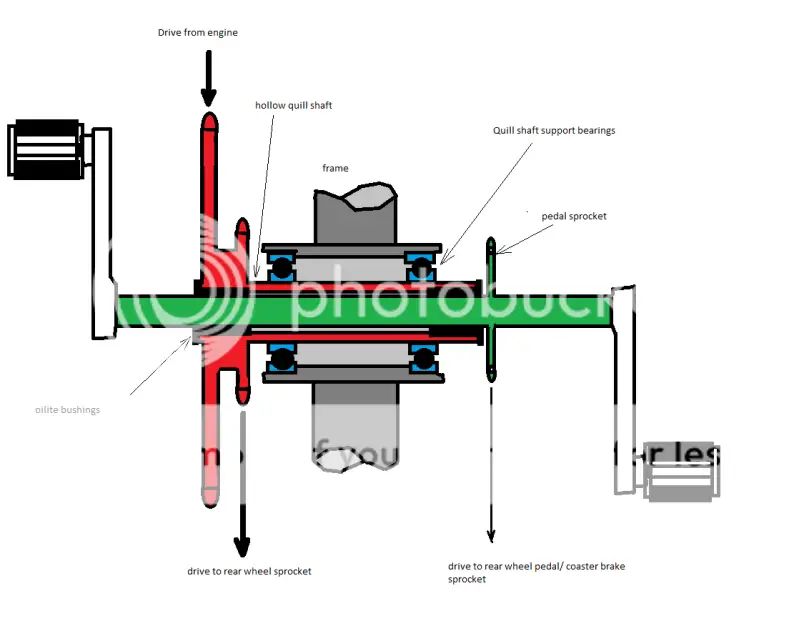
I've simplified the drawing to try to make it a little easier to understand.
Power from the engine is transferred to the large red sprocket via the engine clutch, then directly from the small red sprocket to the rear wheel. The quill shaft is supported by the large bearings in the bicycle frame and is not connected to the pedal shaft, it serves to support the primary reduction sprockets and the pedal shaft bushings only. The pedal shaft rides in the oilite bushings and serves to operate the pedal driven sprocket on the rear wheel and can be used to apply the coaster brake or pedal the bike (or hopefully start the engine, if I can sort that out too). I hope this helps you square this away in your noggin")
I've simplified the drawing to try to make it a little easier to understand.
Power from the engine is transferred to the large red sprocket via the engine clutch, then directly from the small red sprocket to the rear wheel. The quill shaft is supported by the large bearings in the bicycle frame and is not connected to the pedal shaft, it serves to support the primary reduction sprockets and the pedal shaft bushings only. The pedal shaft rides in the oilite bushings and serves to operate the pedal driven sprocket on the rear wheel and can be used to apply the coaster brake or pedal the bike (or hopefully start the engine, if I can sort that out too). I hope this helps you square this away in your noggin
Last edited:
Goldy ... Man i just love your stuff...one of my favorite things on the merkel is the tins and esp.
http://db.tt/KdcJRha
For some reason that little chain cover just draws my mind back to the old bikes in a way other things don't? Can't wait to see your version
As others have said "a builder to watch "
http://db.tt/KdcJRha
For some reason that little chain cover just draws my mind back to the old bikes in a way other things don't? Can't wait to see your version
As others have said "a builder to watch "
Thanks Goldy for sharing, much appreciated. Thanks for sharing your wisdom with us. Ill be waiting and watching this build unfold. As always top notch work!!!!!
How is the quill shaft held in place (stopped from sliding side to side) to the pedal shaft? And how is the pedal shaft held in place? Grub screws or something?
What are oilite bearings? The brand name or type of bearing? Id imagine they must be a slim bearing? Roller bearing?????...... Also do these have to be high quality bearings as its a jackshaft?
Sorry for all the questions but it looks like a really great setup, one day id love to try it...
What are oilite bearings? The brand name or type of bearing? Id imagine they must be a slim bearing? Roller bearing?????...... Also do these have to be high quality bearings as its a jackshaft?
Sorry for all the questions but it looks like a really great setup, one day id love to try it...
As I said, I was trying to keep the drawing simple, but I'm happy to provide more details.
First: The quill shaft is held in place by a large nut with a left hand thread (not shown) on the right side of the shaft. The length of the shaft between the bearings is about 0.015" longer than the space between the bearings. This slight clearance keeps both the quill shaft and bearings axially located without side loading the ball races.
Next: Oilite has been around for a very, very long time. It's a trade name of course for sintered bronze impregnated with oil...very easy to machine and properly lubricated will last a very, very long time. There is only minor stress on the pedal shaft and in this case, the bushings are about 1.5" long providing plenty of support.
On the 'real thing' the left pedal and pedal sprocket are mounted very near the quill shaft...this fixes the pedal shaft axially.
If this doesn't clear things up for you, let me know...I can always take a few more pics.