1911 Flying Merkel single build.

GoldenMotor.com

Velodrome

Well-Known Member
May 27, 2011
2,387
271
63
Phoenix-ish
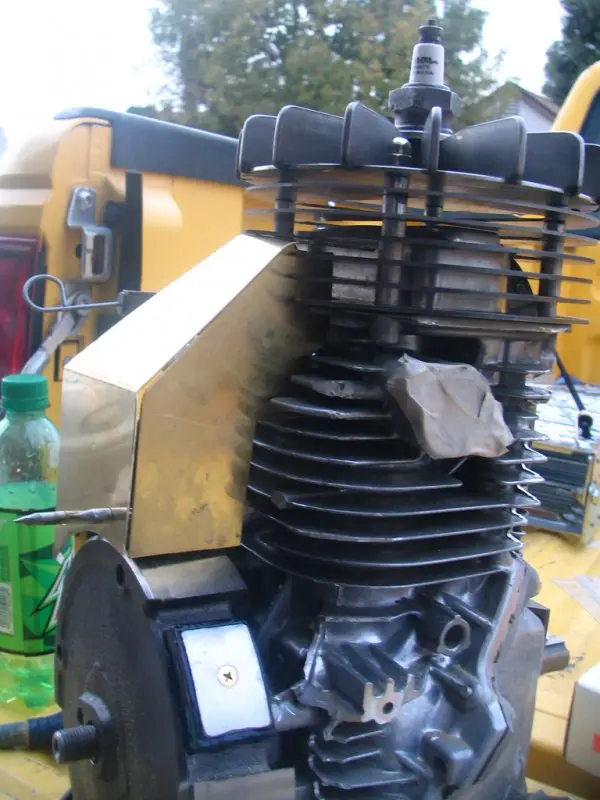
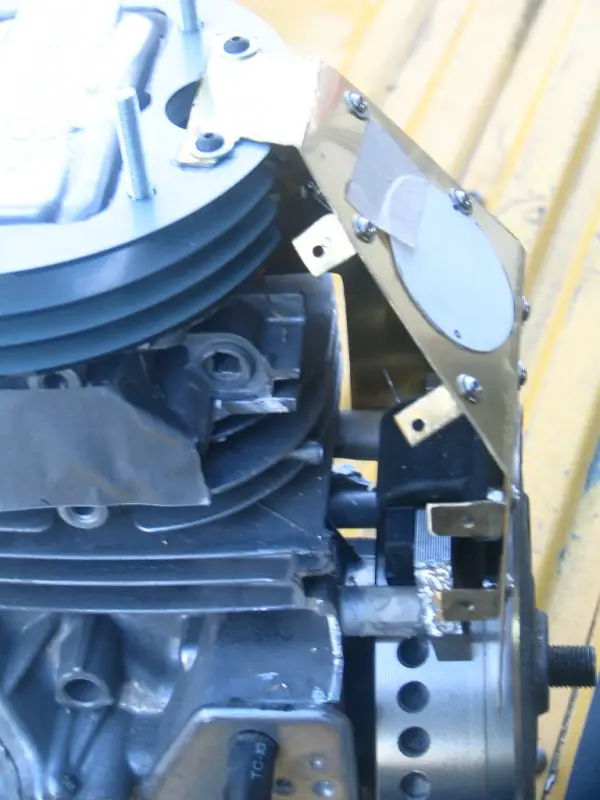
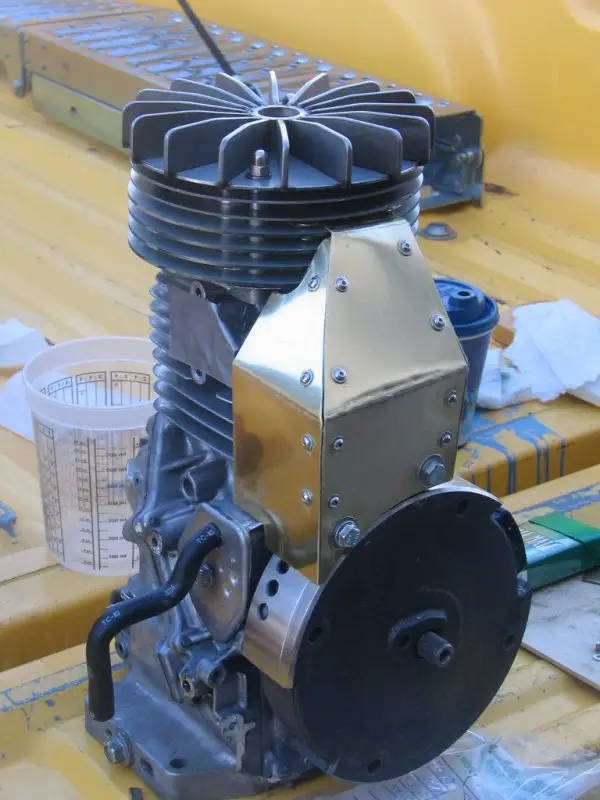
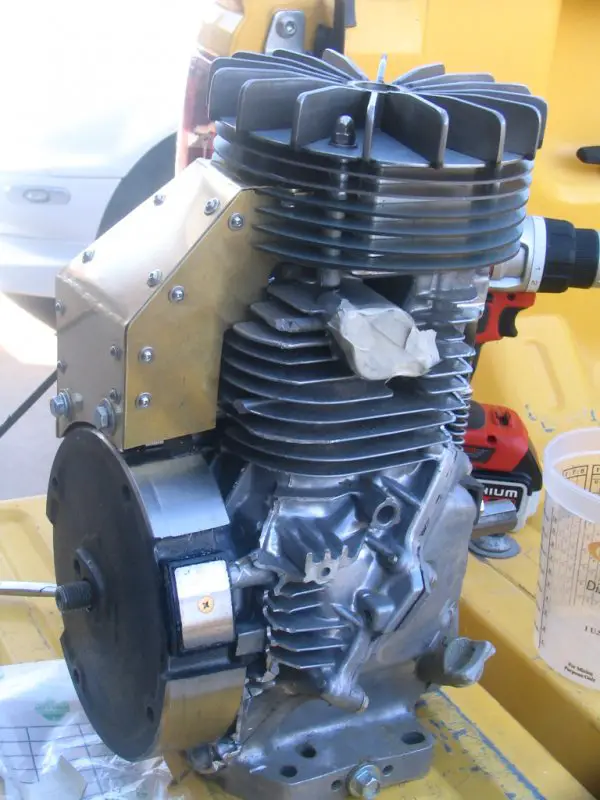
If I trusted myself with silver solder I would have gone that route but I have no idea how to do it. Tabs and stainless button heads! There is a VERY strict sequence of assembly and dis assembly which I now have down but getting the steel spacer in front of the mag and behind the brass is key and requires a very long set of hemostats. On the back plate I had to go the captured nut route. !! JB Weld to the rescue !!
1-2-18 007.JPG
1-2-18 008.JPG
1-2-18 012.JPG
1-2-18 014.JPG
1-2-18 016.JPG
 
Last edited:
  • Like
Reactions: Nightster

Velodrome

Well-Known Member
May 27, 2011
2,387
271
63
Phoenix-ish
I managed to re use the stock spark plug boot over the cloth wire and brass nut I went with under the doghouse. I ditched the stock wire and boot due to space concerns the turned out to be imaginary. Time for a wire to the Edison plug! I used lamp conduit from Ace hardware. I joke with the guys there that my hobby is going to Ace to buy nuts bolts screws and look at thing figuring how I can re-purpose it. Occasionally a motorized bicycle happens from this. :)
1-2-18 019.JPG
1-2-18 018.JPG
1-2-18 020.JPG
 

Velodrome

Well-Known Member
May 27, 2011
2,387
271
63
Phoenix-ish
FINALLY Ready for disassembly !! 2 or 3 cans of brake cleaner and it will be ready for paint! I' m going PINK and Kawasaki green!
 

Velodrome

Well-Known Member
May 27, 2011
2,387
271
63
Phoenix-ish
Thanks guys. You would not believe what a pain in the ass this doghouse has been; hand fitting putting on talking off back and forth time after time. And I'm STILL not overly happy with it. But I've dicked around enough on it and its time to move on.
 

Harold_B

Active Member
May 23, 2012
997
246
43
Grand Rapids, MI
Looks great to me but I get it if you’re not 100% on the new cover. Things look different on the bench as compared to the plans imagined typically. I try to give things a little time before making more changes to decide what it is that’s bothering me. Might scale very different in the frame and make the finished bike look complete. Can always change it later if you don’t like it but as I started with, looks great to me.
 
  • Like
Reactions: Tom from Rubicon

Velodrome

Well-Known Member
May 27, 2011
2,387
271
63
Phoenix-ish
Thanks Harold. Ya. Its a compromise. I HAD to do something about that stock mag and spark plug / wire hanging out in the wind but don't have the machining skills or tools to mount a vintage magneto. The multi gear case from block to mag would be a nightmare to machine. (( 3D printer??? )) The brass doghouse hides it all and will make people wonder WTF?? Very few people have studied or even seen the real deal so many might even get fooled! :)
 

indian22

Well-Known Member
Dec 31, 2014
4,722
7,697
113
Oklahoma
I think you've done a fine job. New brass requires photo skills( I don't possess) to show up well in photographs, As it ages brass actually looks better with a patina in most photos (non pro) but when viewed in person both new and aged the metal looks great. WTF, what did you do? is really what I'd prefer to hear from astute viewers...the naive will fall for any manufacturer's repro label stuck on a China doll! Rick C.
 

PeteMcP

Well-Known Member
Jun 27, 2017
918
2,545
93
68
Hey Velo, Fantastic motor transformation you're pulling off here.
Your motor's new 'doghouse' looks the dogs danglers to me!
You're past the point where this tip may be useful, but bear it in mind for the future when you want to repeatedly fasten/undo/refasten metal panels together like you did on your 'doghouse' mag cover. Ever considered using Cleko pins to secure the panels in place? Used widely in the aircraft industry, these mighty useful temporary fasteners clip in/out of pre-drilled bolt holes in a jiffy and hold everything secure and in alignment until you are ready to finally bolt things up proper. I first used them extensively when skinning my replica Morgan 3 Wheeler with its aluminium body panels and it saved a whole bunch of time repetitively doing-up and undoing umpteen threaded fasteners. I found them useful again for temporarily securing my DECOLINER's alloy motor mount panels.
Carry on.

FSCN5375.JPG FSCN3488.JPG
 
  • Like
Reactions: Harold_B

Velodrome

Well-Known Member
May 27, 2011
2,387
271
63
Phoenix-ish
Dang... Cleko's. Where were you 3 weeks ago? Haha! Never thought of cleko's. I doubt they come is size 3mm which is the button head size Im using but If they do it would have saved me tremendous grief. Now.... About you starting a build thread on that Morgan!!
 

PeteMcP

Well-Known Member
Jun 27, 2017
918
2,545
93
68
Dang... Cleko's. Where were you 3 weeks ago? Haha! Never thought of cleko's. I doubt they come is size 3mm which is the button head size Im using but If they do it would have saved me tremendous grief. Now.... About you starting a build thread on that Morgan!!
You're in luck. I use 1/8" Cleko pins which translates to 3.1mm. I've used them in holes drilled with a 3mm drill bit....
 

Velodrome

Well-Known Member
May 27, 2011
2,387
271
63
Phoenix-ish
Humm.... Thought sure I had moe and better pic's of post paint/ Oh well. Im off tomorrow and will be re assembling so Pic's then!