


On my Briggs Carburetor which is not the one listed below on Amazon, but another which is the Briggs and Stratton 498170, I have found out how to remove the throttle butterfly parts which I wanted to remove.
I show this other one as it is made similarly and they have more pictures to see. I would have taken pictures, but I had forgotten.
The reason I wanted to remove the throttle part was that the cable linkage part that attaches to it is made of plastic and it broke when I dropped it by accident. I kept that carburetor and today found a need for it. The oring gasket on the other carburetor, where the bowl is attached was leaking. The one that was saved was functional if I could swap the control linkage part.
The control linkage part is like a pin that swivels inside the carburetor throat and has the butterfly round disk attached. This one does not have screws to remove it. It is just press fitted in the plastic rod that has a cut away vertically just enough that the butterfly round disk stays in place.
I turned the butterfly disk round so it was aligned with the carburetor throat on the side towards the engine. Then I took a needle nose pliers and grasped it and pulled and at the same time moved the pliers back and forth to try to wiggle it free. There are some detents that keep it in place, so a little work is needed to remove it.
Once removed the pin swivel with the throttle link age connection point comes out the top. There is a round felt part that is by the top which I suppose keeps leakage from air entering there. Maybe also to make it move freely.
I did the same on the other carburetor and it was a bit more stuck and I left scratches on the butterfly disk but it was not dented or deformed. It could be sanded and smoothed out if I need it later.
I press-fitted it into the other carburetor and felt is snap into the detents.
The carburetor worked fine and did not leak. I checked it first anyway with blowing into the gas inlet with it right side up and by breath was heard going through the jet. When I put it upside down nothing went through.
Who can throw stuff out! It helped in a pinch. I did not have to wait for mailing of another part.
The second of five pictures downward on the Amazon website shows the end where I use the needle nose pliers to pull the butterfly disk press fit part out.
https://www.amazon.com/799866-Carbu...TF8&qid=1510111731&sr=8-1&keywords=B073129YTD

Yep, I keep all my unbroken used parts. I've also been able to re-use something. Or, It's been sent out to help other members in need. Lord knows that I need to help balance my Karma equation!Who can throw stuff out! It helped in a pinch. I did not have to wait for mailing of another part.
https://www.amazon.com/799866-Carbu...TF8&qid=1510111731&sr=8-1&keywords=B073129YTD
I have succeeded in putting the bike back together after adjusting the intake valve, but had this leak start. I am sort of unhappy about that, but still it is better than on the trail. It made it easy as covers were off the engine and all my tools and parts were all still where I knew they were. Now when rain stops I will ride it till it gets all warmed up and see if restarting problem where I had to wait for it to cool off is not happen any more. I will be sure to not go very far, or keep it from stalling so I don't have to walk or wait for it to cool off if for some reason it was not the valve adjustment only. You know sometimes there can be multiple problem happened concurrently. I am psyched though that it is it. Then onto another engine with the same problem.
Last edited:
Do any of you guys have problems with the 415 chain? I ended up breaking two this week, well one was a loss completely, the second broke then i put a master link on there and it broke again..... I thought it could have been because i put a new spark plug on, so i switched it back to the old one and it still broke, could it be because of the cold weather i'm in Arizona so it was 45 degrees so im not sure if that will effect it? I cant figure it out for the life of me and this really is my only means for transportation
Your spark plug has nothing to do with the chain. And 45° F is easily within the normal operating temperature of a chain or anything to do with the bike.Do any of you guys have problems with the 415 chain? I ended up breaking two this week, well one was a loss completely, the second broke then i put a master link on there and it broke again..... I thought it could have been because i put a new spark plug on, so i switched it back to the old one and it still broke, could it be because of the cold weather i'm in Arizona so it was 45 degrees so im not sure if that will effect it? I cant figure it out for the life of me and this really is my only means for transportation
I don't like the idea of having 2 drive chains to the rear wheel, 1 from the pedals, and one from the engine. A jack shaft arrangement solves this problem, but the kits are expensive, about $200 USD.
If the rear (engine driven) sprocket is in perfect alignment, and the sprocket is centered on the wheel, then the system should work. But getting the alignment right and keeping it that way is difficult.
I understand your dependence on the bike. Lots of people depend on only one vehicle. If it happens to be a motorized bike, you need to be a mechanic. If you budget some time every day to tending to the bike, it helps.
Last edited:
I have a motorized bicycle, it is a 66cc on a hyper mens cruiser from walmart. i want to put a rear disc brake on it, i've seen sprockets that offer the 6 hole mounts for one, but i have no space in between the frame and sprocket. I was wondering, could i put it on the other side with the bicycle drive sprocket? there is about 3/4 inch of clearance where i could put a stock 9 hole clamp assembly, and a disc hub mount to go from the 9 holes and have a spacer for the 6 holes at MBrebel. in turn, it would probably work like an adapter to the hub for disc brakes. here are the links for the disc hub mount, and the clamp assembly.
Disc hub mount:
https://mbrebel.com/product/disc-hub-mount-9-bolt-hole-standard-sprockets-bore-1-3inches-33mm/
Clamp assembly:
http://fastbikemotor.corecommerce.com/9-hole-sprocket-clamp-assembly.html
Disc hub mount:
https://mbrebel.com/product/disc-hub-mount-9-bolt-hole-standard-sprockets-bore-1-3inches-33mm/
Clamp assembly:
http://fastbikemotor.corecommerce.com/9-hole-sprocket-clamp-assembly.html
Just a thought, Tyler. But the hyper has no front brakes? Could get an adapter or new front forks and put a disk brake up forward.
Just a thunk. Some folks do fine with just coaster brakes. I personally really prefer both front and rear brakes. Much, much safer.
Just a thunk. Some folks do fine with just coaster brakes. I personally really prefer both front and rear brakes. Much, much safer.
I agree, but with what i have currently, only a coaster brake and a flimsy front u brake i stole off my other bike. now, with all my mods i did, i get all the way up to 40-50 mph and im just looking for an alternative.
If we as cyclists can dispense with factions we can become a much stronger forceYou know most of us do things eventually to modify the bikes for the better or worse. It would be a nice gesture if we stick them out there for others to see.
Take this one for what it is worth.
The clutch lever in my kit was trash from the first. I never could make it work worth a darn, so I replaced it with a brake lever I had laying about. Here is the trick. I cut a piece of old inner tube to lock the handle up so I could roll the bike in and out. I leave it on the grip so I can use it to hold the clutch in if I need to adjust the bike.
I also hated the throttle that came with the bike. I replace it with a shifter from a mountain bike. I can lock the throttle in any position while I work on things. I don't think either of those is earth shattering, but they seem to work better for me. Probably won't help anyone else.
So leave me your tip I can use all the help I can get...
for change by forming a coalition of pedal, electric, & gas.
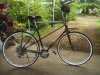
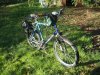
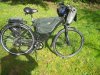
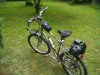
Some of my bikes: 1, my bus touring bike 2, Dirt & beach 3, electric daily driver
4, gas road tour.
Attachments
-
 140.5 KB Views: 386
 -
 194.6 KB Views: 397
 -
 181 KB Views: 388
 -
 147.1 KB Views: 373
Last edited:
Even though this is old I will answer it. I put a bead of Shoe Goo or Goop on top of the frame tube before I mount the tank. Works perfectly and it never moves. You can take it off later and it will pull off in one piece if you need to, but it is not affected by gasoline and works perfectly. LarryHey guys and gals got the beach cruiser running the other day. I would not start for the life of me. I tried and tried and finally found out the clutch was just enough off to not draw in fuel. So get her running and let me say. WHAT A BLAST LOVE IT GOES JUST FAST ENOUGH FOR THIS OLD MAN NOW!!! It had been 15 years since I rode a bike smile ear to ear love it. putting the chain thing on that goes under the case so it won't bind. and a spring loaded tensioner too. Can you tell me how do you keep the tank in one place? I don't want to crank down on the bolts I think they will rip right out of the tank. So please if any other ways of mounting it would be very help full. And is there any people that ride together in southern California? I am in Riverside would like to ride with some other people. Thanks and one word WOW
You seem knowledgeable and I'm looking for advice, I'm still breaking in my engine and all the sudden it won't idle when I pull the clutch in. I've tried adjusting my needle, idle screw and throttle cable and I'm not sure what's wrong, thank you, chucktake a tip...leave a tip...or a bunch of 'em
These engines were originally made to haul around people for a tiny sip of fuel, low operating costs, and ease of MAINTENANCE....kinda like the old V-Dub beetle. Or the early Honda step through. Or the model T.
Top performance for these engines then should be defined as great fuel mileage, ease of operation and low overall cost.
Some are treating these engines like they should do something other than putt around on a litre of fuel all day and get you where you are going with a minimum of drama.
You aren't going to make one of these engines haul you down the coast @ 40+ MPH or win any stop light drags with that blue haired lady in the Volvo. (although, you may)
You aren't going to find any magic fuel or "performance" add-on that is going to do anything you can't do for pretty much free with the exception being your time. Coleman fuel? nah...super duper spark plug thingy? nah....NOS or turbos? Are you serious? You aren't really serious, are you?
100+ MPG? Yes. Easy running, and easy maintenance? Yes. Lots of tinkering and learning to do maintenence and repairs? Yes, if you want to keep riding it. Fun? Of course, why else would you want to own one?
Buy a good plug, and a good replacement sparkplug wire cap from Pep Boys or other favorite large auto outlet.
Never remove a sparkplug from a hot engine, you may remove the threads from the head as well.
Here's a list of replacement plugs- do it today!
NGK B5HS (preferred)
Champion L86C
Champion CJ7Y low profile or CJ-8
Autolite 4093 or 425
Mix your fuel/oil mixture @ 20:1 for break-in and 36:1 after.
Buy some good gasket paper DON'T MAKE ONE FROM A CEREAL BOx! (really cheap) and make a couple intake gaskets, and install one, even if you think yours is fine. You can make gaskets really easily by drawing the new gasket by using the old gasket as a pattern, and no, it doesn't have to be PERFECT. Use an exacto knife and take your time, finish the rough stuff with some 220 sandpaper. Some of you (me) old-timers will use the "good old ball peen hammer method" to make the gaskets.
Make sure your carb is set right and that means check where the needle clip is, start at the second from the bottom in most cases. One slot lower near sea level. I have two bikes and they are both set up diferently due to poor tolerances in manufacturing FIND THE ONE THAT WORKS FOR YOU- it just depends on your carb and your elevation. (I'm @ 1000' here)
Clean out your tank before you mount it...at least look in there and see if it's full of rust or crud. You can use a shop vac ONLY IF THERE HAS NEVER BEEN ONE DROP OF FUEL...otherwise you'll blow your shop vac to smithereens.
While your in a cleaning mood, pop off the mag side cover and clean all the metal shavings out of there with some spray can brake cleaner and compressed air. Check the area around the sprocket too- full of metal dust!
To save yourself a lot of hassle, buy a length of M6X1.00 pitch threaded rod and REPLACE ALL THE STUDS. Or make them outta bolts like I did. Those would be the intake, exhaust and also the four mounting studs. The originals are made of "anti-metal" and will strip at the first inopportune moment.
Secure all wires with zip ties or electricians tape so none are pulling at the ends or connections. Seal up any ends/connections that are in doubt with liquid electricians tape...READ THE DIRECTIONS ON THE CAN!
Grease your gears with some wheel bearing grease or lithium grease before you ever fire the engine up, then again after about 50 miles. USE ONLY A TINY AMOUNT OR YOU'LL BE CLEANING THE CLUTCH SOON. (a dab about the size of a pencil eraser is PLENTY. Clean them first with some brake cleaner, or carb cleaner, then lube.
Don't spray brake or carb cleaner in your eyes, you won't be doing anything else on the bike for awhile afterwards, if ever.
While you are greasing stuff remove, clean and grease all your wheel bearings, or YOU WILL BE SORRY. Bicycles are not really made to haul a 200+ pound guy over the road and all the bumps/potholes/ect @ 25-35 mph. The bearings take a massive beating. Use red grease because it starts to turn black when it needs servicing.
Make sure your chain is aligned and lubed. Same goes for the pulley/tensioner. Don't make the chain TOO TIGHT. 3/4-1" play.
Always clip on your masterlink so the opened end faces toward the rear when it's at the top of the chain run and going forward.
Zip tie your spokes where they cross while you are installing your sprocket.
Balance your wheels- I used solder wrapped around the spokes at the rim. You can buy stick on weights at the sporting goods store...in the golf aisle.
Don't try to use your clutch to take off.
Use loctite on every bolt you put a wrench on, and don't OVERTIGHTEN the head bolts, or any bolt that goes into aluminum. 15-20 ft/lbs. is enough, and that goes for the spark plug too! While we're on the subject, you do use anti-seize compound on the plug threads, don't you? Never remove a sparkplug from a hot engine, you may remove the threads from the head as well.
Make sure your brakes are up to par. Stuff hurts more @ 35MPH than it does @ 10MPH, especially if it stops you before your brakes do.
Ride defensively, because the only drivers that will see you are the ones you DON'T want to see you- aka "da fuzz".
If you have a problem with dogs chasing you- eventually they get old and bored and leave you alone...if they are smart.
You know most of us do things eventually to modify the bikes for the better or worse. It would be a nice gesture if we stick them out there for others to see.
Take this one for what it is worth.
The clutch lever in my kit was trash from the first. I never could make it work worth a darn, so I replaced it with a brake lever I had laying about. Here is the trick. I cut a piece of old inner tube to lock the handle up so I could roll the bike in and out. I leave it on the grip so I can use it to hold the clutch in if I need to adjust the bike.
I also hated the throttle that came with the bike. I replace it with a shifter from a mountain bike. I can lock the throttle in any position while I work on things. I don't think either of those is earth shattering, but they seem to work better for me. Probably won't help anyone else.
So leave me your tip I can use all the help I can get...
i bought a 80cc motorized bike kit and the clutch stuff that were you suppose to ride to 5mph and let the clutch out which will engage the engine that doesnt work for mine i found out i could use a power drill and hook it up to the mag bolt to turn over the engine i got it to crank up and run one time today but i need to know whats wrong with my clutch
Using a drill to crank the engine requires a ratchet adaptor between socket and drill.i bought a 80cc motorized bike kit and the clutch stuff that were you suppose to ride to 5mph and let the clutch out which will engage the engine that doesnt work for mine i found out i could use a power drill and hook it up to the mag bolt to turn over the engine i got it to crank up and run one time today but i need to know whats wrong with my clutch
If not, the drill will eventually loosen the crank nut.