Schwinn 5 Star Cruiser build

GoldenMotor.com

CTripps

Active Member
Aug 22, 2011
1,310
1
38
Vancouver, B.C.
Hey folks. This project has been an ongoing thing for quite a while, but now that it's ready, I'll show you what I was working on.

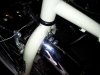
I started off with a Schwinn 5 Star cruiser (6 speed) from CL. I lucked out on it, as it had pretty good paint and some really nice fenders already, they were just a little rusty.


The fenders cleaned up nicely using a mix of half lemon juice, half white vinegar and a bit of #0000 steel wool. The rust buffed right off and the chrome came back reasonably well.

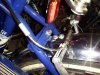
I pulled out the 'silver' 66cc kit from the back room I set aside for this frame and did a partial teardown on it. The intake and exhaust ports were the usual 'high qualtiy' work, so I cleaned them up.


CTripps

Active Member
Aug 22, 2011
1,310
1
38
Vancouver, B.C.
Even the intake manifold was bad.


Mounting the engine in the cruiser frame was a bit trickier than the two previous MTB builds, so I had to get creative. I started by replacing the studs with new material from my local Fastenal. I cut them a bit long to be sure I could work out what I needed, and then trimmed the excess off the ends. I went with cutting an engine spacer to reach the front tube.


CTripps

Active Member
Aug 22, 2011
1,310
1
38
Vancouver, B.C.
In frame, it sits like this:


For the exhaust I wanted to do something more, so I went with an expansion chamber. I had to cut the bracket off of it, trim the pipe and weld the bracket back on to change the angle of the end of it as the pedal chain was almost rubbing it.
Exp Chamber top bracket - 01.jpg
Exp Chamber - top angle cut.jpg
Exp Chamber top bracket - repositioned - 01.jpg
 

CTripps

Active Member
Aug 22, 2011
1,310
1
38
Vancouver, B.C.
To bolt the exhaust pipe to the expansion chamber I made a bracket for the end of the expansion chamber that matches to the exhaust. The weld is a bit ugly, but it seems to be holding.

Exp Chamber bottom bracket - 02.jpg

Exp Chamber bottom bracket - 03.jpg

Exp Chamber bottom bracket - 06 - compared to exh bracket.jpg

Exp Chamber bottom bracket - 07 - compared to exh bracket.jpg

Exp Chamber bottom bracket - 08 - welded on.jpg
 

CTripps

Active Member
Aug 22, 2011
1,310
1
38
Vancouver, B.C.
With the aid of an oxy-acety torch, and some help were were able to heat and change the bend in the exhaust pipe. Again, it's not as pretty as I'd like but it works.

So, all bolted up the exhaust turns out something like this.

Exp Chamber - ready to install.jpg

Exhaust - 01 - Jug to Exp Chamber.jpg

Exhaust - 02 - Exp Chamber to Exhaust pipe.jpg

Exhaust - 03 - Exp Chamber to Muffler.jpg

Exhaust - 04 - Muffler bracket.jpg
 

CTripps

Active Member
Aug 22, 2011
1,310
1
38
Vancouver, B.C.
I lapped the head and jug, and I also opened the intake side on the piston by rotating the motor to TDC and marking the overlap of the piston skirt in the intake. A dremel cutting wheel made short, neat work of that. (Hmm... thought I had pics on that.. can't find 'em)...
 

Attachments

CTripps

Active Member
Aug 22, 2011
1,310
1
38
Vancouver, B.C.
For the paint work I decided to try and match what was on the bike to start with, which is blue and a kind of cream/white that looked pretty good to start with. There were a few dings in the paint from chaining it up and such but matching the colours was easy, as I had to cut the cable stays off the main tube so I had them in my pocket when I went looking for paint.

Crossbar with cable stays.jpg Crossbar without cable stays.jpg

After sanding and priming the tank, chainguard and sprocket everything got at least two coats of the base colour.


When it came time to mask off the tank I used a piece of string wrapped around the filler and down to the back studs as my guide.

Tank - using string as guidelines for masking - side.jpg


CTripps

Active Member
Aug 22, 2011
1,310
1
38
Vancouver, B.C.
So, on to the second colour, for two full coats. This time the carrier rack gets some touch ups as well, since it had none of the base colour to work around.


The masking comes off, and everything gets a couple of rounds of clear coat.


The bike has striping, black and silver where the colours meet. I couldn't get 1/8th inch wide in the silver, but I managed it by laying the 1/8th inch black on the 1/4 inch silver, and it comes close enough.


Some chrome door edge trim around the seam really takes it up a notch.

Tank - Left side (mounted).jpg
 

CTripps

Active Member
Aug 22, 2011
1,310
1
38
Vancouver, B.C.
So, all assembled it came out like this:


It started on the second try, I'm pleased to say. Blew the head gasket out on the third or fouth start, and have been taking it for tuning rides the last couple of days.

There are other things I'm working on for it, like an old bullet style headlight I got out of a junk bin cheap. I've had a go at cleaning it up but the chrome finish has gone rough so I'm thinking of stripping it down and painting it to match the bike and tank instead.


Headlight installed - 07.jpg
 
Last edited:

Dan

Staff
May 25, 2008
12,765
115
48
59
Moosylvania
She is beautiful CT! Purty work Mon.

Just saying and from some hard won knowledge and a few scares, your fenders have me a wee bit worried. They can cause a whole bunch of hurt and damage.

But man she is pretty CT.
 

CTripps

Active Member
Aug 22, 2011
1,310
1
38
Vancouver, B.C.
She is beautiful CT! Purty work Mon.

Just saying and from some hard won knowledge and a few scares, your fenders have me a wee bit worried. They can cause a whole bunch of hurt and damage.

But man she is pretty CT.
Thanks, Dan. I've read enough posts on fenders that I'll be keeping a close eye on them and checking them all the time.

I did some homework, and pressed or drilled out the rivets holding the mounting brackets for the fenders and replaced them with bolts, lockwashers and nylok nuts, and added sturdier angle brackets to the assemblies. Also replaced all the hardware where they mount to the frame.
 

Attachments

CTripps

Active Member
Aug 22, 2011
1,310
1
38
Vancouver, B.C.
Thanks rdog. I just had a quick look, it does look similar to the Delmar. I haven't seen too many fenders with the extra skirts on them, but people keep telling me they've seen them.
 

CTripps

Active Member
Aug 22, 2011
1,310
1
38
Vancouver, B.C.
I've got the exhuast pulled apart today. Cleaned it out with brake cleaner, now I'm waiting until tomorrow for some JB Weld to set around the welds to fill in a pinhole (or maybe two) that showed up.

I had to mix up some JB anyway, the headlight needed a fix. The plastic in it is pretty old and brittle, one edge of where the bulb holder screws into the refelctive dish inside broke off.
 

Harley59

New Member
Aug 19, 2012
50
0
0
Vancouver, bc
She runs real sweet. We went for a ride the other day and she was happy and spunky, even with a blown head gasket. We got a couple of "looks amazing" from some 'cagers. My bike was happy for the run once she got the bit**yness out.