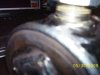
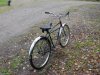
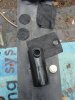
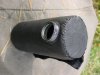
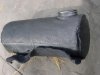
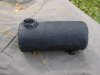
Rock & Doc,Rock Thanks for the gas tank photos.I went into the shop and made one for my rear rack on my trec.It is made from1/4 inch thick pipe. Harleys Dad
Thanks to you both for the great ideas. I'm going to do some experimenting myself. Doc, is that 1/4" stelel pipe? Did you also use silver solder? I've been trying to come up with something for my Worksman paperboy... a cylinder to fit between the top forks. I'm picturing a tennis ball can where the end comes off and can go back on again... solder it shut after the filler and fuel line are in place.
As I recall one I had about a hundred years ago it was a heavier metal than a juice can and had smooth walls. Longer and more narrow... kind of like the opening in my Worksman frame, methinks! Now I'm wondering what I can use to make an angled fill tube & cap. I think I will drill a hole in the end bottom for the fuel line and use a regular shutoff valve... drill the hole a little small, screw in the valve and solder it up. Doc, what did you do for closing up the ends of the pipe?
Can different metals be mixed using silver solder? I'm wondering if I had a fill cap of tin/steel and had an angled extension of copper to the can (steel) would there be a problem? Lots of fittings are available in copper. Thanks for this great thread... I think it is the answer!
Silverbear
")
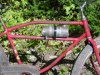
") I have that same rear rack on my daily rider..I'm interested in seeing how you fasten it down.
I have that same rear rack on my daily rider..I'm interested in seeing how you fasten it down.