Point Beach gets an EZM kit.

GoldenMotor.com

scotto-

Custom 4-Stroke Bike Builder
Jun 3, 2010
6,505
24
38
Ridin' inSane Diego, CA.
You've got to get some "along the way" pictures..(of your progress)

Where did you buy your 4stroke kit?
I have been saving and want to buy a complete 4 stroke kit, with the EZM clutch already installed (straight out of the box).
Anybody have some suggestions?

And my other question is: in a year or so, if I try to build a harbor freight 4 stroke motor, can the EZM trany fit on that?

I like what I'm reading about your build can't wait to see the pictures.
I concur.......pics are in order Dan.....let's see some ;)

And too answer a question or two gokart25, GearNut got his 4-stroke kit from me as I am an EZM dealer near him. The Kit does come with the EZM tranny bolted to the engine so it's ez to install. And yes, the EZM's bolt-up to the Harbor Freight 4-strokes just fine. Hope this helps.

dnut
 
Last edited:

GearNut

Active Member
Aug 19, 2009
5,104
11
38
San Diego, Kaliforgnia
My kit did have the tranny bolted up to it, but everything else was very well packed up in bubble wrap and lots of styrofoam peanuts.
Today I am working out the details of chain alignment. With the rear sprocket bolted up to where the engine is happy the chain drags on the upper and lower chain stays.
With the sprocket bolted up to where the chain is happy the engine will not slide over to the right enough to allow for proper chain alignment. The EZM's output shaft bracket hits the seat post tube. I am going to have to use only one bolt on each side of the front engine mount plate bracket to allow the engine mount plate to slide back far enough to allow the output shaft bracket to fit completely behind the seat post tube (not where it is supposed to be according to the instructions). Then the air cleaner will be up against the seat post tube and not allow easy access for maintenance. Also the choke lever will be buried up against the two cantilever frame tubes. That I can heat and bend to point another direction though. The air cleaner cover may end up getting quite a chop job just to get it all to fit.
(Edit: maby I will somehow get it to fit in front of the seat post tube? Don't know if there is enough room between the cylinder head and top tube for that.)
The Point Beach is a nice bike to motorize, but does not play well with the EZM kit thus far. Perseverance will prevail, so long as welding on that aluminum Point Beach frame does not become a necessity (I doubt it).
Pictures will be made and added to the previous threads.
Any free time I have recently is spent with the kit in hand instead of a camera in hand.
Sorry I am getting impatient with it.
I wanna ride! :D
 
Last edited:

GearNut

Active Member
Aug 19, 2009
5,104
11
38
San Diego, Kaliforgnia
I fixed the mounting issues (super easy), but definitely now have an air cleaner issue.


I am hesitant to cut and grind on the outer air cleaner housing, but I have no choice. There is no room for it any other way.
I hate to do anything that could void any potential warranty if the engine happens to be a lemon.
I did a quick search through the common vendors and nobody seems to sell a replacement cover. I need to do a more extensive search I guess...
 
Last edited:

The_Aleman

Active Member
Jul 31, 2008
2,653
4
38
el People's Republik de Kalifornistan
Wow GearNut, no wonder you're not done building it yet! I thought the carrier was supposed to rest _on_ the seat tube, as it does on my brother's bike. Even with more room than you have, my brother and I had to chop our aircleaner housings pretty good to make it fit. We both had to cut off the choke levers on our builds. We ended up using the SBP filter instead. Also, don't worry about using one bolt at each corner of the mount. My brother's is set up that way, and the mount never moves. As long as the mount blocks sit flush on the frame, you're good to go.

I have an idea for your aircleaner housing. Maybe you could get 1-2 of the AGK high-flow elements (the aqua-colored filter), or just an extra stock filter, and use a bit of pantyhose to keep it in the filter box. Just a thought. I don't think you have enough room for the SBP filter, so your options are as limited as your space!
 

GearNut

Active Member
Aug 19, 2009
5,104
11
38
San Diego, Kaliforgnia
Yeah, it's a pretty tight fit in there. I should be able to get at least 3/8" forward/ backward movement out of it to accommodate chain tensioning. I do not want to run a tensioner/ guide if I don't have to.
Both blocks are custom ground/ filed/ sanded to fit as perfectly as I could get them to fit.
They should never budge.
I am wanting to butcher up another air cleaner instead of the one the kit came with.
Still looking.....
 

scotto-

Custom 4-Stroke Bike Builder
Jun 3, 2010
6,505
24
38
Ridin' inSane Diego, CA.
Actually, you have plenty of room for that stock air cleaner......more room than I had on either of my HS builds. On my 4G I had to take a half-round file to the cover as it was hard up against the seat tube. The thing you may not be realizing is the cover hinges at the bottom, so once it's installed you can still open it to clean or replace the filter element. The cover doesn't need to come off for servicing the element.

Now concentrate more on securing the bearing carrier and forget about the air cleaner. If it's really bothering you, I've got a used spare cover you can have.....just ask ;)

dnut
 

scotto-

Custom 4-Stroke Bike Builder
Jun 3, 2010
6,505
24
38
Ridin' inSane Diego, CA.
Here, this should make you feel better........


dnut

I fixed the mounting issues (super easy), but definitely now have an air cleaner issue.


I am hesitant to cut and grind on the outer air cleaner housing, but I have no choice. There is no room for it any other way.
I hate to do anything that could void any potential warranty if the engine happens to be a lemon.
I did a quick search through the common vendors and nobody seems to sell a replacement cover. I need to do a more extensive search I guess...
 

The_Aleman

Active Member
Jul 31, 2008
2,653
4
38
el People's Republik de Kalifornistan
My clearance problem was mostly because of the SBP jackshaft mount. It cut into a lot of the space the airbox needs to hinge open. I cursed that thing many times when the carb I had at the time started acting up. It was impossible to get my wrench in there and remove the carb, and I was getting pretty mad by the 8th or 9th time I had to do it! I ended up replacing the carb and the airbox.

GearNut, notice on Scotto's bike his carrier rests on the seattube. My brother's does as well. Is your seattube too wide to let you do that?

Edit: also GearNut, don't be afraid to run an idler. With the Q-matic, the idler is not under anywhere near as much pressure as it is with a HT build.
It's never really stressed and will wear a very long time. My brother has never had an issue with his. He still runs a kit idler and it's 2 years old, still looks great.
 

Attachments

Last edited:

GearNut

Active Member
Aug 19, 2009
5,104
11
38
San Diego, Kaliforgnia
GearNut, notice on Scotto's bike his carrier rests on the seattube. My brother's does as well. Is your seattube too wide to let you do that?

Edit: also GearNut, don't be afraid to run an idler. With the Q-matic, the idler is not under anywhere near as much pressure as it is with a HT build.
It's never really stressed and will wear a very long time. My brother has never had an issue with his. He still runs a kit idler and it's 2 years old, still looks great.

With the bearing carrier positioned anywhere near the left outer side of the seat post tube (like where scotto-'s is) the chain run interferes with the chain stays, especially the seat stay. I had to position the bearing carrier behind the seat post tube in order to allow the unit to slide to the right enough to keep the chain run off of the chain stays. I really would have liked to position the engine forward enough to put the bearing carrier in front of the seat post tube, but the mount plate will not accommodate that much forward movement. To give you an idea of how far forward it would be sitting, the engine block would be up against the front down tube with 1/8" or so clearance.

If I do end up running a tensioner (and I most likely will have to) it will be mounted to the bearing carrier.
Something like this one:
http://www.choppersus.com/store/product/974/Chain-Tensioner-Derailleur-Mt/

Edit: The_Aleman, I like your oil drain hose idea.
 
Last edited:

scotto-

Custom 4-Stroke Bike Builder
Jun 3, 2010
6,505
24
38
Ridin' inSane Diego, CA.
With the bearing carrier positioned anywhere near the left outer side of the seat post tube (like where scotto-'s is) the chain run interferes with the chain stays, especially the seat stay. I had to position the bearing carrier behind the seat post tube in order to allow the unit to slide to the right enough to keep the chain run off of the chain stays. I really would have liked to position the engine forward enough to put the bearing carrier in front of the seat post tube, but the mount plate will not accommodate that much forward movement. To give you an idea of how far forward it would be sitting, the engine block would be up against the front down tube with 1/8" or so clearance.
Look closely grasshoppa........this is how ya do it....


URL=http://imageshack.us/photo/my-images/607/img1258p.jpg/]
[/URL]
URL=http://imageshack.us/photo/my-images/215/img1259h.jpg/]
[/URL]

One other important factor to consider is where your chainline is now......you're gonna be running the chain awefully close to the rear tire. I'm running fat 2.5" Hookworms and the stays on my frame are larger in diameter than your Schwinns. You gotta get it right before you bolt everything down for good, so consider the size tires you'll be running as well. Just a little extra insight;)

dnut
 
Last edited:

GearNut

Active Member
Aug 19, 2009
5,104
11
38
San Diego, Kaliforgnia
Tonight after work I decided to stop messing with the spring tensioned chain (loose ends of chain hooked together with a spring, before cutting it to proper length) and cut it to length instead. I quickly discovered that the rear sprocket is slightly warped.
All the messing around that I did with my laser chain alignment tool was for not, a complete waist of time. The warped sprocket skewed how the laser pointed down the chain run. I now have plenty of air cleaner clearance and the bearing carrier actually clears the seat post tube. All is good in bonehead land now! it actually closely resembles scotto-'s positioning. I am going to run it how it sits right now until the chain stretches a bit, then mess with alignment later if necessary. No, the sprocket is not warped enough to cause the chain to jump off.

Air cleaner clearance.


Clearance between seat post tube and bearing carrier.


and

 
Last edited:

GearNut

Active Member
Aug 19, 2009
5,104
11
38
San Diego, Kaliforgnia
This morning I started pulling my hair out trying to figure out why the chain just would not roll smoothly around the clutch sprocket. If I leave the chain all sloppy loose everything is good. If I tension it to 1/2 to 3/4 inch free play it binds up.
Chain alignment is good.
FINALLY I figured it out! I double checked the mount plate for dead level as measured from left to right. It is off by 1 degree, tilted to the left.
I checked the bearing support for plumb. Zeroed the bicycle by measuring the seat post tube and adjusting my rig to set it at exactly 90 degrees straight up and down.
Next I measured the bearing support. It has a 4 1/2 tilt to the left. The clutch sprocket must be crooked too as the output shaft is held true by the bearing support.
So now I either twist the EZM back plate to correct for this angle or I shim under the left side motor mounts to raise that side of the engine. I am wanting to do the twist rather than the shimming.
Any EZM gurus out there, what do you think of this idea?


Oh yeah, more pictures:

Chain to seat stay clearance. Also shows chain to tire clearance, about 5/8 inch.


Same looking the other way.
 
Last edited:

scotto-

Custom 4-Stroke Bike Builder
Jun 3, 2010
6,505
24
38
Ridin' inSane Diego, CA.
The chainline looks well out of whack in the pics, unless you're using a fish-eye lens. Looks like it's bending alot in the pics. I would tweak the bearing carrier before shimiming anything. Just make sure the engine is straight in the frame and the rear wheel is the same. Then line them up as best as possiblle.......you may need to flip the sprocket and/or use some spacers to true your alignment.

Make certain you're using #41 chain or you're sure to have problems.

Be patient and don't lose your cool.......you will prevail and you know it.

dnut
 
Last edited:

killercanuck

New Member
Dec 17, 2009
1,748
6
0
47
Wallaceburg ON
little bowing, you may have to get some crud on your tire... especially if the engine sprocket isn't happy. ferfeik! only another days work... get'r done. gl. :)
 

agk

New Member
Oct 2, 2010
151
4
0
Santa Barbara CA
I can relate to all the measuring and hair pulling. I had the same problem on a fairly recent build. I measured everything multiple times trying to find the problem. This bike was custom built on a jig and everything measured square and perfect. I finally discovered the clutch sprocket was not in proper alignment even though everything else appeared to be. I never came up with a fix for the problem. This bike just sits in my garage. It's rideable but the misaligned sprocket causes excessive chain noise. I'll be watching this to see what you come up with.
 

GearNut

Active Member
Aug 19, 2009
5,104
11
38
San Diego, Kaliforgnia
Oh I will prevail! I have been wrenching on motorcycles nearly non stop for 28 years, this is the first time I have made a log (blog?) of all the typical glitches that come along with a retrofit assembly.
I am also currently dealing with some physical issues right now and I know that the prescription meds are messing with my head as well, hence some of my boneheaded procedures or lack of a realization of them until I go back and double check my work.

The chain line does look like it is bowed in the pictures, but watching it track with the sprockets (taking into account the slight wobble of the rear one) and sighting along it's length, it is very straight. I even did a string test to be doubly sure as I cannot trust the laser in this application.
The chain (it is a #41, came with the kit) seems to have some issues of it's own as well ....... but I am just going to stop picking nits now and just ride the darned thing tomorrow. I am sure that after a little break in period things will loosen up quite a bit and what does not fall into place I will tune and tweak into place as needed.

Tonight I installed the pedal crank arms and pedals, muffler, throttle, kill switch and gas tank. Tomorrow it gets gas and oil! :D
I am far from done with it (are we ever?) but it will be good enough for a maiden voyage.
Pictures will be taken as well.
 

killercanuck

New Member
Dec 17, 2009
1,748
6
0
47
Wallaceburg ON
Oh yea, better to beg for forgiveness than to ask permission. Taking her for a boot and seeing what doesn't click always does the trick.

If the drive sprocket still gives you a hard time, take a dremel to the sprocket teeth to smooth her out. Nothing major, just a little 'smoothing' will do the trick. Take out those "Clacks" at speed, know what I mean?
 

GearNut

Active Member
Aug 19, 2009
5,104
11
38
San Diego, Kaliforgnia
I came into the house for a lunch break.
This morning I messed with the chain alignment some more and tried to correct the engine for any yaw that might have been there or in my imagination. It seems like every time I mess with it it is perfect when I am done. I go back to it later and look at it again and it needs a little adjustment. Is this what OCD is like?

For the time being I am fabricating a bracket to anchor the bearing support to the seat post tube.
 

GearNut

Active Member
Aug 19, 2009
5,104
11
38
San Diego, Kaliforgnia
Issues with the chain line are as resolved as they are going to get right now.
I corrected a little bit of yaw on the engine mounting, twisted the EZM backing plate a teeny bit, and decided to run 1" chain free play. Yeah it's on the loose side... but nothing horrible.

The bearing support anchor bracket is done and installed. It will get painted white after the maiden voyage, and once again I say..... tomorrow!?

Anchor bracket in raw form:


Hot off of the welder:


Slotted to allow engine movement for chain tension adjustment:


Installed:
 

GearNut

Active Member
Aug 19, 2009
5,104
11
38
San Diego, Kaliforgnia
Oil oil everywhere!
I measured out 8 1/2 oz. (as instructed) of HondaPro4 10-40, poured it in, and it overflowed.
I just let it sit there for a while and drool out what it did not want, about 2 1/2 oz.
I wiped everything down twice and went out to get some fresh gas.
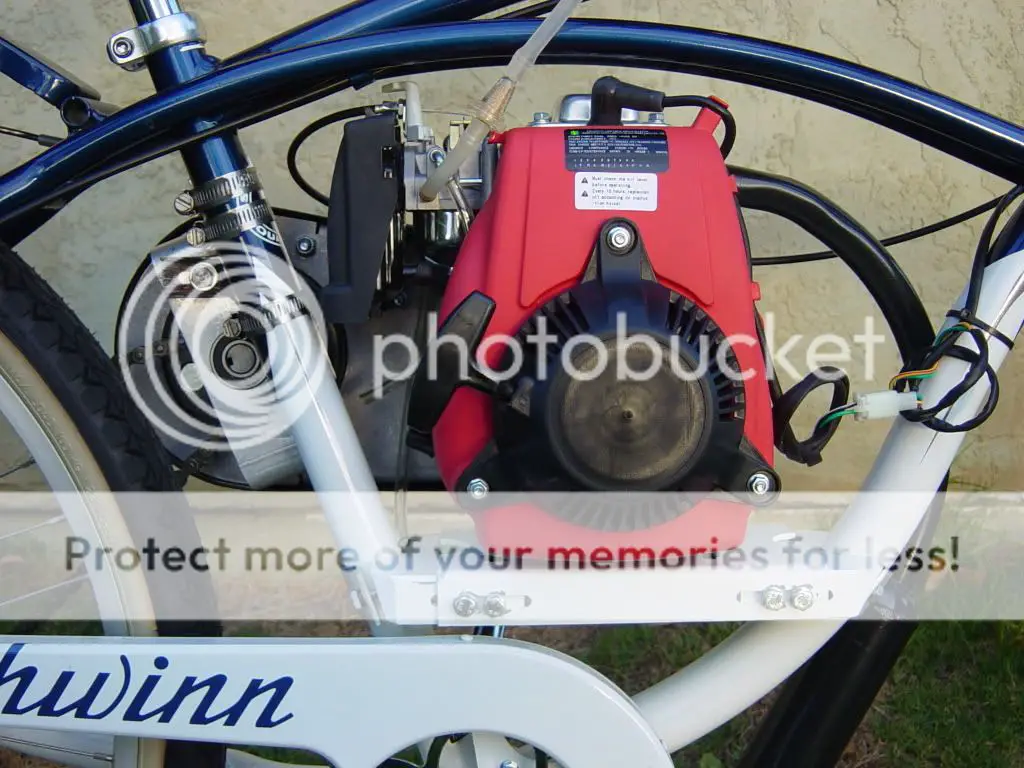
Filled the tank about 1/3 full, set the choke at 3/4 closed and it fired up on the 3rd pull.
Such a nice and quiet little engine it is!

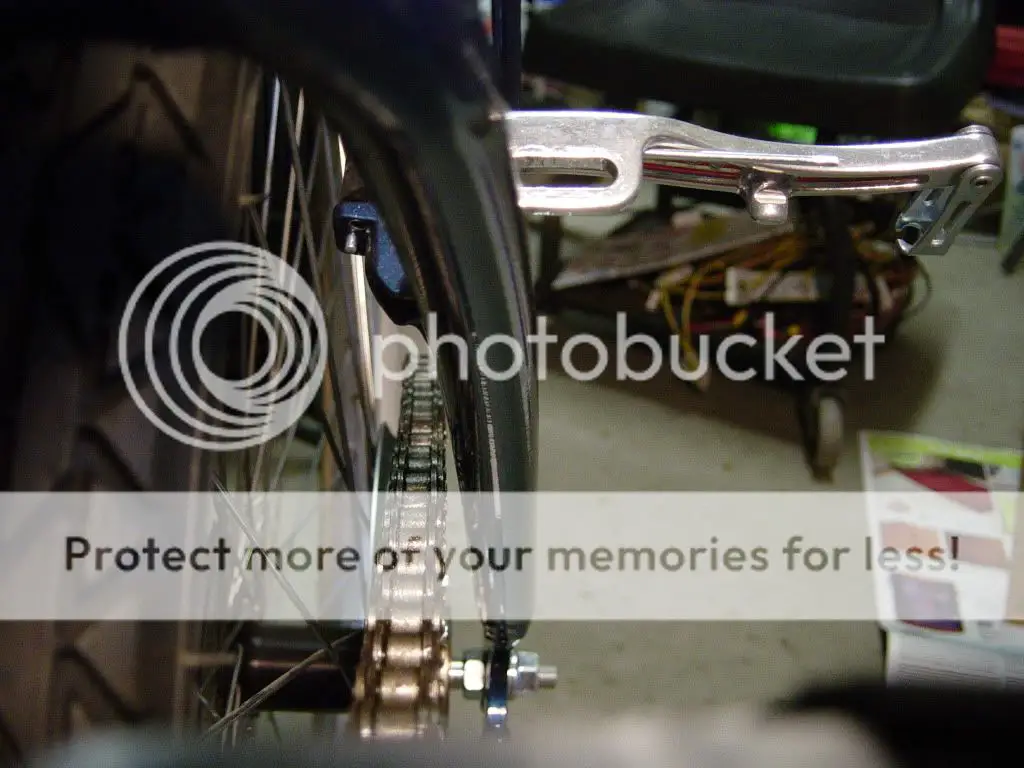
Now that I can watch the engine turn the chain and rear wheel on it's own, my chain alignment fears have come to rest. I messed with the chain alignment some more after it derailed. I am sooooo very glad that I installed that old metal spoke guard! It did it's job and no harm was done to the Staton rear wheel. The chain itself has a horrible bow in it. The rear sprocket moves back and forth less than 1/8" if even that much. The chain snaked all over the place. I thought I saw it before when I initially fiddled around with it, but I hoped for the best and tried to adjust it out. You cannot adjust out a crookedly manufactured chain.
I reset the engine placement to get the best possible compromise to keep the chain on the sprocket, and took her for her maiden voyage, slowly.... very slowly.... just in case the chain jumped again. It did not, but it still "popped" a couple of times. I am not going any further on that issue until I can afford a quality chain for her. I am not going to risk damaging anything on it due to the chain misbehaving.
There are still lots of things on the to do list in the mean time.

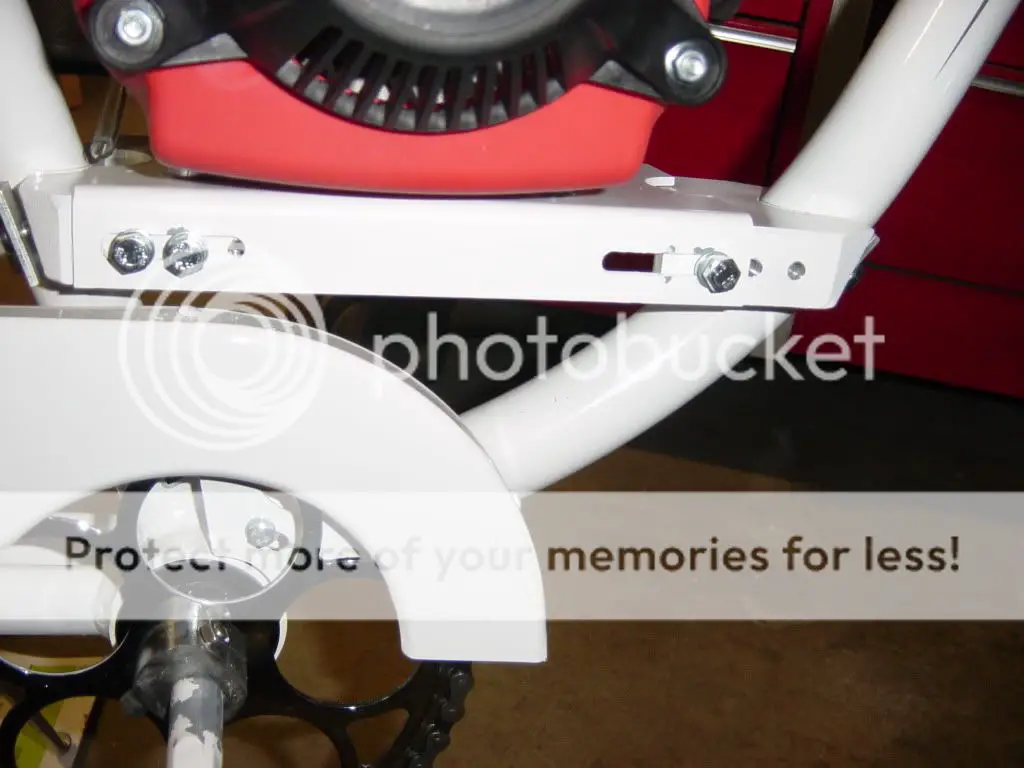
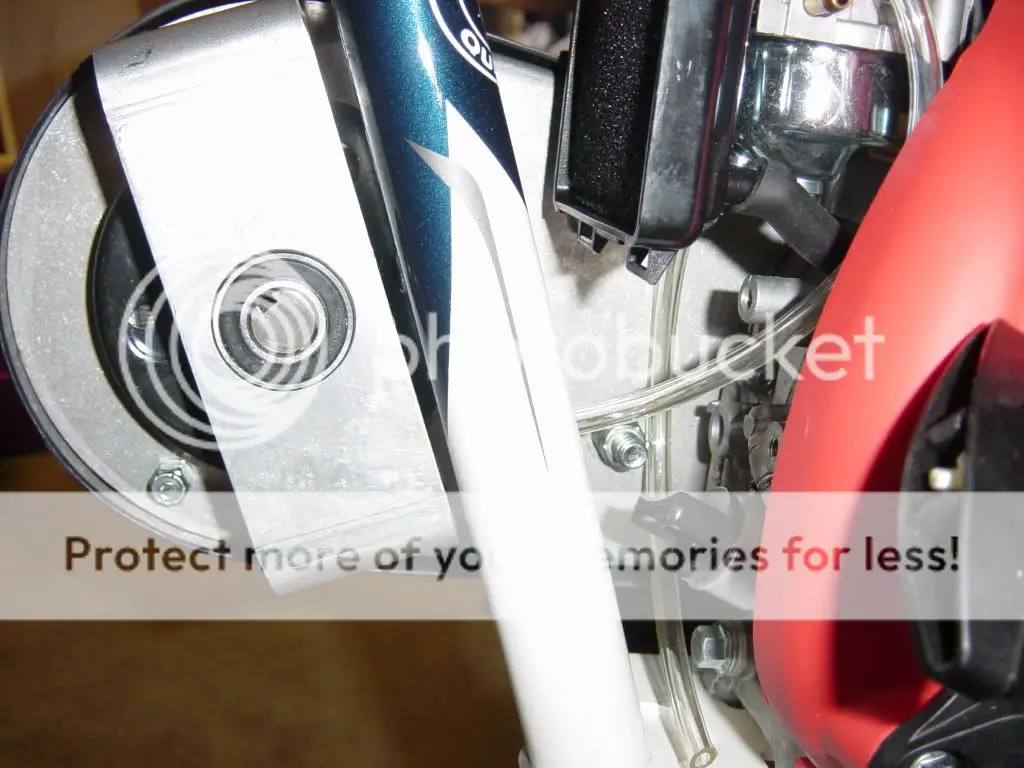
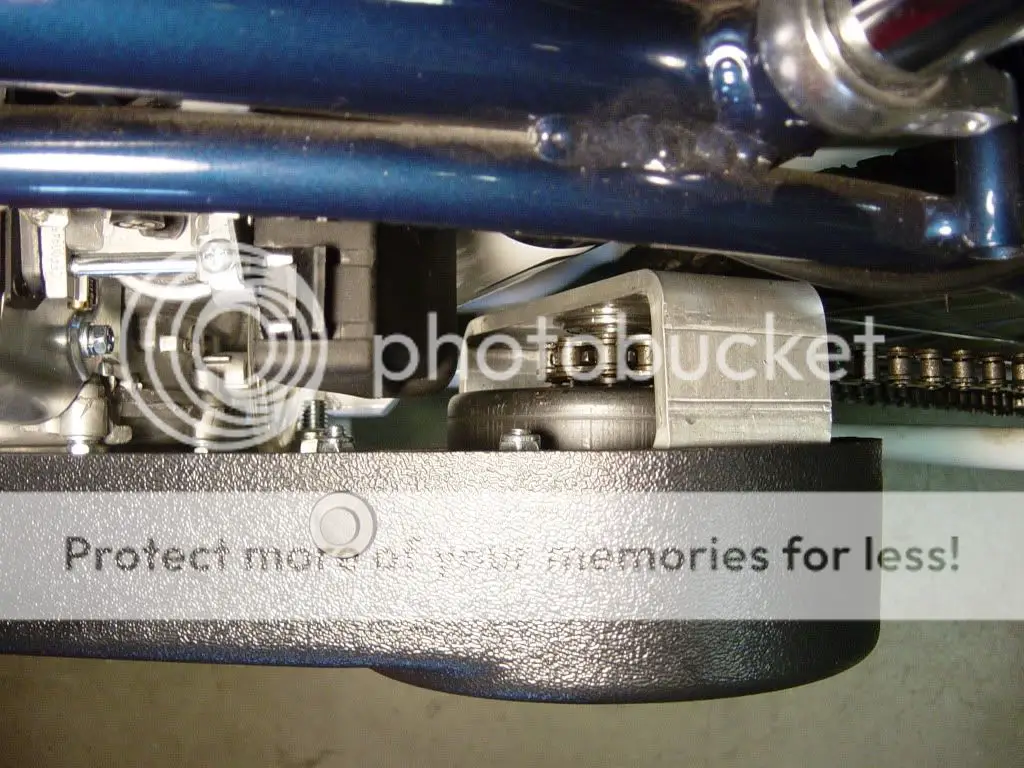
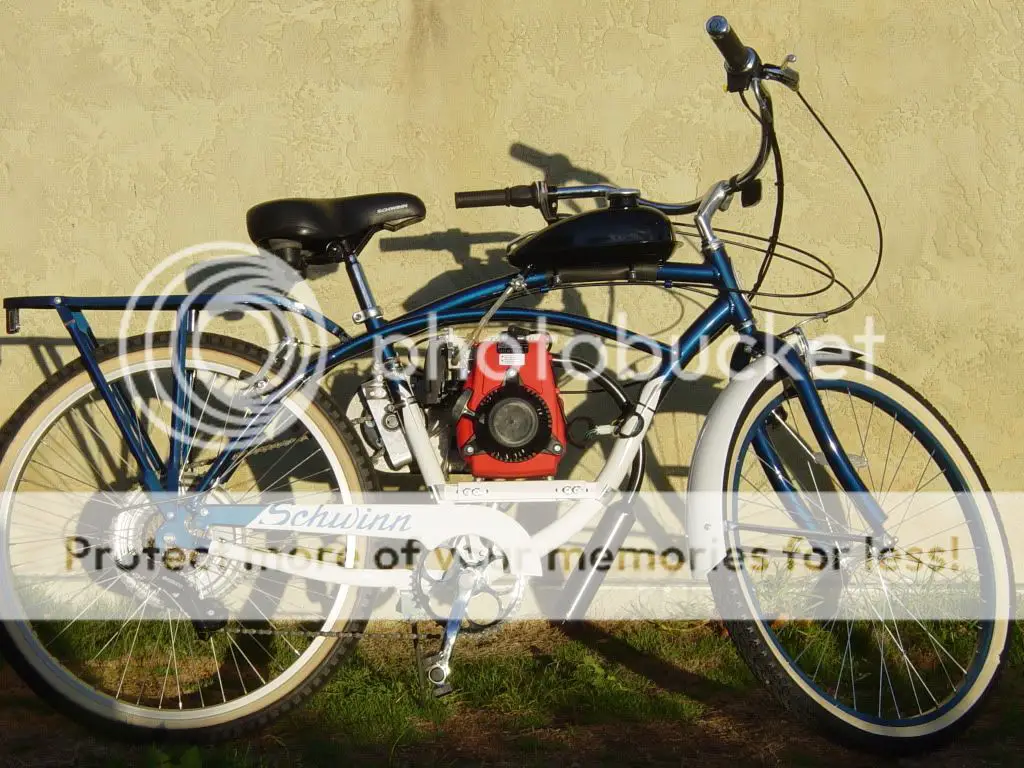
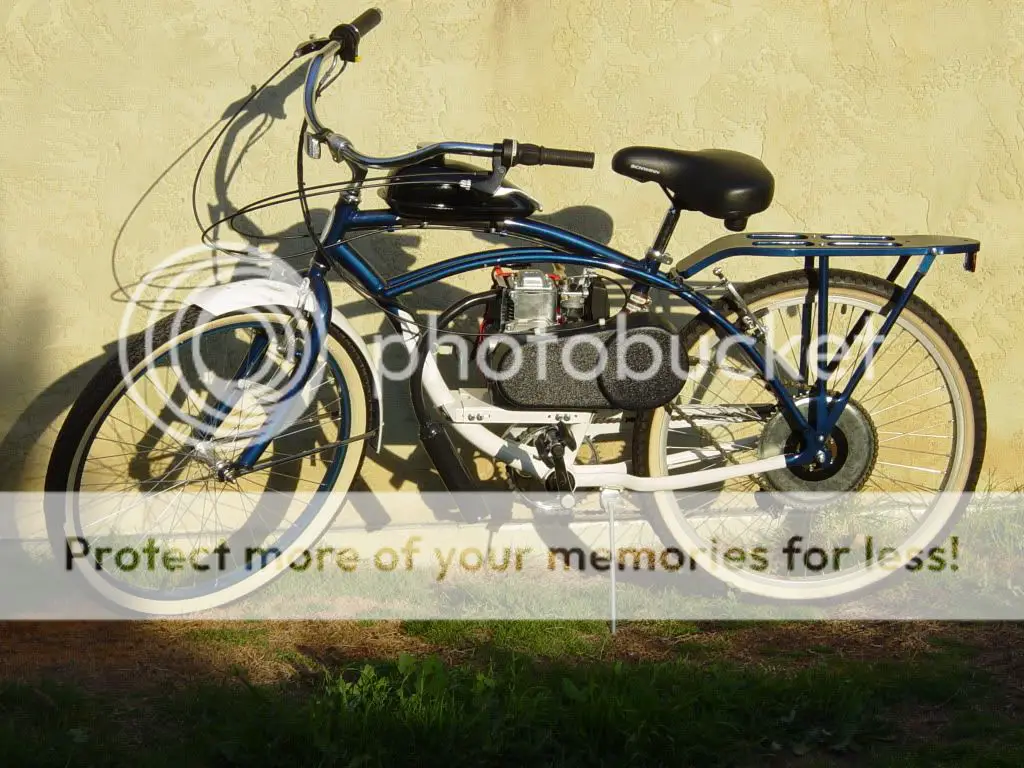
The build as it sits today:


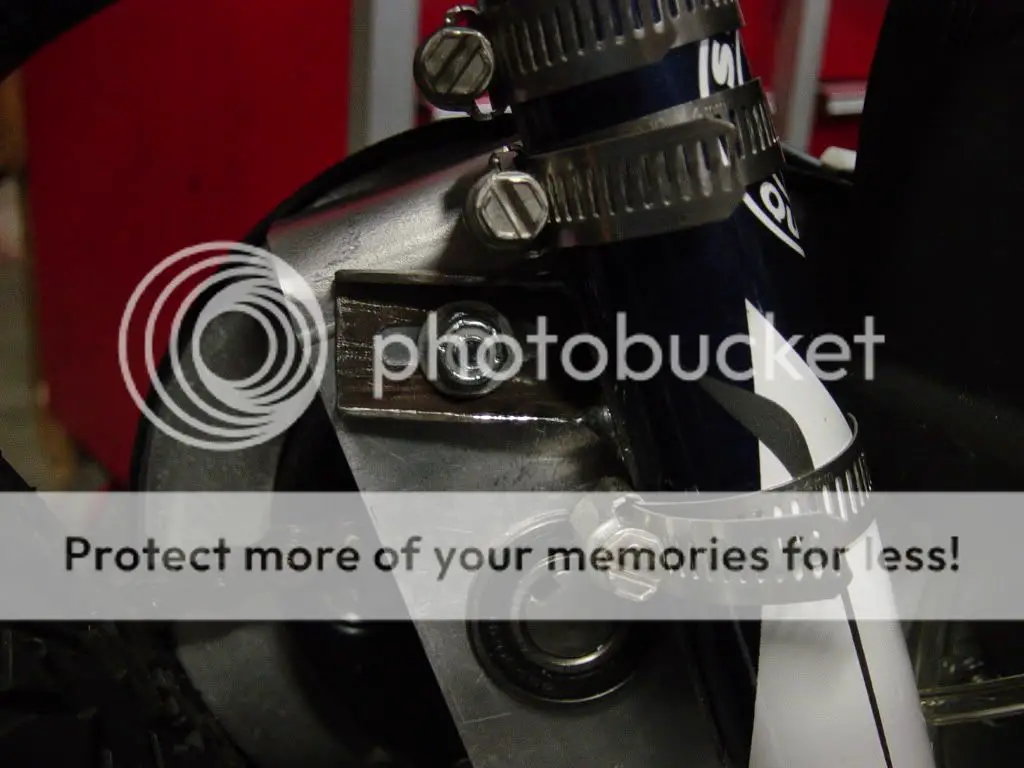
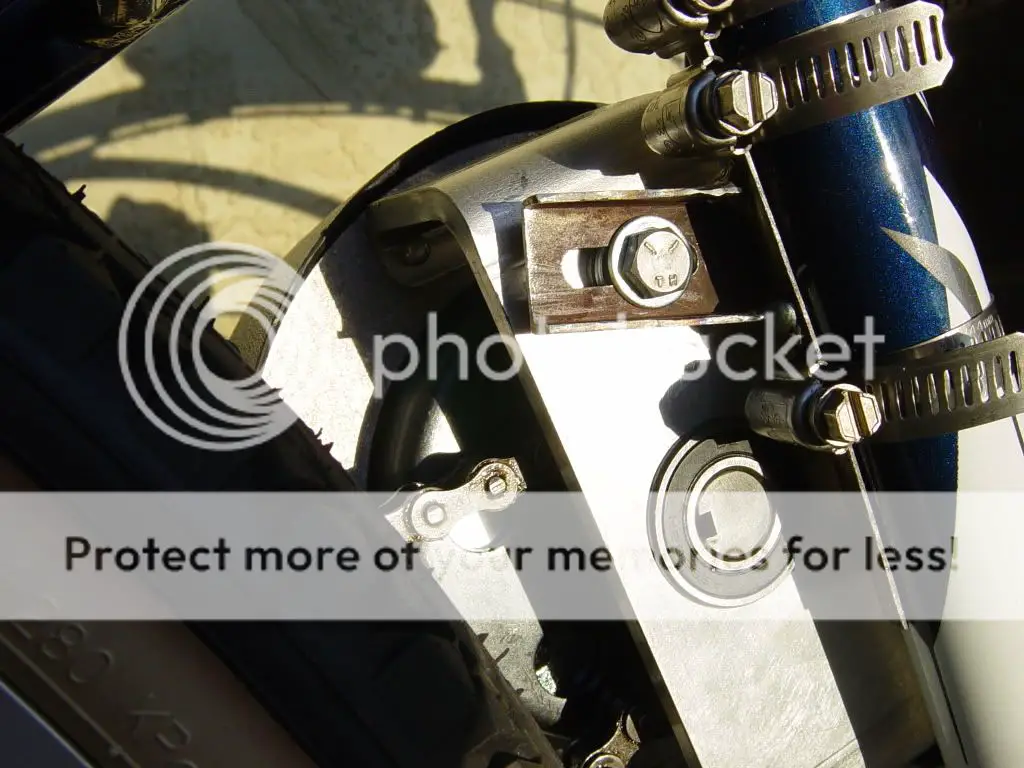
Here you can see how far over I moved the engine to try and make the snarky chain happy. There were no washers in there when I first installed the support bracket.


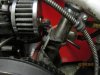
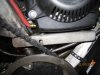
A little fuzzy, but that's as good as my camera could do:
 
Last edited: