


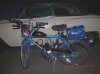
I installed the ZB BLACK SLANT 80CC MOPED BICYCLE MOTOR ENGINE KIT being sold on E-Bay on a Schwinn Mirada MTB Mountain Bike. Installation was a bit tedious.
The engine came with an installation manual. There is a manual online on the manufacturers website titled "User Manual". It should be called an installion guide. I thought that the supplied Installation Manual would be the correct document to follow to install the engine. I took it for granted that they were the same. That was a big oversight on my part. The manual that came with the engine is incomplete and has one major error. I have a nice shop so none of the drawbacks were insurmountable. However they should have mad it obvious and explicit about not using the supplied manual for installation.
The supplied manual does not have a comprehensive explanation of the parts, tools, and methods. Being an amateur bicycle mechanic and having worked with small engines occasionally for the past forty five years gave me the experience and knowledge to complete the various tasks such as breaking, shortening, and reattaching a chain as well as other fairly common procedures that assume the person installing the engine knows a bit about bicycles and small engines.
The biggest error in the supplied manual was showing installation of the sprocket bolts from the back through semicircular backing plates. The bolts supplied would have needed to have been cut off to clear the frame. The instructions in the online Users (Installation) Manual shows the correct way to do it.
The supplied manual shows the sprocket being installed with the tire on the bike. I figured it out that it would be far simpler to remove the tire right off the bat.
The supplied manual does not adequately explain how to attach the kill switch wires. It gives the impression that the green wire is grounded to the chassis and the yellow/red wire is attached to the white wire which does not have a mating connector. Neither manual tells exactly what to do with the white wire except that the supplied manual says that it can be used for auxiliary power (0.5 amp max at 7.5 volts, but I have not tried that yet).
They should update the online manual to reflect that.
The supplied manual does not explain that the pedal should be adjusted out to clear the engine in the event of conflict. This adjustment is not always available on some pedals. In order to adjust my pedal out I had to take it off and beat the tar out of it to get it to clear.
The chain idler pully is not really a tensioner. I inserted a short length of tubing through the bracket so the pully could slide freely in the slot and used a cot spring suspended by a small length of chain attached to the frame above to keep tension on the chain at about 15 pounds. It works very well and does not loosen or need periodic adjustment. It also eliminated noise from the chain. I used a Nylock nut on the spindle. The pully is nylon and I suspect it will not last a long time, however it shows no wear after the first hundred miles.
I switched several of the nuts to Nylocks to prevent loosening. That has worked very well. I haven't had any problem with the nuts loosening on the motor mounts.
I broke the clutch handle tying to spread it to go over the handlebar. The diameter of add on handlebar risers I have is slightly large. The clutch handle is somewhat fragile. In retrospect I should have reamed it instead. I would caution anyone purchasing the same engine not to attempt to spread the clutch handle. I ended up drilling and screwing it in place. I greased the clutch linkage and lubricated the cable but it was still very stiff.
The accelerator gave me some trouble. Although the instructions did say to turn the throttle slide so it would fit in the carburetor body it did not elaborate that it would go in backwards but would seat at the top fully open. I had a heck of a time getting it to start like that but when it did, it took off like a rocket. At first I forgot about the kill switch. That would have helped. I tried to pull the plug wire on the fly until I remembered the kill switch. I discovered the problem when I went back over the carburetor.
Whoever came up with the term "it flys like a bat out of ****" must have put one of these engines on their bicycle. It is really quick and climbs hills like they are not even there. It is kind of startling at first, (particularly when the accelerator sticks wide open). Thank God for the Kill switch.
I would suggest that anyone who purchases one of the engines use the online manual and not the one supplied with the engine.
It's a fast engine. It's not a toy. It has some real giddyup and go. It could cause some real harm without due caution. I just got through the break-in period and so far so good. The oil mixture during break-in is specified at 16:1. Now that I'm using the 40:1 oil mix specified after the break-in period the bike runs even faster.
It seems to be fairly stout. I look forward to many happy trails.
After all was said and done, the price was reasonable for the product supplied.
Fred
Attachments
-
 518.7 KB Views: 1,055