My (re-)Build Journal

GoldenMotor.com

Dymaxion

New Member
Jan 1, 2010
66
0
0
Michigan
My (re-)Build Journal *Update: DONE*

I built up my first bike about 1.5 years ago over the winter, drove it very little during that summer then we moved to a new home and the bike got put aside for some time. Recently I took it out and it was running OK, not great. A few weeks ago I pulled the head to take a look and found some scoring and a chunk of chrome cylinder wall gone. Looks like metal around the sparkplug hole in the cylinder dome flaked off and caused the havoc. So that started the rebuild project, but if I was going to do that I figured I should fix all the other things I was never happy with.

I am going to use this thread as my build journal to keep track of what I want to do to the bike, and the progress I make.

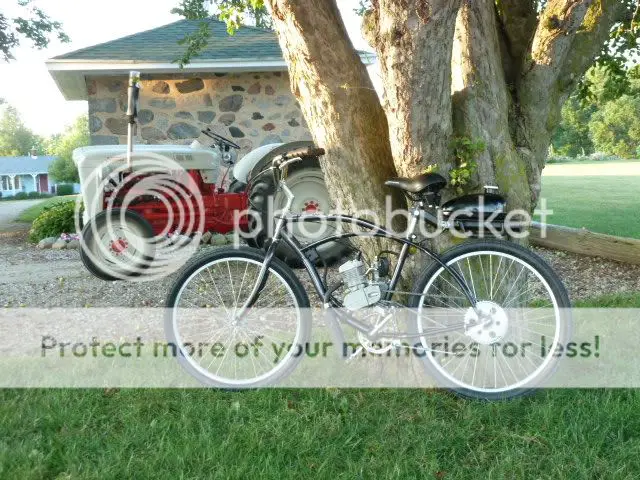
Bike is an el-cheapo walmart Schwinn DelMar.
Motor is an el-cheapo SkyHawk GT-5.

Here is the list of improvements and changes for the bike:

-- New top end due to cylinder and piston damage
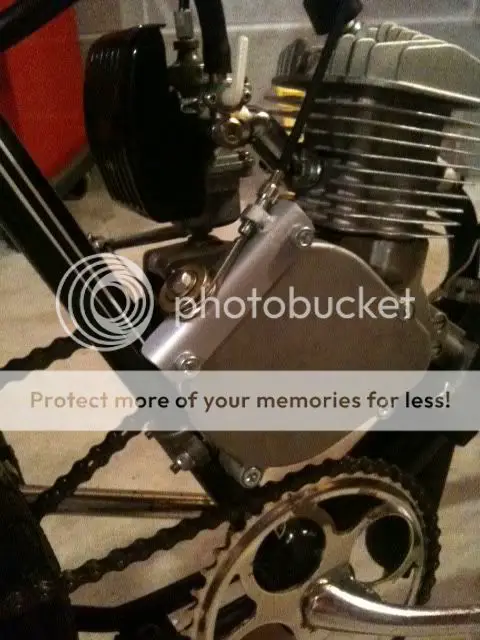
-- Inspect motor and replace cheap hardware
-- Improve the motor mount as the motor sat with too much forward cant
-- Improve rear wheel sprocket as it was not true - had a slight wobble
-- Replace throttle as the plastic original is junk and cracked
-- Wire up a kill switch as I never got around to that the first time
-- New rear hub or wheel as the current one "clicks" and the bearing cage tore up and scratched the race
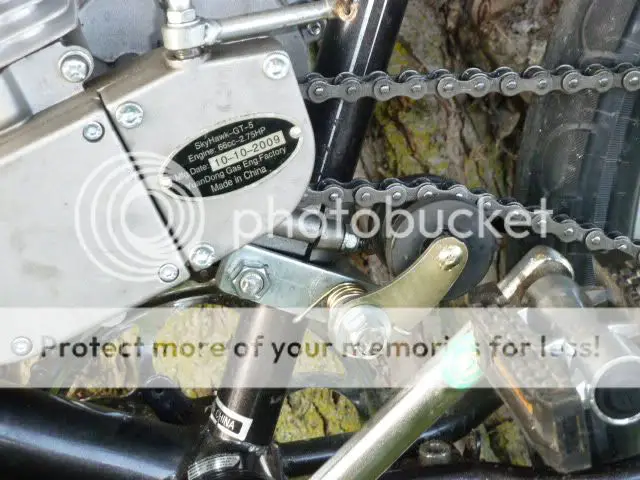
-- Add a chain tensioner as I originally tried to go without. Worked OK but would like a tensioner long term.
-- Improve tank mount as the original rear rack on the bike where I mounted the tank is too flimsy
-- Narrower tires - the original tires had occasional chain rub issues
-- Shorten cables - the throttle, clutch and brake cables are way too long
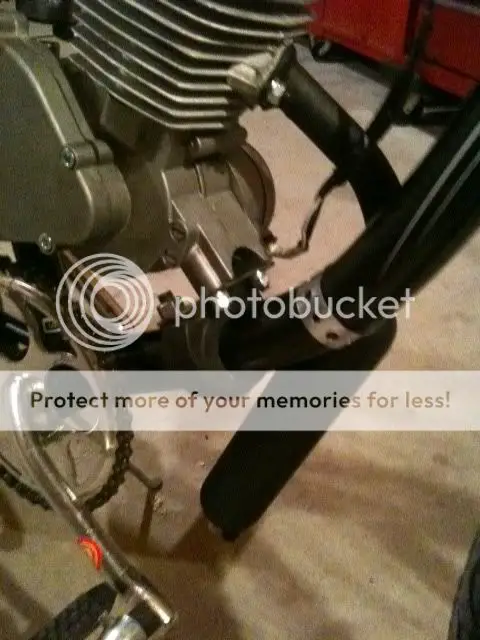
-- Add a support to the muffler
-- Add a fuel filter
-- Get it running smoothly - tuned right with no leaks

That is all I can think of right now. I'll add more as I think of it. I have already stared the project a week or so ago, so I will post a few updates shortly to get this journal current.

Happy Motor Bicycling!
 
Last edited:

Dymaxion

New Member
Jan 1, 2010
66
0
0
Michigan
Broken Stud

Last night I was swapping out the hardware for better quality hardware and one of the front mounting studs broke off flush with the motor. I had an easyout so I drilled the pilot hole an lightly tapped the extractor into the hole. As soon as I started to turn the extractor, the tip broke off in the original stud! How I have a stuck stud with a hardened steel piece in the middle.

Looks like I need to find a machine shop...:-||
 

Dymaxion

New Member
Jan 1, 2010
66
0
0
Michigan
Broken stud update

After calling several bigger shops that wouldn't touch it for less than the cost of a replacement motor, I found a small-local-polebarn-next-to-the-house type of machine shop who will do it for $20. Man do I love small shop owners doing what they love! Only problem is a 1-2 week wait.

Time to move on to the non-motor items on the list.
 

Dymaxion

New Member
Jan 1, 2010
66
0
0
Michigan
Wheels and tank

I laced a new rear hub onto my rims last night. I have never built a wheel and the process went faster and easier than I expected. I also picked up a Sportsmans hub adapter and sprocket. This looks awesome! I recommend the adapter; the quality is impressive.

I also found an aluminum rear rack that attaches to the seat post which I am going to try for a more sturdy tank mount. I drilled four holes for the tank mounting studs. Looks like it will work nicely.
 

Dymaxion

New Member
Jan 1, 2010
66
0
0
Michigan
Woot! The machine shop called and he got the broken stud out.

Here is what has been done so far:
- Rear wheel rebuilt with Shimano e110 hub and is spinning true
- New tubes and tires
- Mounted clamshell sprocket adapter and sprocket from Sportsman
- New aluminum throttle from SBP installed
- Mounted gas tank to new rear rack. The rack mounts to the seat post and I added a bolt through the seat post to make it more solid.
- Milled head and cylinder surfaces (wow - they are really not very flat from the factory)
- New piston, rings, cylinder installed
- Replaced all hardware on the engine with hardware kit from SBP

So bottom line - the motor is buttoned up and ready to go on, and the bike is ready for it. Tomorrow I will get it mounted, cables run, and hopefully running!

I'll put up some pics as soon as it is all together.
 

Dymaxion

New Member
Jan 1, 2010
66
0
0
Michigan
Didn't get as far as I wanted today. Super hot (90's) and had family activities take me away for a good portion of the day, but here is what got done today:

- Motor mounted (used a hockey puck to make the front mount)
- Throttle installed and cable in place
- Fabricated a "clutch roller" which really looks great! It attaches to two of the clutch cover bolts. This took a lot longer than it should but I am a brazing rookie.
- CDI in place and wires soldered together (white wire cliped and sealed up so no accidental shorts)
- Fuel line connected and filter in place
- Carb and exhaust mounted (trying the o-ring for the carb as previously I used high-temp RTV which worked great but is messy to clean up)
- Added a strap to support the exhaust to the frame of the bike. Long term I would like to weld a support tab to the muffler but that will require much more bending of the exhaust.

I did not get to the clutch cable (which I need to shorten), and the chain and idler. Unfortunately I need to head out of town tomorrow so it will probably be Tuesday night before I can get the rest done. I cant wait to get it on the road.

Pics will follow once it's all together.
 
Last edited:

Kristof

New Member
Jan 21, 2011
232
0
0
Aliso Viejo, CA
Nice, I cant wait to get my project going as well. The worst part about these projects is the waiting time for parts, trying to make everything fit, breaking it in, and then tuning it. Ive got a long ways to go...I even have to put together the bike that is coming from walmart.com.
 

Dymaxion

New Member
Jan 1, 2010
66
0
0
Michigan
It's Alive!! Pics included

Late last night I had a chance to finish most of the bike and took it out on the first shake down run. Here are a few pics (sorry about cell phone camera quality):


Hockey puck front mount:


Snazzy clutch roller:


And the super slick rear hub adapter:


Since my original build was nothing but problems, I tried to improve the weak points this time around. The shake-down cruise was brief (and in the dark) but it ran well. Only a few issues - first the muffler end cap fell off and is a real pain in the rear to find in the tall grass on the side of a pitch dark road. But I finally found it. Next, the rear tire still has very little chain clearance. I need to see if a chain tensioner will help, or maybe skinnier tire. At one point I looked down while riding in the dark and a fire fly had splattered on the engine and the juice was glowing. When I glanced down, I thought there was a fire starting!!

I decided to give opti-2 oil a spin for this build from day one after reading much of the epic thread. I LOVE the lack of smoke and oil spitting out the exhaust. We'll see how it holds up.

Still more to do, but many of my original goals are accomplished. Here is what remains:
- clean up the wires
- fab a tensioner I am happy with
- fix the rear wheel chain clearance issue
- tune it up - seems a little rich with clip on top notch. Will probably try smaller jet
- wire up kill switch

Now I can't wait to take it for another spin tonight.
 
Last edited:

Dymaxion

New Member
Jan 1, 2010
66
0
0
Michigan
One step forward; two steps back

Good news / bad new sort of night. I went out to the garage tonight and had a little time to kill so I was tinkering on the bike ( cleaning up the cables etc) and decided to take it for a quick spin before the sun went down.

The good news is it is really running stronger - break in is going well as I only have about 5 miles on it so far. So I am about 1 mile into the ride and all of a sudden bad vibrations start, so I quickly stopped.

The bad news - I checked bolts before the ride but failed to check the rear sprocket bolts that hold it to the hub adapter and two of the three had worked lose and were gone. Looks like no major damage although the nice aluminum sprocket has a few gouges in it now. I will check the sprocket and hub tomorrow to make sure all is well.

Up until that moment though it was running like a dream.
 
Last edited:

Dymaxion

New Member
Jan 1, 2010
66
0
0
Michigan
RE-BUILD IS DONE!! Pics

My re-build is DONE!!!

After my little sprocket-flying-off issue, I got it put back together. No real damage.

I also put together a spring loaded tensioner today using the TSC rubber roller. I ran it for probably 5 or 6 miles tonight and it really was working well. The roller is quiet and much better than the chain slap I was getting running without.

Looks like I have accomplished all but one of the initial goals I set out when starting this project, and so far I am pleased with the result. The remaining goal was to get it running smoothly. It is four stroking a fair amount but I am still on the first tank, so I will drive it for a few more tanks before getting serious about tuning it up. Now I think it is time to ride this thing for a while.

Here is the bike and a shot of the tensioner:


ddesens

Member
Jun 27, 2011
173
0
16
New Port Richey, FL.
I also like your clutch roller and chain tensioner. Very, very professional looking. I think that is a great idea for a rear gas tank mount. I have the same mount but have not installed it yet. Very nice build you have done.--Dave