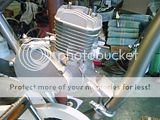
No start if no base gasket, no head gasket?

GoldenMotor.com

his196

New Member
Jun 19, 2011
99
0
0
Thousand Oaks, CA
Rebuilt this SkyHawk GT 2, from top to bottom, but won't start!
Could it be I've not left ANY room for compression by only using Spray on, High Temp, Copper Gasket maker?

48cc.
Totally replace/torqued all bolts with steel.
Dax RT Carb.
NO air leaks anywhere.
Great compression (using finger-over-the-sparkplug-hole method).
Good spark with Jaguar CDI/COIL.
Brand new Mag/Coil/CDI/Cable/Plug,with GOOD spark (against Head).
Boost Bottle.
32:1 Mix on 6th tank. Ran great before old CDI went out.
ALL electrical wired right.

I have:

Good spark.
Great compression.
Fuel line clear/clean/32:1.
No Air Leaks.
After trying to fire up, and plug check, I have a wet plug (fuel reaching piston), and plug shows (tan/brown) evidence of firing.

BUT....

NO base gasket, no head gasket, JUST copper spray on.

Could it be I've not left/allowed enough room for anything to happen?

All ports polished/ported.

Help!

~CB
 

Tohri

New Member
Aug 28, 2010
159
0
0
People's Republik of Massachusetts
Check to make sure you put your magneto rotor on the right way round. At TDC the keyway should be at the 1'oclock mark and the magneto rotor should be horizontal.

BTW, no head gasket is fine as long as you've lapped your cylinder and head. BUT I'd reccomend against 'no base gasket'. What you've done is raise your compression AND retard your port timing a full mm or greater. if anything, I'd put a 1/8" gasket at the base, you can cut one from Fel-pro gasket material from Autozone. if you go out to ride it now, you'll be dissapointed by it's performance because of the teensy openings your ports are now.
 

his196

New Member
Jun 19, 2011
99
0
0
Thousand Oaks, CA
No gaskets would mean higher compression. Since you feel you have fuel, fire and compression, I'd think a compression test would be in order (with a compression tester). Second since you tore it down, are you sure the magneto was installed correctly? See link.

Magnetto pictures by Ron-Becker - Photobucket
Hi Ron,

Yeah, fuel, fire, and compression, in fact, with the 'finger over the sparky hole' compression test, I've got more suck and blow than I've EVER felt before, which tells me it's great.

Mag is in properly too.

??
 

his196

New Member
Jun 19, 2011
99
0
0
Thousand Oaks, CA
Check to make sure you put your magneto rotor on the right way round. At TDC the keyway should be at the 1'oclock mark and the magneto rotor should be horizontal.

BTW, no head gasket is fine as long as you've lapped your cylinder and head. BUT I'd reccomend against 'no base gasket'. What you've done is raise your compression AND retard your port timing a full mm or greater. if anything, I'd put a 1/8" gasket at the base, you can cut one from Fel-pro gasket material from Autozone. if you go out to ride it now, you'll be dissapointed by it's performance because of the teensy openings your ports are now.
Hey Tohri, yeah mag is in right, and sitting pretty at 1pm (woodruff super glued in place even!).

I'm thinking that because I've retarded the port timing combined with the brand new Jaguar CDI, which retards firing a bit, maybe I'm over-retarded???

:)

Gonna try and put a base gasket back on the thing, we'll see...

It won't even start right now.

~CB
 

his196

New Member
Jun 19, 2011
99
0
0
Thousand Oaks, CA
Well, that's it, I'm toast!

Was re-inserting the steel head bolts, with the jug on, and must have over-tightened because, all of the sudden, she seized, and wouldn't crank at all, by hand/rolling.

Opened her back up, took jug off, and saw that on two of my base stud holes, where the studs get torqued down to bottom out, I had cracked the case/mount on the inside, and pushed aluminum right down onto the crank-wheel (that the rod is connected to).

This cracked/compressed alum. is pushing down on the wheels so hard, and is wedged in there, that it won't rotate a bit!

Crap!

So, now I get to take the bottom end apart completely, and try to get in there and fix it up...or maybe just buy a new motor! Ouch!

Any comments on tearing apart the lower end? I need a step by step.

Help is appreciated.

Thanks.
 

Al.Fisherman

New Member
Sep 9, 2009
1,966
5
0
Calera, Alabama
Well, that's it, I'm toast!

Was re-inserting the steel head bolts, with the jug on, and must have over-tightened because, all of the sudden, she seized, and wouldn't crank at all, by hand/rolling.

Opened her back up, took jug off, and saw that on two of my base stud holes, where the studs get torqued down to bottom out, I had cracked the case/mount on the inside, and pushed aluminum right down onto the crank-wheel (that the rod is connected to).

This cracked/compressed alum. is pushing down on the wheels so hard, and is wedged in there, that it won't rotate a bit!

Crap!

So, now I get to take the bottom end apart completely, and try to get in there and fix it up...or maybe just buy a new motor! Ouch!

Any comments on tearing apart the lower end? I need a step by step.

Help is appreciated.

Thanks.
First, when installing cylinder studs, I take the jug off. I never have it on.
Second..I use double nuts (one as a lock nut) 8mm 150-175 INCH pounds Max for cast aluminum is 204 INCH pounds. I use 150 then if I have to get into it, second time around is 175 INCH pounds. And use locking nuts.
Third..if you are not accustomed to torqueing, and I am,I use a INCH pound torque wrench. The cost would of save you all this trouble.
And finely here is a tutorial about tearing a HT down, I made.

http://s982.photobucket.com/albums/ae309/Ron-Becker/Chinese HT breakdown/

Looking at a case, you most likely broke out the bottom of the threaded hole...right?
If so, clean up what broke through, and anything in the case itself. When installing the studs, use locktite, this will hold the stud in place and will give a seal around the threads. DO NOT use JB Weld. Make sure that the studs are long enough, let sit overnight so the locktite will dry and seal. It doesn't matter if the bottom of the stud hole is open to the case. If need be get longer studs. I use RED locktite, it will take heat to remove then if need be. I would take something to measure the hole depth, like a drill bit. Take that measurement and measure the (4) studs and mark with tape. Only thread the studs as far as the tape.
 
Last edited:

2door

Moderator
Staff member
Sep 15, 2008
16,302
175
63
Littleton, Colorado
First, when installing cylinder studs, I take the jug off. I never have it on.
Second..I use double nuts (one as a lock nut)
Third..if you are not accustomed to torqueing, and I am,I use a INCH pound torque wrench. The cost would of save you all this trouble.
And finely here is a tutorial about tearing a HT down, I made.

Chinese HT breakdown pictures by Ron-Becker - Photobucket
Exactly the way it should be done. Al's method, if used, would eliminate a lot of stripped threads and fastener failure when it comes to cylinder and cylinder head fastening.
Thanks Al, for posting the double nut, cylinder off the case, suggestion. Now all we need to do is get rid of those stupid acorn nuts. :)
Tom
 

his196

New Member
Jun 19, 2011
99
0
0
Thousand Oaks, CA
First, when installing cylinder studs, I take the jug off. I never have it on.
Second..I use double nuts (one as a lock nut) 8mm 150-175 INCH pounds Max for cast aluminum is 204 INCH pounds. I use 150 then if I have to get into it, second time around is 175 INCH pounds. And use locking nuts.
Third..if you are not accustomed to torqueing, and I am,I use a INCH pound torque wrench. The cost would of save you all this trouble.
And finely here is a tutorial about tearing a HT down, I made.

Chinese HT breakdown pictures by Ron-Becker - Photobucket

Looking at a case, you most likely broke out the bottom of the threaded hole...right?
If so, clean up what broke through, and anything in the case itself. When installing the studs, use locktite, this will hold the stud in place and will give a seal around the threads. DO NOT use JB Weld. Make sure that the studs are long enough, let sit overnight so the locktite will dry and seal. It doesn't matter if the bottom of the stud hole is open to the case. If need be get longer studs. I use RED locktite, it will take heat to remove then if need be. I would take something to measure the hole depth, like a drill bit. Take that measurement and measure the (4) studs and mark with tape. Only thread the studs as far as the tape.
Thanks Ron, yes, actually, I am using an INCH pound Torquer, and only went to 120 INCH pounds with LockTite, and double-nut method.

Problem was, once I got up to around 110 INCH pounds or so, it SEEMED that I was already bottoming out, so I went a wee bit more, and yes, broke the bottom half of the aluminum threaded hole and it JAMMED the wheels (connected to the Piston Rod) so that it won't spin.

Gonna attempt a tear-down, clean up tonight.

Woohoo! Let's DO THIS!

Thanks Ron and 2Door for your input.

Appreciate the time.

~CB:-||...but not for long!
 

Al.Fisherman

New Member
Sep 9, 2009
1,966
5
0
Calera, Alabama
How in the Heck could you punch through the threaded hole with 120 inch pounds, sorry I see NO way. I have torqued the cylinder studs as tight as 175 inch pounds, that was on 8mm studs. Are yours 6mm studs, that's what I find in a (GT-2) 49cc's ??? 6mm 50 to 75 inch pounds.

By the way... "counter weights" that's what they are called...were hitting the studs.
 
Last edited:

his196

New Member
Jun 19, 2011
99
0
0
Thousand Oaks, CA
How in the Heck could you punch through the threaded hole with 120 inch pounds, sorry I see NO way. I have torqued the cylinder studs as tight as 175 inch pounds, that was on 8mm studs. Are yours 6mm studs, that's what I find in a (GT-2) 49cc's ??? 6mm 50 to 75 inch pounds.

By the way... "counter weights" that's what they are called...were hitting the studs.
Well that'll do it!
I read somewhere on the forum to torque to 125 - 150 INCH pounds, so I did.

BUT, I'm using M6x1.0!!!!

No wonder they popped! So, now ya'll know that going to 120 INCH pounds on M6's WILL BREAK THE 'counter-weights'!

Live and learn...
 

rustycase

Gutter Rider
May 26, 2011
2,746
5
0
Left coast
...seems to me it *might* be the QC of the original build and not the torque applied at this time... the original thread may have been loose/oversized, or shallow??? and the re-build took things to excess???
...I dunno...
but u just can't expect things with these china girl motors.
every single little thing has got to be inspected to see that it is the way it's supposed to be. ...as in GN's cranks and cyl heads and stuff... all different.

...if they have left enough room in the casting to install a heli-coil or thread-sert, you'll probably be better off, in the end. ...like the old air-cooled VW cases...
The problem with these HT's is they frequently have threads cut right at the very edge of the casting!

Good luck
rc
 

his196

New Member
Jun 19, 2011
99
0
0
Thousand Oaks, CA
...seems to me it *might* be the QC of the original build and not the torque applied at this time... the original thread may have been loose/oversized, or shallow??? and the re-build took things to excess???
...I dunno...
but u just can't expect things with these china girl motors.
every single little thing has got to be inspected to see that it is the way it's supposed to be. ...as in GN's cranks and cyl heads and stuff... all different.

...if they have left enough room in the casting to install a heli-coil or thread-sert, you'll probably be better off, in the end. ...like the old air-cooled VW cases...
The problem with these HT's is they frequently have threads cut right at the very edge of the casting!

Good luck
rc
Thanks, yeah, I had re-tapped them before putting the studs in...methinks I just over torqued the heck out of them.

Thanks!
 

rustycase

Gutter Rider
May 26, 2011
2,746
5
0
Left coast
I just looked at your tear-down pics on photobucket...
Excellent job, Alf!
Really good pics and dialogue along with them!
****
Four Stars !
rc
 

Mozenrath

New Member
Jan 13, 2011
340
0
0
California
Removing your base gasket will effect the timing.

I replaced my head gasket with a homemade one made of soda can metal. Made it nearly exact to the original, but thinner. I had no air leaks what so ever but for some reason my engine didn't run as well. So I had to switch back to the original gasket.

It could be that these engines have trouble with higher compression, but I really don't see why. I'd like to try raising compression again.
 

his196

New Member
Jun 19, 2011
99
0
0
Thousand Oaks, CA
How in the Heck could you punch through the threaded hole with 120 inch pounds, sorry I see NO way. I have torqued the cylinder studs as tight as 175 inch pounds, that was on 8mm studs. Are yours 6mm studs, that's what I find in a (GT-2) 49cc's ??? 6mm 50 to 75 inch pounds.

By the way... "counter weights" that's what they are called...were hitting the studs.
Ok, tore down the whole thing, lower end.

I need to actually remove the two wheels that hold the rod in place, in order to access the damaged aluminum on the threaded intake.

How do I remove the actual two wheels that hold the rod in place?

Chris B.
 

rustycase

Gutter Rider
May 26, 2011
2,746
5
0
Left coast
Whew!

You are gonna need a press, and a truing stand (lathe).

IMO, you would be btr off buying a new crank from bgf or one of our forum sponsors. The china parts are cheep. ...but that's why we buy em!

Best
rc
 

wayne z

Active Member
Dec 5, 2010
1,743
5
38
louisiana
I think he wants to know how remove the crank assembly from the crankcase half, not how to dissasemble the crankshaft.
I've never done that to a HT, but prolly need to use care to not damage crankshaft end and hammer or press it out.
 

rustycase

Gutter Rider
May 26, 2011
2,746
5
0
Left coast
Ur probably right, Wayne... but still, them guys will sell a complete lower end cheep!
..and they will ship the lower end, complete in the case, to Kalifornia .... that won't tick off the CARB guys.

Best
rc