The Hustler, my ugly lovely bike

GoldenMotor.com

LS614

Active Member
Dec 22, 2009
1,236
3
36
CT and MA
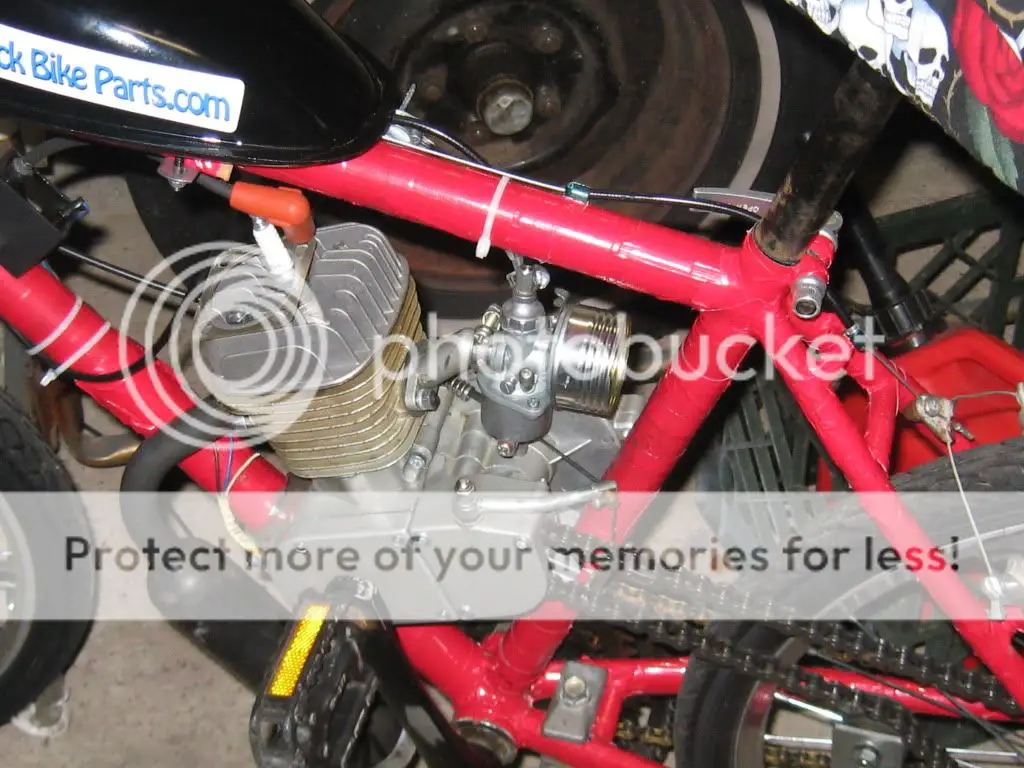
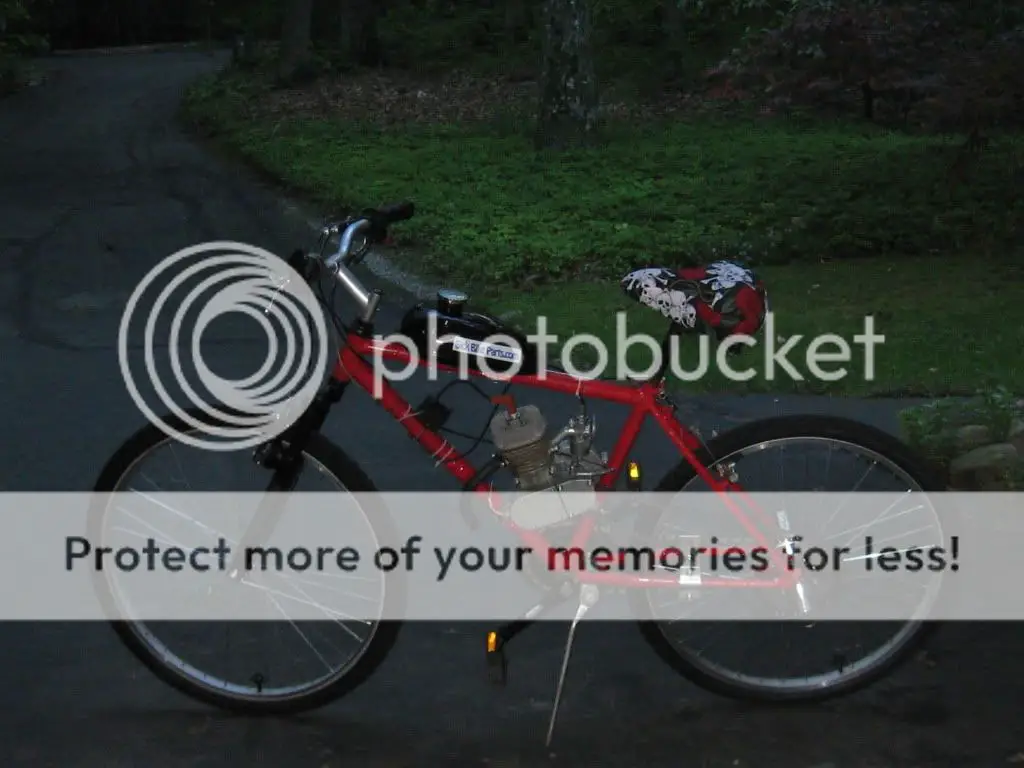
Hi guys, here she is, the Hustler. She doesn't quite live up to her name yet, but I call her that because I'm tuning her to be FAST even though she won't look fast. I started with an ugly oddball bike that was filled with problems. The brakes sucked and the frame sucked and the wheels sucked. IT SUCKED. The mounts were splayed out on the front because the tube was too big. That kind of stuff makes me grit my teeth.

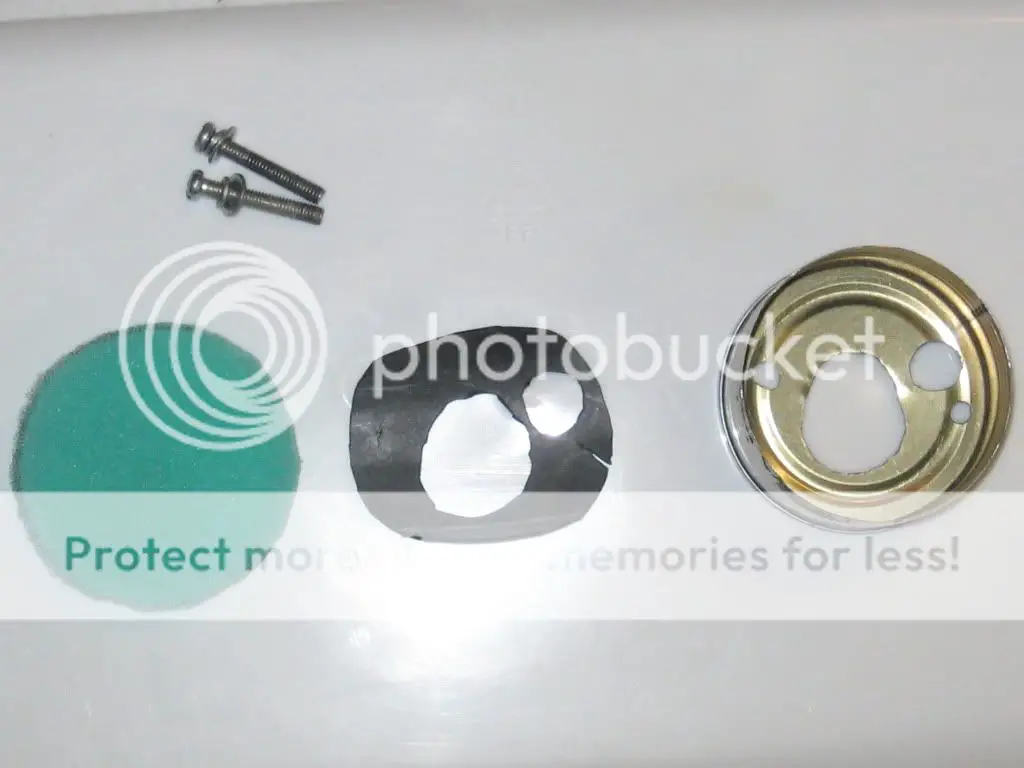
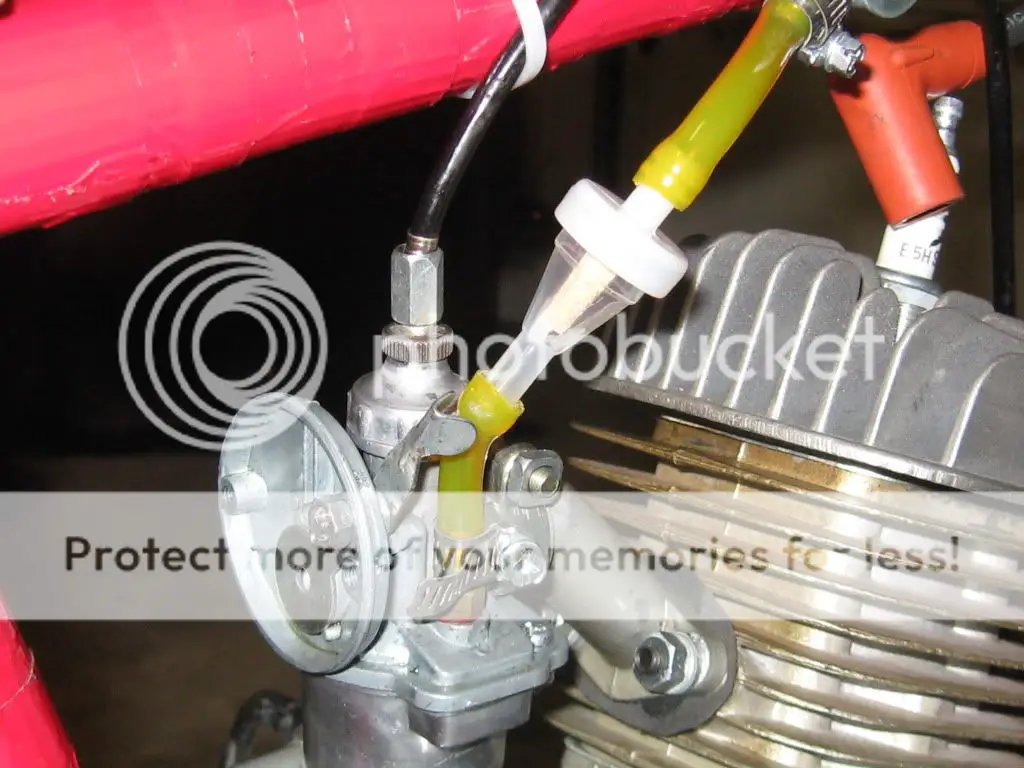
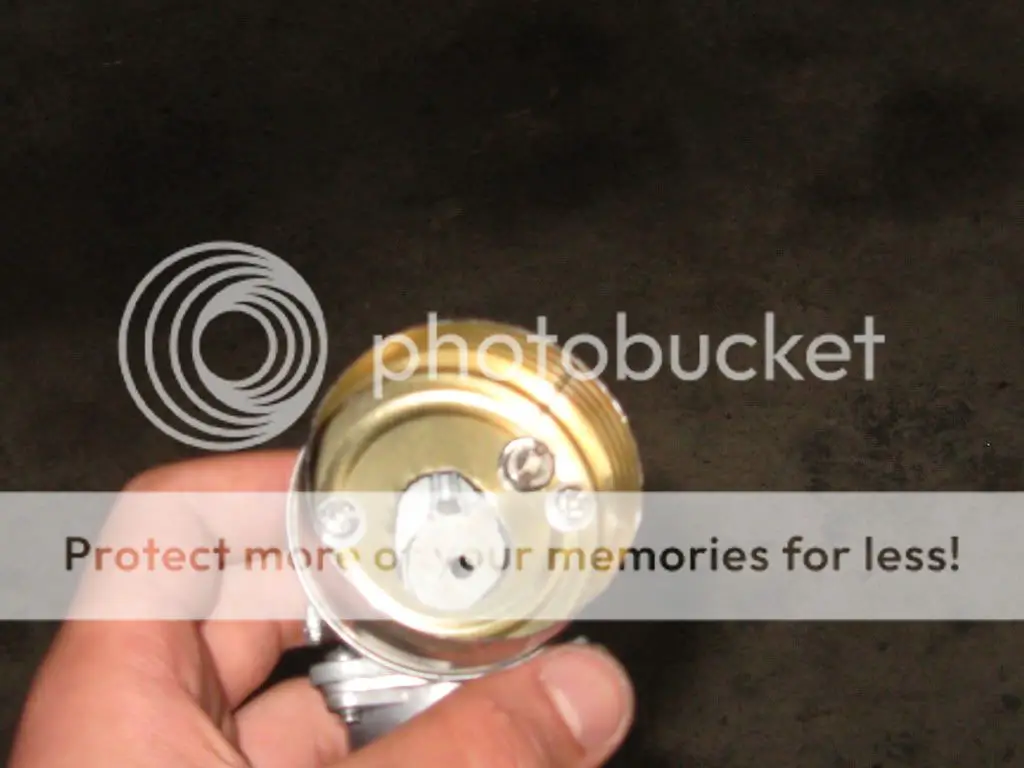
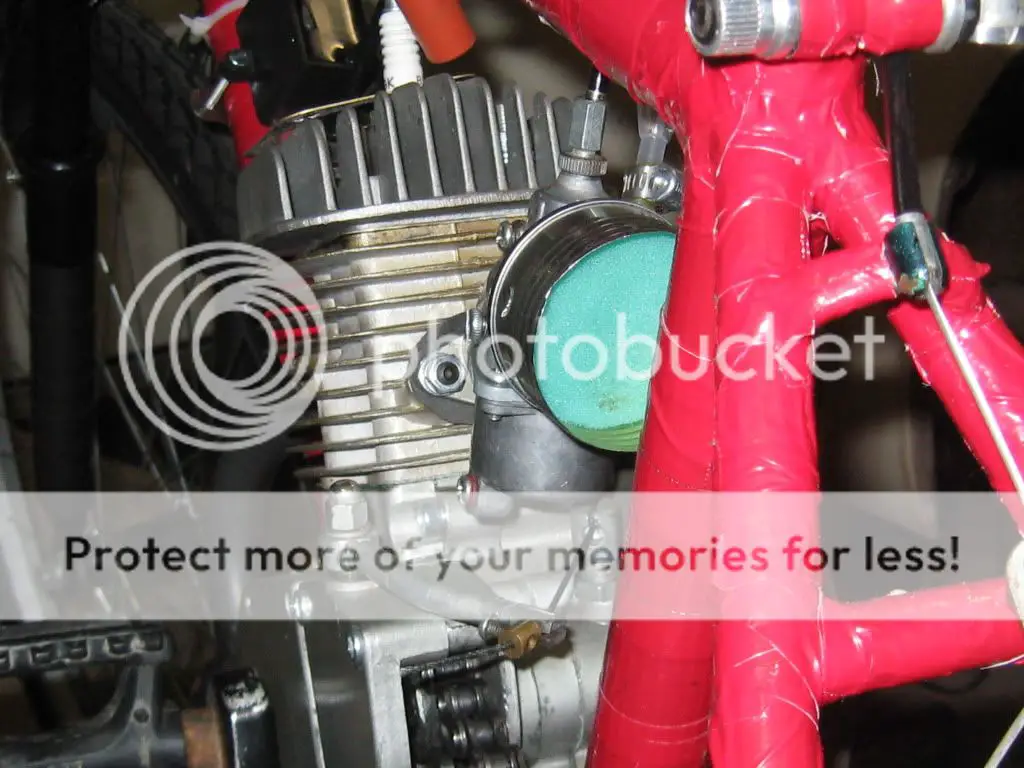
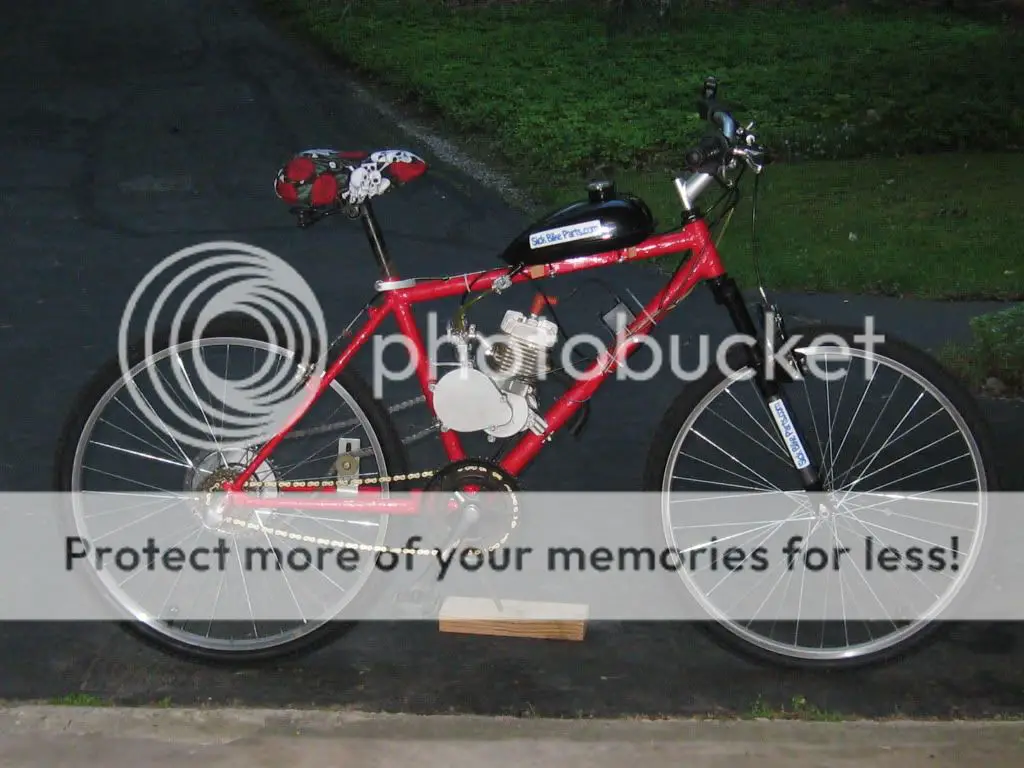
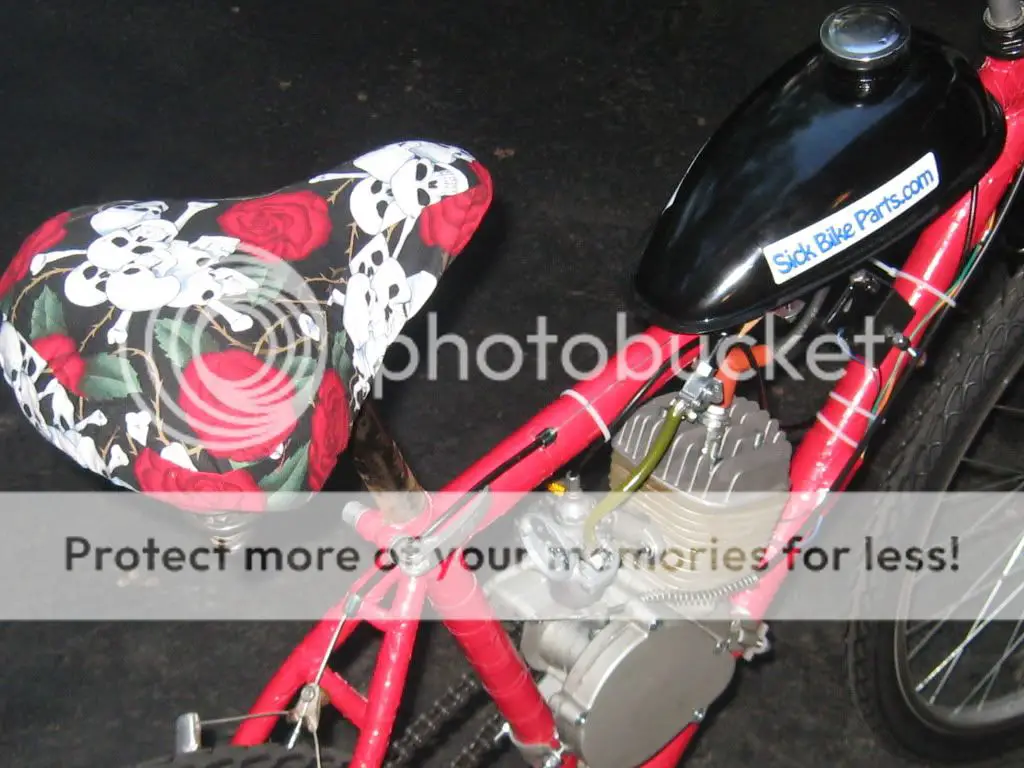
The engine though, is a PK80, and boy does it have power! I did an initial cleaning of the entire engine and, I clean and rebuilt the carb, and I put on a straight plug head with a single gasket because, well, I don't like slant heads. I repacked the rear wheel bearings and had the front and rear wheels trued. The frame I used is an old diamondback frame that actually fits the stock mounts without splaying them out (praise the lord) I got a hardware kit and headbolt kit from sbp and the quality ROCKS. I also got a good carb gasket from them because the original engine had NO GASKET o_O.

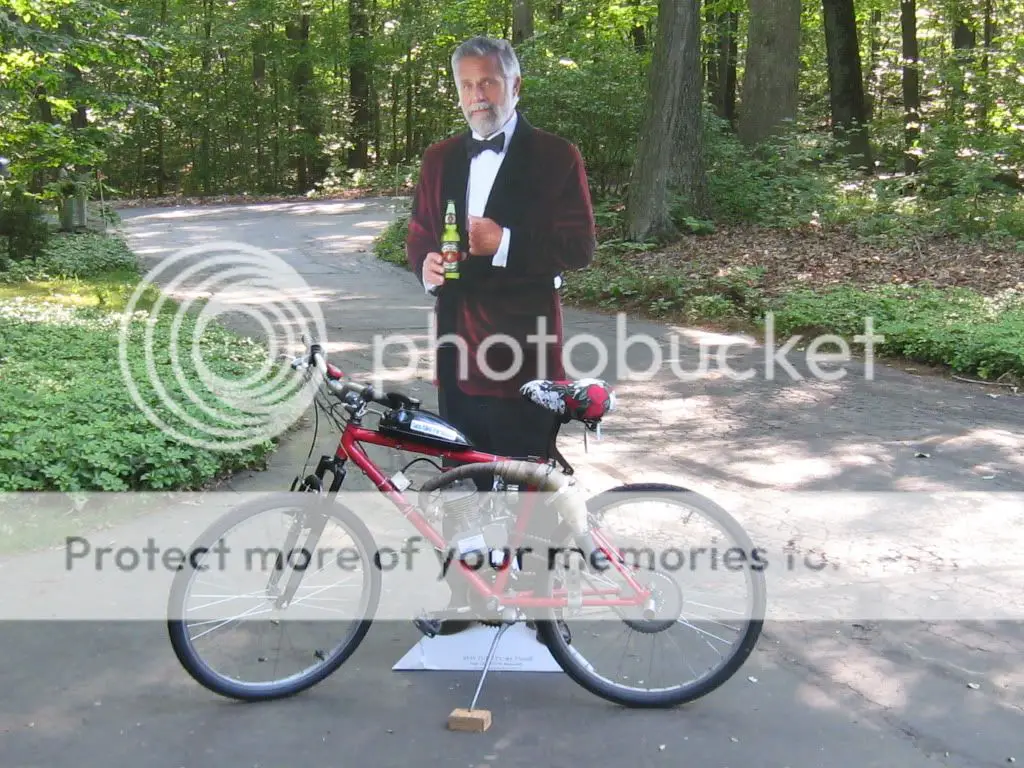
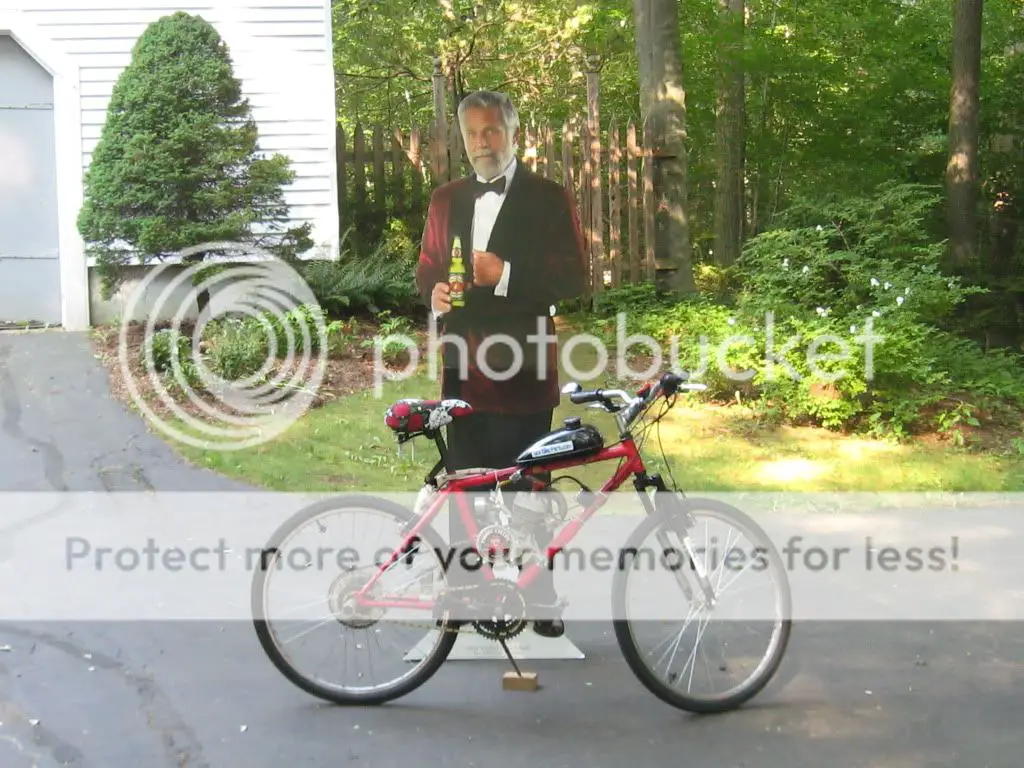
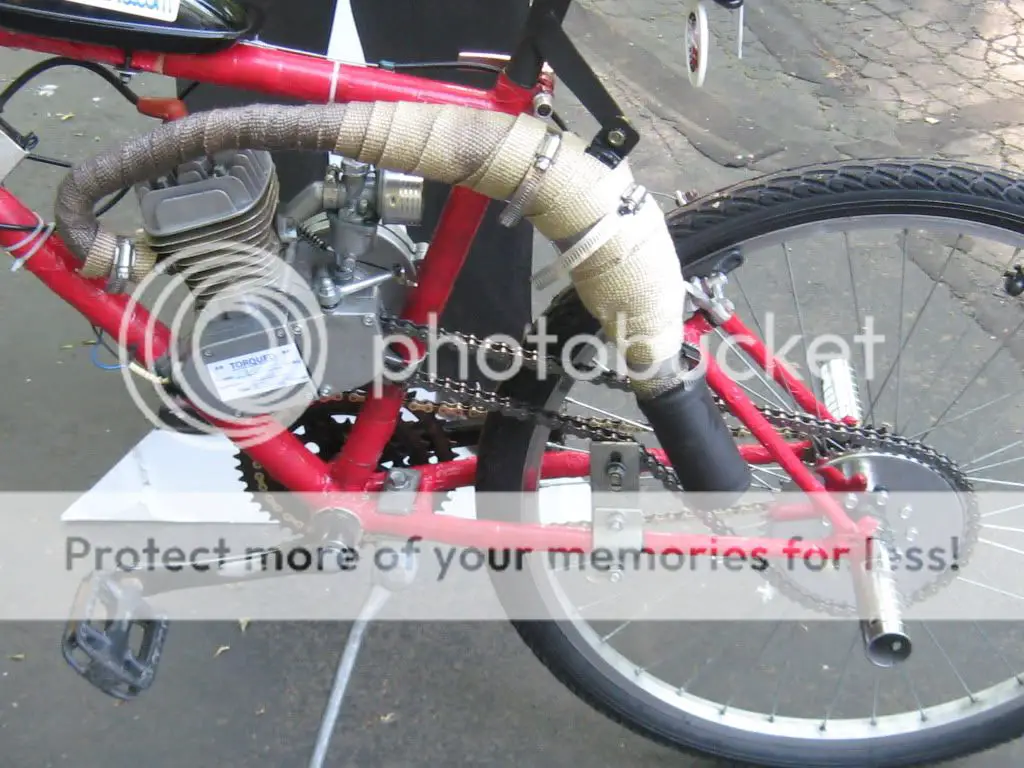
The front fork is a gas shock and you don't want to know what I had to go through to get it to fit right. I decided that to contribute to the hustler appearance I'd wrap the frame in red duct tape as a kind of bastard ferrari paint. The tires are kevlar reinforced 1.75" with slime tubes inside. I put on skull valve caps and made a special seat cover. The clutch cable is the teflon coated and the exhaust is just a cut off muffler (it hurts my ears lol) It's pretty impressive to see the before and after. I had to work hard to make the brakes and wheels and chain and everything work well on this bike. Both derailures are removed so it is a single speed now. That's all I have to say about it for now. Once I do a port and balance job with new bearings (japanese nachi bearings) and an sbp pipe it should be a real hustler. I can't wait to do more work, but I whipped it together now so that I could go to the rally this weekend! I also started my first gallon of opti2 these are good times!!! here are pics, before and after. Enjoy
Before:


After:


LS614

Active Member
Dec 22, 2009
1,236
3
36
CT and MA
Well guys, the hustler proved to be pretty darn fun at Dan's rally. It kept pace without too much effort! I know that all of the guys there were lecturing me about running without a filter so HERE IT IS! I woke up this morning ready to make a filter. I went to NAPA today (one of the best places ever!) and I got a solid foam tractor air filter. I cut a slice off with a coping saw and made a nice round that would fit in a cut back tomato paste can. I made a hole in the can for the choke nut and two holes for the screws. I decided that I don't want to suck in dirt behind my filter unit, so I made a gasket out of innertube. The stock screws were too long so I cut those back, and BOY I'LL TELL YOU, it was a pain to get the screws in again. I think it looks good now. The can was complimentary of the pantry and the foam filter was $4. I love napa so much. I bought a sintered bronze filter for only $3.50. The welder is going to fix the off weld on the sbp pipe tomorrow, and my header wrap will also be here so now I won't burn my tender spots off. Lastly, I got some semi metallic friction material from mcmaster carr to use for clutch pucks. It ships tomorrow and should be here soon! Here are the pics!


LS614

Active Member
Dec 22, 2009
1,236
3
36
CT and MA
I'll have to test it out and see what happens, but I have to imagine it will do it right. I found out that my engine was running WAY TOO RICH with opti 2 because of the lower viscosity of the fuel mix allowing more to be drawn into the engine. I re-adjusted the carb, we'll see what happens :)
 

ratrod

New Member
Feb 7, 2011
106
0
0
Australia
hey there nice bike i really like the can creativity and man that tape would have taken you a while.....you've given me a great idea for my next build...you know the fishing rod tape and resin finnish?? that on matt black would set my frame off.. your bike would really hustle with some red tyres

cheers
 

LS614

Active Member
Dec 22, 2009
1,236
3
36
CT and MA
haha, thanks mate, glad to know you like her :) the tape did take a while. I like my tires now because they are skinny, smooth, and kevlar reinforced for more speed. Unfortunately I'm down until I get a helicoil kit to fix my stripped head stud hole :( I made some clutch pucks from a high grade material, made a hardened clutch plate, got my sbp pipe welded and wrapped it in header wrap, and I made a motor stand for repairs. I'll have pictures up soon. I love your idea about the wrap and the resin finish :) I'd love to see that. This bike was a throw together bike that I built to beat up and ride often. I'm glad you like her :) I hope to be back on the road in about a week (going away for a few days) Peace and I hope the weather is nice in Australia :)
 

LS614

Active Member
Dec 22, 2009
1,236
3
36
CT and MA
Well guys, I got back from VA and ran right back into the shop :D It amazes me the things that take the most time that you really don't expect. The head stud stripped a while ago and the walls of that casting on the stock PK80 case were too thin to helicoil, so I had to do a case swap. Now this is an ENORMOUS pain in the butt and is a true test of patience, but when it is done right, as I found out, it is WELL WORTH the effort! While I was in the engine I changed the rest of the screws that do NOT come in the sbp engine hardware kit to allen bolts. I made the main case gasket for the engine which was a tiny bit of a pain, but no biggie. I replaced the bearings with my high grade japanese bearings, but since they were pre-greased, I had to soak the mains in acetone to remove the grease so the engine oil could do its work. Everything was cleaned with acetone and re-lubricated in this engine. I put in a slightly thicker head gasket off a different HT just to lower compression a little so it would start easier, lol. I flipped around my fuel filter (only Aleman noticed it was backwards) and I set my carb to leaner. I ran into an issue with my master link smashing the inside of the clutch arm housing, so I flipped that around and it's fine. I added my BEAUTIFUL sbp pipe, freshly welded and mummified in header wrap. I upgraded the stock clutch pucks for some ones I made from mcmaster 1/4" friction material and I heat treated and scored the pressure plate so it would handle the new material better. I do not have photos of my engine rebuild unfortunately because I was so keen on just DOING it. The end result of all of the engine work, it's a SCREAMER. The engine went well with NO slipping right from the start because of the clutch pucks, and it has so much more torque and speed. It isn't four stroking or running rich either. It had beautiful solid acceleration with no dead spots and minimal vibration, and it started easily :) I couldn't be happier with the result of the case swap, even though it was a pain. the other thing is, if I run into problems down the line, this case has room for helicoils. Pics will be up tomorrow. Peace!
-LS
 

LS614

Active Member
Dec 22, 2009
1,236
3
36
CT and MA
Fresh pictures as promised

Ok guys, here are the pictures, from the last time I posted I did some light over-engineering on a few more things. The paper gasket I originally made for the carburetor was leaking BADLY, and I think the float tangs were adjusted wrong. Rather than going through the hassle of adjustment, I just popped the tangs from a different NT and put it in. Then I got some rubberized 1/32" gasket material made by felpro for sealing fuel pumps. It did the trick perfectly but I added some allen bolts to the carb just to make sure it was tight. Made a clutch cover gasket and got my clutch cable adjusted right too. She goes 34 with a 44 tooth sprocket, has beastly torque, and gets to 25 mph in well under 10 seconds ( I haven't actually counted yet). My plug is a beautiful chocolate brown running on the opti-2 mix at ~100:1 and my engine is NOT exploding. Next two items of business are a .68mm jet from sbp just to keep her from doing the teeny bit of four stroking that happens at the lowest rpms, and a tachometer/hour meter so I know the rpms I'm getting. Thanks to steampunk I found out that at 34 my engine is probably going at 8500 rpm. Good thing I installed the new bearings. The vibration is NOTHING at full throttle! She's a fun ride for sure. Eventually I'd like to get a beefier rear wheel and a sprocket adapter with a smaller sprocket, but for now she's fine how she is. Here are the pics, enjoy!


ratrod

New Member
Feb 7, 2011
106
0
0
Australia
No comments anyone?
TOP READ MAN. Good to hear your bottom end has held together. i like your theory on lubing the bigend berring, i had done the same by accident ....not mixing the tank and strait oil first few revolutions...carbie clean and fuel and no probs touch wood.
THE GUY IN THE SUIT LOOKS FAMILIAR WHATS HIS NAME ITS NOT CHEWBACCA ALL SHAVED UP IS IT?laff
 

LS614

Active Member
Dec 22, 2009
1,236
3
36
CT and MA
Lol, glad you like her, yeah the guy doesn't always ride motorbikes, but when he does, he prefers pk80s rotfl
 

happycheapskate

New Member
Nov 26, 2009
1,989
3
0
Rockwall TX
Great build. Seems strange to "paint" a bike with tape, but I thought about doing that to my wife's purple mtn bike if she wasn't going to ride it. Every time I mentioned putting camo duct tape on it "Just for the summer", she'd eventually get on it.

If you cut screws, it is best to install a couple nuts first, and use a sharp hacksaw blade. Then slightly file the end to be a little rounded at the edge, like a BMX axle. Taking the nuts off will "chase" the threads, and you will have a lot better luck installing the screw.

If you can hit 35 with the 44 tooth, you must have a smooth engine! Good job! When I had the 44 tooth my bike would only top out at 29mph but didn't vibrate much.

I like the tomato can air filter box. I plan to make a filter "box" sometime out of a couple of plastic cutting board pieces cut to about 3", spaced with ink pen tubes cut to size over the screws, and mounted to the carb like the original. The foam filter will just be pushed in there and have plenty of room to breathe.
 
Last edited:

happycheapskate

New Member
Nov 26, 2009
1,989
3
0
Rockwall TX
Cool. That might actually work well. The plastic ones are pretty sturdy, and might do just as well. If you don't have a screen to keep the foam from sucking into the carb, glue a few pieces of thick weedeater line across the hole, or just drill smaller holes, leaving a "web" between them. Don't forget to plot the screw holes first.

I use dip cans for lots of stuff, like holding spare change in a pocket, or keeping guitar picks from wandering around the house.